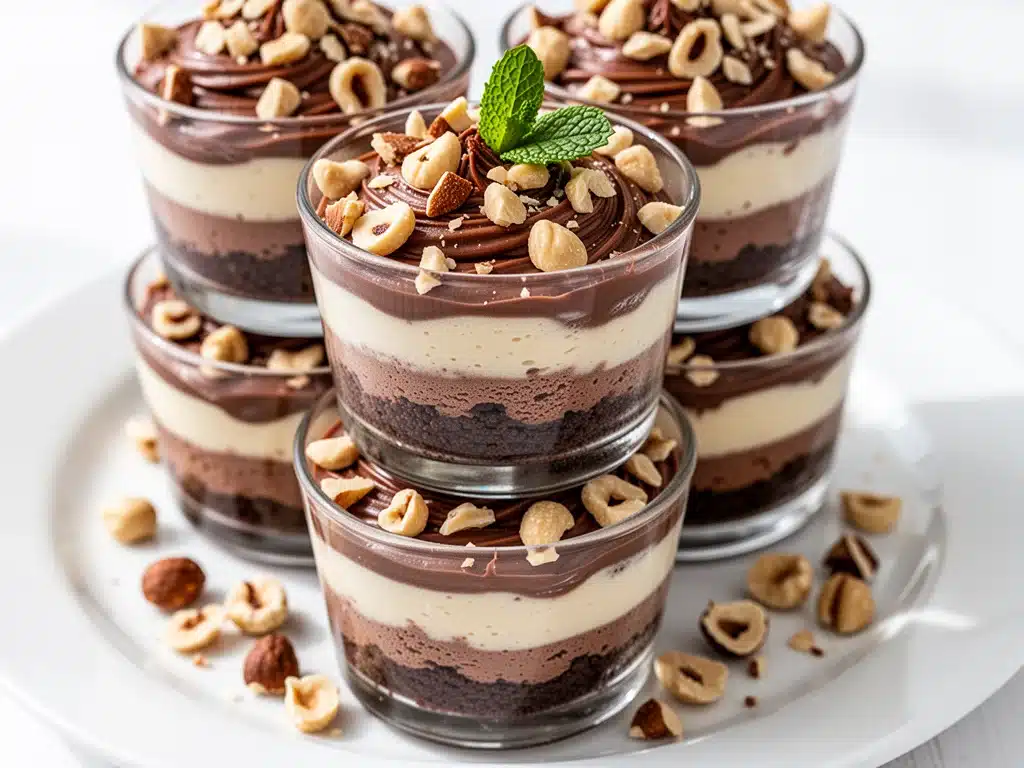
Last Tuesday night, I was in a panic. My daughter’s soccer team was coming over for a post-game snack, and I had completely forgotten to buy dessert. I stood in my kitchen, staring at a pantry that contained nothing but stale crackers and a jar of Nutella that was dangerously close to being empty. I didn’t have time to bake. I didn’t have the energy to wash a bunch of bowls and deal with a 35-degree oven in July. And honestly? I didn’t want a giant cake sitting in my fridge for two weeks because nobody ate it.
So, I did what any desperate, lazy, but creative mom does: I made no-bake Nutella cheesecake cups. I grabbed some Oreos, whipped up a quick cream cheese mixture with more Nutella than I probably should have, and spooned everything into plastic cups. Ten minutes later, I had six individual desserts that looked like they came from a fancy café. The kids devoured them. My husband asked for the recipe before I could even put the spoon down.
That was the moment my dessert game changed forever. I realized that for busy weeknights, last-minute gatherings, or when you just want a sweet treat without the fuss, individual no-bake desserts are the ultimate hack. These No-Bake Nutella Cheesecake Cups are now my go-to. They’re rich, they’re creamy, and they require zero oven time. If you’ve ever looked at a recipe for classic classic apple crisp with oat crumble and thought, “That’s too much work for a Tuesday,” you need to try this instead.
Why You’ll Love This Recipe
There are about a million reasons I keep making these, but let’s be real—you’re here because you want dessert that tastes indulgent but doesn’t demand your entire evening. Here’s why these cups have taken over my kitchen:
Zero Oven Required — Seriously. If you can use a spoon, you can make this. I’ve made these in the middle of summer when my kitchen is already 80 degrees, and I haven’t once regretted skipping the oven. It’s literally mixing and chilling.
5 Ingredients, Max — I’m not exaggerating. You need Oreos, cream cheese, powdered sugar, heavy cream, and Nutella. That’s it. No weird thickeners, no gelatin, no tempering chocolate. Just simple, high-quality ingredients that work together perfectly.
Portion Control Built-In — This is the secret weapon. When you make a whole cheesecake, you’re tempted to take “just one more slice” because it’s right there. With cups, you have a defined portion. I can have one cup and feel satisfied without eating the whole batch. Plus, they look adorable in a mason jar or a clear plastic cup, making them perfect for gifting or parties.
Make-Ahead Friendly — These taste even better the next day. The flavors meld together in the fridge, and the texture sets up perfectly. I often make them on Sunday for weekday cravings, or the morning of a dinner party so I can focus on the savory stuff.
Gluten-Free Option — If you’re hosting friends with dietary restrictions, just swap the Oreos for gluten-free chocolate sandwich cookies. The rest of the recipe stays exactly the same. It’s inclusive dessert making at its finest.
This is my answer to “what’s for dessert?” when I want something special but don’t want to spend hours in the kitchen. It’s reliable, delicious, and always a crowd-pleaser.
Ingredients You’ll Need
Here’s the best part: you probably have most of these items already. This isn’t a recipe that requires a trip to three different specialty stores. It’s pantry-friendly comfort food. I’m particular about a few things here, so pay attention to the details.
For the Crust:
Oreo Cookies (1 package, about 36 cookies) — Yes, the full package. I use regular Oreos for the classic chocolate-vanilla combo. If you want a darker, more intense chocolate flavor, you can use Double Stuf or even gluten-free chocolate sandwich cookies. The key is crushing them into fine crumbs. I usually toss them in a food processor for 10 seconds, but a rolling pin and a ziplock bag work if you’re feeling violent.
Unsalted Butter (4 tablespoons / 57g) — Melted. This binds the crumbs together. Don’t use margarine; it changes the texture and flavor. Real butter makes the crust crisp and rich. I measure mine out before melting so I don’t overdo it.
For the Filling:
Full-Fat Cream Cheese (8 ounces / 225g) — This is non-negotiable. Light cream cheese won’t set properly and will taste too tangy. Make sure it’s softened to room temperature. If you try to whip cold cream cheese, you’ll end up with lumpy chunks that you’ll spend five minutes trying to fix. I take mine out of the fridge about 30 minutes before I start.
Powdered Sugar (½ cup / 60g) — Also known as confectioners’ sugar. Do not use granulated sugar; it won’t dissolve in the cold mixture and will leave a gritty texture. Sift it if it’s clumpy, though usually, it’s fine straight from the box.
Heavy Whipping Cream (1 cup / 240ml) — Cold. Very cold. This is what gives the cheesecake its airy, light texture. If your cream is warm, it won’t whip up stiff peaks. I keep a carton in the back of the fridge and use it within a week of opening.
Nutella (½ cup / 150g) — The star of the show. Use good quality Nutella. Generic hazelnut spreads often lack the depth of flavor and the right sweetness level. You want that distinct hazelnut-chocolate taste. Measure it out before you start mixing so you don’t have to stop mid-recipe to find a spoon.
Optional Garnish:
Extra Nutella Drizzle — Just a little extra for the top. It looks professional and adds a nice visual contrast.
Mini Chocolate Chips — A sprinkle on top adds texture and makes it look like a real dessert.
Fresh Raspberries — If you want to cut the sweetness, a few fresh berries on top add a nice pop of color and tartness. I love this trick when I’m serving these to adults who find pure chocolate desserts too sweet.
Equipment Needed
You don’t need fancy gadgets for this. Here’s what I actually use in my home kitchen:
Food Processor — For crushing the Oreos. It’s fast and gives you uniform crumbs. If you don’t have one, a ziplock bag and a rolling pin work, but it takes more elbow grease.
Mixing Bowls — Two medium bowls. One for the cream cheese mixture, one for whipping the cream. I like using glass bowls because I can see through them to check consistency.
Hand Mixer or Stand Mixer — A hand mixer is perfect for this. It’s lightweight and easy to clean. A stand mixer works too, but you have to be careful not to over-whip the cream cheese mixture.
Spatula — A flexible silicone spatula is essential for folding the whipped cream into the cheese mixture without deflating it. I have a few of these lying around; they’re cheap and indispensable.
Serving Cups — I use small plastic deli cups with lids for parties, or nice glass ramekins for home. Clear cups are best because you want to see the layers. If you don’t have cups, you can make this in a 9-inch springform pan, but the cups are just so much more convenient.
Measuring Cups and Spoons — Standard stuff. I use a set I bought at the dollar store years ago, and they still work fine.
Small Saucepan — Just for melting the butter. You can also use a microwave-safe bowl if you’re in a hurry, but the saucepan gives you more control so the butter doesn’t burn.
How to Make It: Step-by-Step
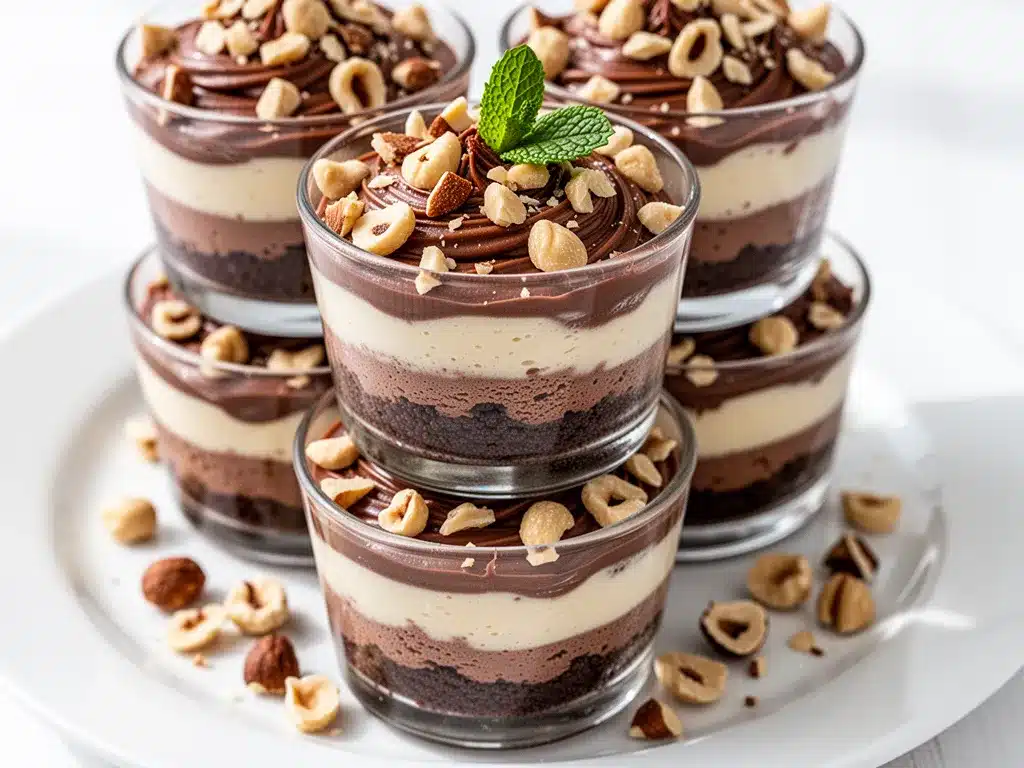
Alright, let’s make this! I’m walking you through exactly how I do it, including the little tricks I’ve picked up over the years. This recipe is forgiving, but following the steps ensures you get that perfect creamy texture.
Step 1: Prepare the Crust (5 minutes)
Start by crushing the Oreos. If you’re using a food processor, pulse until you have fine, sandy crumbs. If you’re using a bag and rolling pin, roll until there are no large chunks left. Transfer the crumbs to a medium bowl. Melt the butter in a small saucepan over low heat or in the microwave until it’s liquid but not hot. Pour the melted butter over the crumbs and stir until the mixture looks like wet sand. It should hold together when you pinch it. If it’s too dry, add a teaspoon more butter. If it’s too soupy, add a few more crumbs.
Step 2: Press into Cups (5 minutes)
Take your serving cups and spoon about 1 tablespoon of the crumb mixture into the bottom of each. Use the back of a spoon or the bottom of a small glass to press it down firmly. You want a compact base, not a fluffy pile. This step is crucial because if the crust isn’t pressed down, the filling will sink and it won’t look neat. Do this for all your cups. Set them aside on a baking sheet or tray to keep them stable while you make the filling.
Step 3: Whip the Cream Cheese Mixture (3 minutes)
In a large mixing bowl, beat the softened cream cheese and powdered sugar together on medium-high speed until smooth and creamy. This should take about 2 minutes. Scrape down the sides of the bowl with your spatula to make sure there are no lumps. Add the Nutella and beat until fully combined. The mixture will be thick and rich. Taste it at this stage—it should be sweet and chocolatey. If you want it sweeter, you can add a little more powdered sugar, but I usually find the Nutella is sweet enough.
Step 4: Whip the Heavy Cream (3 minutes)
In a separate clean, cold bowl, whip the heavy cream on high speed until you form stiff peaks. This means when you lift the beaters, the cream stands up straight and doesn’t droop. Be careful not to over-whip it into butter! It should look like thick, glossy whipped topping. This usually takes 2-3 minutes with a hand mixer.
Step 5: Fold It All Together (2 minutes)
This is the most important step for texture. Take about one-third of the whipped cream and fold it into the Nutella cream cheese mixture. This lightens the dense cheese mixture. Then, gently fold in the remaining whipped cream using a spatula. Use a cutting motion, lifting from the bottom and folding over the top. Do this until just combined. You want to keep as much air in the mixture as possible. If you mix too vigorously, you’ll deflate the cream and end up with a dense, heavy cheesecake.
Step 6: Assemble and Chill (2 minutes + 4 hours chill time)
Spoon the creamy Nutella filling into the prepared crust cups. Fill them to the top, but don’t pack it down. You can smooth the tops with a spatula if you want them to look neat, or leave them rustic. I usually leave them rustic because it looks more homemade. If you’re drizzling extra Nutella on top, do it now. Sprinkle with mini chocolate chips or raspberries if you’re using them.
Place the cups in the refrigerator for at least 4 hours, or ideally overnight. This chilling time is what allows the flavors to meld and the texture to set into that classic cheesecake consistency. If you’re impatient, you can freeze them for 30 minutes, but the fridge is better for texture.
Total Time: About 15 minutes active work, plus 4 hours chilling.
Expert Tips & Tricks
Here’s everything I’ve learned from making these dozens of times. These tips will save you from my mistakes.
Room Temperature Cream Cheese is Key
I can’t stress this enough. Cold cream cheese is the enemy of smooth cheesecake. If you try to mix it cold, you’ll get lumps that you can’t beat out. Plan ahead and take it out of the fridge in the morning. If you forgot, you can microwave it in 5-second bursts, checking frequently, until it’s soft. But don’t melt it!
Cold Cream, Cold Bowls
For the heavy cream, temperature matters. If your bowl and beaters are warm, the cream won’t whip. I keep my metal mixing bowls in the fridge for a few minutes before whipping. It sounds excessive, but it makes a difference in how quickly and stably the cream whips.
Don’t Skip the Chilling Time
I know you want to eat them now. But if you eat them immediately, the texture will be more like a mousse than a cheesecake. The chilling time allows the fat in the cream cheese and cream to firm up, creating that sliceable (or scoopable) texture. Patience pays off.
Customize the Crust
While Oreos are classic, you can use graham crackers for a more traditional cheesecake flavor. Or try crushed chocolate cookie bars. The butter ratio stays the same. I’ve even used crushed pretzels for a sweet-and-salty version, which is surprisingly good.
Storage is Simple
These keep well in the fridge for up to 5 days. Just make sure they’re covered. If you’re using plastic cups, keep the lids on. If you’re using ramekins, cover them with plastic wrap. They don’t freeze well because the texture of the cream cheese can change when thawed, so stick to the fridge.
Variations & Substitutions
Once you’ve nailed the basic version, here’s how you can mix it up. I’ve tried all of these, and they’re all winners.
Strawberry Nutella Cups
Add ½ cup of pureed strawberries to the cream cheese mixture. It adds a beautiful pink swirl and a fruity tang. I usually mash fresh strawberries with a fork and stir them in gently at the end.
Biscoff Swirl
Swap the Nutella for Biscoff cookie butter. It’s less sweet and has a warm, spiced flavor that pairs amazingly with the chocolate crust. This is my favorite version in the fall.
Mini Cheesecake Bars
Instead of cups, press the crust into a lined 8×8 inch pan. Spread the filling on top and chill. Cut into squares. This is great for potlucks because it’s easier to serve. You can also make this in a healthy pumpkin bars style pan for easy portioning.
Gluten-Free
Use gluten-free chocolate sandwich cookies for the crust. The rest of the recipe is naturally gluten-free, so no other changes needed. Just check your Nutella label to ensure it’s certified gluten-free if you have celiac disease.
Dairy-Free
This is trickier because cream cheese and butter are dairy. You can use vegan cream cheese (like Kite Hill or Miyoko’s) and vegan butter. For the heavy cream, use full-fat coconut cream that has been chilled overnight. Whip the solid part just like dairy cream. The flavor will be slightly coconutty, but it’s still delicious.
Low-Sugar Option
Use a sugar-free Nutella alternative (like SunButter or a homemade sugar-free hazelnut spread) and sugar-free powdered sweetener. The texture might be slightly different, but it’s a good option for those watching sugar intake.
Serving & Storage
These are incredibly versatile when it comes to serving. I usually serve them straight from the fridge, but here are some ideas:
How to Serve:
I love serving these in clear plastic cups with a small spoon. It feels like a treat from a dessert shop. If you’re having a dinner party, I’d recommend making them in small glass ramekins and topping them with a fresh raspberry and a mint leaf. It looks elegant and sophisticated.
Side Dishes:
These are rich, so they don’t need much else. A simple green salad with a light vinaigrette balances the sweetness perfectly. I also like serving them with a cup of black coffee or tea, which cuts through the richness.
Wine Pairing:
If you’re pairing with wine, a dessert wine like Moscato or a late-harvest Riesling works well. The sweetness in the wine complements the Nutella. For beer lovers, a chocolate stout is a fun, unexpected pairing.
Storage Instructions:
Refrigerator: Store in an airtight container or with lids on for up to 5 days. The crust might soften slightly after day 3, but the filling stays great.
Freezing: I don’t recommend freezing these. The whipped cream and cream cheese can become grainy or watery when thawed. It’s better to make fresh.
Meal Prep: These are perfect for meal prep. Make a batch on Sunday, and you have dessert ready for the week. Just grab one from the fridge when you get home.
Nutrition Information
I’m not a nutritionist, but here’s the breakdown if you’re tracking. Keep in mind that these are rich desserts, so portion control is key.
Per Cup (based on 12 cups):
- Calories: 320
- Protein: 4g
- Carbs: 28g
- Fiber: 1g
- Sugar: 22g
- Fat: 22g
- Saturated Fat: 13g
- Cholesterol: 45mg
- Sodium: 180mg
What’s Good:
- It’s a smaller portion than a slice of whole cake, which helps with calorie control.
- Contains some protein from the cream cheese.
- No baking means no added fats from frying or extra butter in the crust.
What to Know:
- High in sugar and saturated fat due to the Nutella and cream cheese.
- Contains gluten (unless using GF cookies) and dairy.
- Best enjoyed as an occasional treat rather than a daily snack.
My Take:
Look, this is a dessert. It’s sweet, rich, and delicious. It’s not a health food. But it’s so much better than store-bought cupcakes, which are often full of preservatives and artificial flavors. When I make these, I know exactly what’s in them. I use real ingredients, and I control the sweetness. I usually limit myself to one cup, and that’s plenty satisfying. If you’re watching your sugar, try the low-sugar variation or just share a cup with a friend.
Final Thoughts
So that’s my take on No-Bake Nutella Cheesecake Cups! I’ve probably talked your ear off at this point, but when you make a recipe this often, you have a lot to say about it.
This has saved me more times than I can count. It’s my answer to “what’s for dessert?” when I’m tired, don’t want takeout, and still want something that tastes really good. My kids are happy, my husband’s happy, and I’m happy because I’m not stressed about cooking.
Make it yours! Try different crusts, swap in your favorite chocolate spread, or add fresh fruit. The best recipes are the ones you adapt to your family’s tastes. If you make this, drop a comment and let me know what you think! I love hearing how recipes turn out in your kitchen. And if something doesn’t work, tell me that too—I’m here to help troubleshoot.
Happy cooking! And I hope your kitchen smells half as good as mine does right now.
Frequently Asked Questions
Can I use whipped topping (like Cool Whip) instead of heavy cream?
You can, but the texture will be different. Cool Whip is lighter and airier, but it doesn’t have the rich, creamy mouthfeel of whipped heavy cream. If you use Cool Whip, fold it in gently and don’t overmix. The cheesecake will be softer and might not set as firmly. I prefer heavy cream for the best texture, but Cool Whip works in a pinch.
Why is my cheesecake filling too runny?
This usually happens if the heavy cream wasn’t whipped to stiff peaks, or if the cream cheese wasn’t fully softened and mixed smoothly. Make sure your cream is cold and whip it until it holds its shape. Also, ensure you’re using full-fat cream cheese, not light. If your filling is already runny, you can try refrigerating the cups for a few more hours to see if it sets up. If not, you might need to add a little more whipped cream to stabilize it.
Can I make this in a pan instead of cups?
Absolutely! Press the crust into a 9-inch springform pan or a 9×13 inch baking dish. Spread the filling on top and chill for at least 4 hours. Cut into squares or slices when ready to serve. This is great for parties because it’s easier to serve. Just keep in mind that the crust-to-filling ratio will be different, so you might need to adjust the amounts slightly.
How long do these last in the fridge?
They last up to 5 days in the refrigerator if stored in an airtight container. The flavor actually gets better after the first day as the Nutella and cream cheese meld together. Just make sure they’re covered to prevent them from absorbing any fridge odors.
Can I freeze these cups?
I don’t recommend freezing them. The whipped cream and cream cheese can separate or become grainy when thawed. The texture won’t be the same. It’s best to make them fresh or store them in the fridge for a few days. If you need to prep ahead, make the crust and filling separately, but assemble them just before serving.
Is Nutella gluten-free?
Standard Nutella contains wheat flour, so it is not gluten-free. However, many brands offer gluten-free hazelnut spreads. If you’re serving people with celiac disease or gluten sensitivity, make sure to check the label on your Nutella and use gluten-free cookies for the crust.
Can I use a different chocolate spread?
Yes! You can use any hazelnut spread like Ferrero Rocher’s own brand, or even a chocolate-hazelnut spread from a different brand. The flavor will vary slightly depending on the sweetness and hazelnut content, but the technique remains the same. I’ve also tried using almond butter for a less sweet version, which is surprisingly good.
Pin This Recipe!
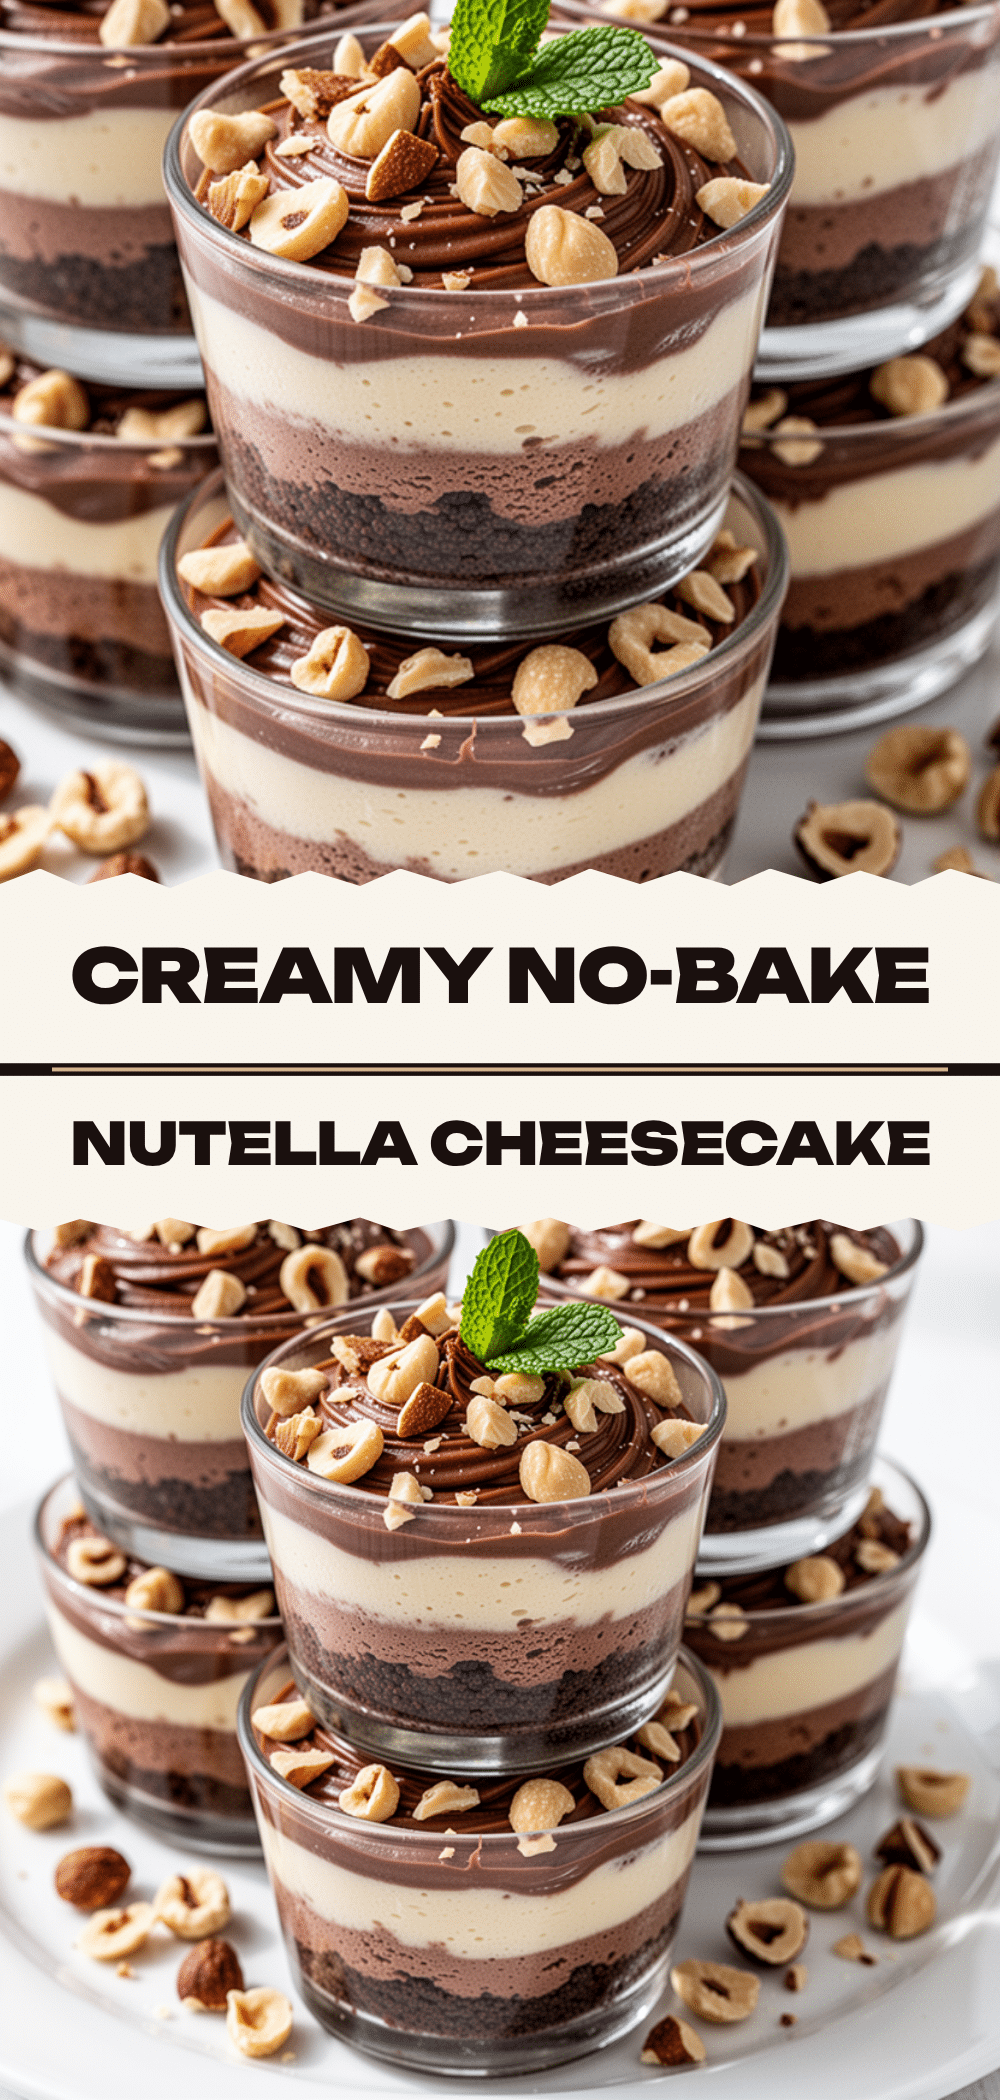
No-Bake Nutella Cheesecake Cups
- Total Time: 4 hours 15 minutes
- Yield: 6 servings 1x
Description
These easy 5-ingredient no-bake Nutella cheesecake cups are the perfect last-minute dessert. Rich, creamy, and portion-controlled, they require zero oven time and come together in just 15 minutes of active prep.
Ingredients
- 1 package (about 36 cookies) Oreo Cookies
- 4 tablespoons (57g) Unsalted Butter, melted
- 8 ounces (225g) Full-Fat Cream Cheese, softened to room temperature
- ½ cup (60g) Powdered Sugar
- 1 cup (240ml) Heavy Whipping Cream, cold
- ½ cup (150g) Nutella
- Optional: Extra Nutella for drizzle, Mini Chocolate Chips, Fresh Raspberries
Instructions
- Crush the Oreos into fine crumbs using a food processor or a rolling pin in a ziplock bag.
- Melt the butter and mix it with the cookie crumbs until the texture resembles wet sand.
- Press about 1 tablespoon of the crumb mixture firmly into the bottom of each serving cup to form the crust.
- In a large bowl, beat the softened cream cheese and powdered sugar until smooth and creamy.
- Add the Nutella to the cream cheese mixture and beat until fully combined.
- In a separate cold bowl, whip the heavy cream on high speed until stiff peaks form.
- Fold one-third of the whipped cream into the Nutella cream cheese mixture to lighten it.
- Gently fold in the remaining whipped cream until just combined, being careful not to deflate the mixture.
- Spoon the filling into the prepared crust cups, filling them to the top.
- Drizzle with extra Nutella or sprinkle with chocolate chips/raspberries if desired.
- Refrigerate for at least 4 hours or overnight to allow the cheesecake to set.
Notes
Ensure cream cheese is at room temperature for a smooth texture. Heavy cream and bowls should be very cold to ensure proper whipping. Do not freeze as the texture may become grainy. For a gluten-free version, use gluten-free chocolate sandwich cookies.
- Prep Time: 15 minutes
- Cook Time: 0 minutes
- Category: Dessert
- Cuisine: American
Nutrition
- Serving Size: 1 cup
- Calories: 320
- Sugar: 22
- Sodium: 180
- Fat: 22
- Saturated Fat: 13
- Carbohydrates: 28
- Fiber: 1
- Protein: 4
Keywords: no-bake, Nutella, cheesecake, dessert, easy recipe, 5 ingredients, make-ahead, gluten-free option


