It was 2012, and I was standing in a freezing cold parking lot, shivering in my thin jacket, holding a paper plate that was slowly disintegrating under the weight of the appetizer I’d been tasked with bringing. It was my first time at a major tailgate party, and I had underestimated the crowd. Or maybe I just underestimated how much people love gooey, spicy, cheesy goodness. I’d brought a simple potato salad. It was fine. It was safe. It was invisible.
Meanwhile, across the table, my cousin Mike had pulled out a slow cooker. The smell hit me before I even saw it—sharp vinegar, spicy cayenne, and rich, melted cheddar. People were forming a line. Not a polite, “I’m just grabbing a chip” line, but a genuine queue. By the time I got my plate, the dip was gone. I ended up eating three chips with just ranch dressing on them, watching Mike refill his pot for the fourth time that day.
That was the day I realized that tailgate food isn’t about gourmet presentation. It’s about impact. It’s about bringing something that stops people in their tracks and makes them forget they’re standing on asphalt in 40-degree weather. That experience taught me everything I know about party appetizers, and it led me to spend the last decade perfecting the one dish that never fails: this Buffalo Chicken Dip.
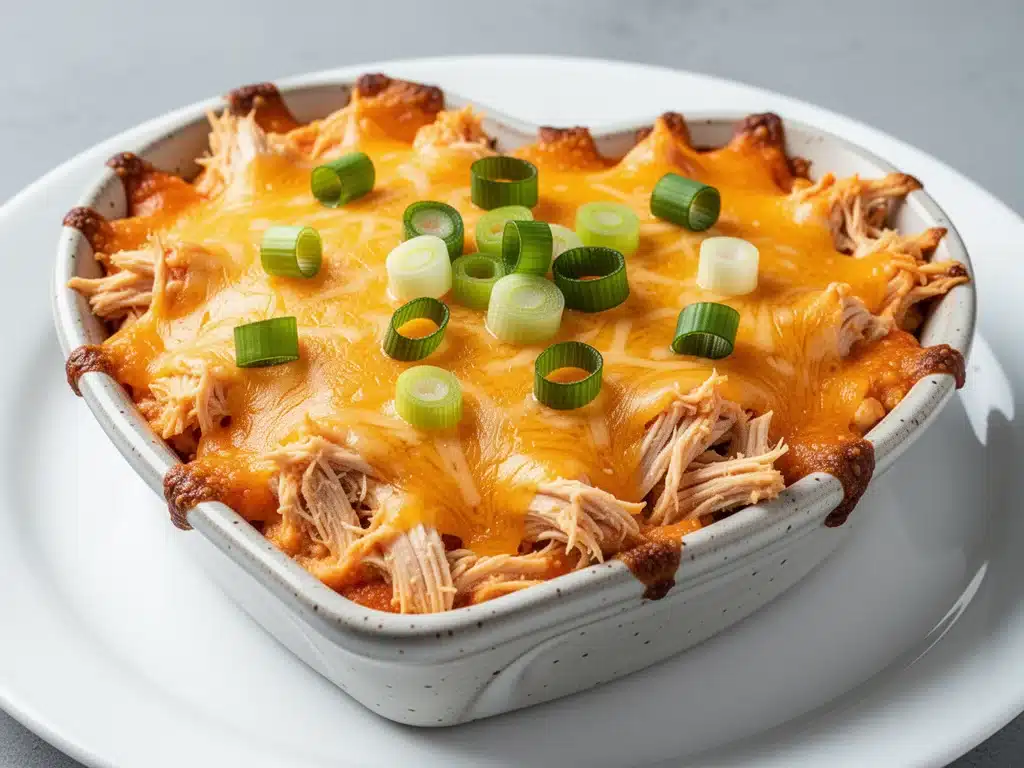
I’ve made this Buffalo Chicken Dip for Super Bowl parties, backyard BBQs, game day gatherings with fifty people, and quiet Tuesday nights when I just need comfort food. It works everywhere. It’s thick enough to hold a sturdy chip but loose enough to scoop easily. It’s spicy enough to wake up your taste buds but creamy enough to soothe them. And the best part? It’s stupidly simple. You don’t need fancy techniques or hours of prep. You just need a few ingredients you probably have in your fridge right now.
If you’re looking for a crowd-pleaser that actually delivers on flavor and ease, stop scrolling. This is the recipe. I’ve tested it with cream cheese, I’ve tested it with sour cream, I’ve tested it with different cheeses, and I’ve tested it with various types of chicken. This version? It’s the gold standard. It’s the one that gets asked for again and again. Let’s get cooking.
Why You’ll Love This Buffalo Chicken Dip
There are about a million dip recipes out there. But this Buffalo Chicken Dip stands out because it hits that perfect balance of savory, spicy, and creamy without requiring a degree in culinary arts. Here’s why it’s become my go-to for every gathering:
- Zero Skill Required — Seriously. If you can drain a can of chicken and mix ingredients in a bowl, you can make this. I’ve walked my teenage nephew through it over the phone while he was at his first apartment. He didn’t burn the kitchen down. He made a hit.
- Feeds a Crowd for Pennies — You can feed 10-15 people with this for under $15. That’s less than what you’d spend on a single platter of wings at a sports bar. I calculated this once after a Super Bowl party and was shocked. It’s budget-friendly comfort food at its finest.
- Make-Ahead Magic — This is crucial for tailgating. You can mix this dip the night before, store it in the fridge, and just pop it in the oven or slow cooker right before you leave. No last-minute stress. I’ve done this so many times that I have the timing down to the minute.
- Customizable Heat Level — Not everyone likes it spicy. With this recipe, you control the heat. Use mild buffalo sauce for kids and sensitive palates, or go full nuclear with hot sauce and jalapeños for the brave. It adapts to your crowd.
- Leftovers That Taste Better — Unlike some dips that get weird when reheated, this Buffalo Chicken Dip actually improves overnight. The flavors meld together, and it’s perfect for dipping raw veggies or spreading on a sandwich the next day. I deliberately make extra for lunch.
This is my answer to “what should I bring?” when I’m invited anywhere. It’s reliable, it’s delicious, and it always disappears faster than I expect. Once you make this, you’ll never buy store-bought party dip again.
Ingredients You’ll Need
Here’s the best part: you probably have most of this already. This isn’t a recipe that requires a special trip to a specialty store. It’s built on pantry staples and fridge basics. I’m particular about three things here—the type of chicken, the cheese, and the sauce—but everything else is flexible.
For the Base
Cooked Chicken (3 cups, shredded / about 450g) — This is the star. I use rotisserie chicken from the grocery store because it’s juicy and flavorful. If you’re using canned chicken, drain it REALLY well. Excess moisture is the enemy of a thick dip. If you’re cooking chicken breasts yourself, poach them gently so they don’t dry out.
Cream Cheese (8 ounces / 225g, softened) — This is non-negotiable for texture. It provides that thick, creamy base that holds everything together. Make sure it’s softened to room temperature before you start mixing. Cold cream cheese creates lumps that are impossible to fix. I take it out of the fridge 30 minutes ahead.
Hot Sauce (Buffalo Style) (½ cup / 120ml) — I use Frank’s RedHot because it’s the classic. It has that perfect vinegar-forward heat that cuts through the richness of the cheese. You can use your favorite brand, but avoid thick, sweet sauces like honey buffalo unless you want a sweeter dip.
Mayonnaise (½ cup / 120g) — Yes, mayo. Don’t skip it. It adds richness and helps emulsify the sauce so it doesn’t separate. Use full-fat mayo. Low-fat versions can make the dip watery. I use Hellmann’s because it’s consistent.
For the Flavor and Body
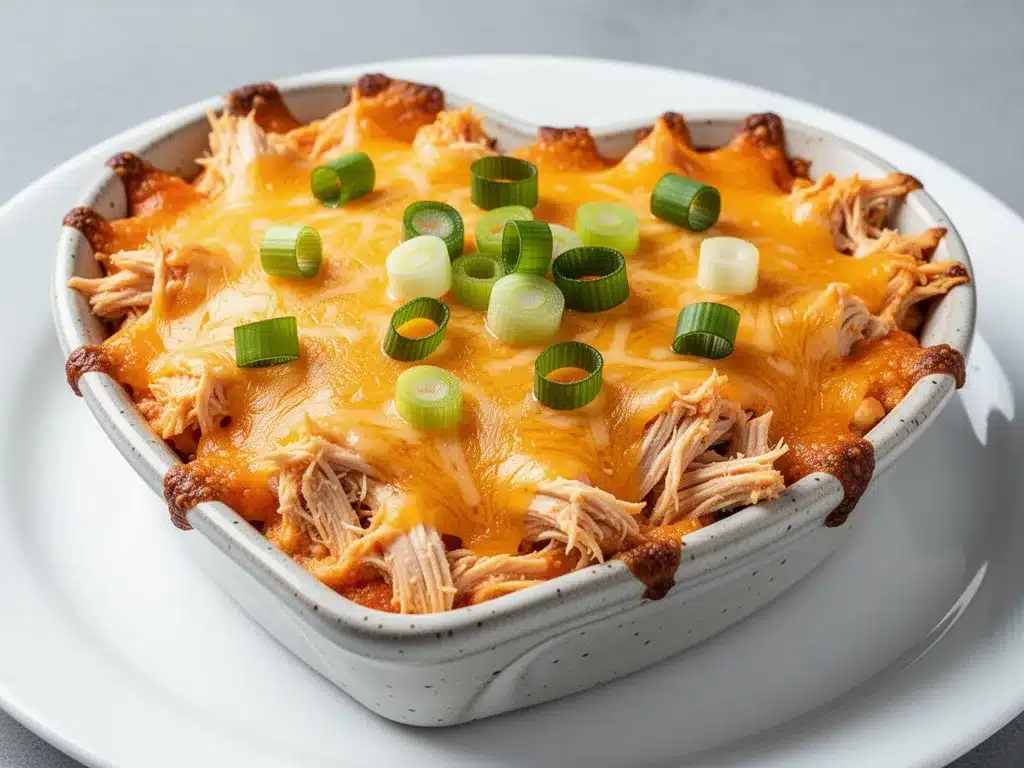
Shredded Cheddar Cheese (2 cups / 200g, divided) — Sharp cheddar gives the best flavor. Mild cheddar is too bland for this. I buy a block and shred it myself because pre-shredded cheese has anti-caking agents that prevent it from melting smoothly. Trust me, the extra two minutes is worth it. Reserve ½ cup for the topping.
Ranch Dressing (½ cup / 120g) — This is the secret weapon. Ranch balances the heat of the buffalo sauce and adds herby notes. I use store-bought Hidden Valley because it’s consistent, but homemade ranch works too. If you hate ranch, you can substitute with blue cheese dressing, but it will change the flavor profile significantly.
Garlic Powder (1 teaspoon) — Just a touch to round out the flavors. Fresh garlic can burn easily in this dip, so powder is safer and more consistent.
Onion Powder (½ teaspoon) — Adds depth without the texture of raw onions. If you really want onion flavor, you can sauté some finely diced yellow onion in a little butter first, but it’s not necessary.
For the Topping
Green Onions (3-4 stalks, sliced) — Fresh green onions add a pop of color and a mild onion bite that cuts through the richness. They’re essential for garnish. Don’t use dried onion flakes as a substitute here; they don’t provide the same fresh crunch.
Blue Cheese Crumbles (Optional, ½ cup) — Traditional buffalo wings come with blue cheese, so adding some crumbles to the top is a nice nod to that classic pairing. If you hate blue cheese, skip it or use more cheddar. I usually do half-and-half.
Additional Cheese (½ cup shredded cheddar) — This goes on top right before serving to create that golden, bubbly crust.
Equipment Needed
You don’t need fancy equipment for this. Here’s what I actually use:
Large Mixing Bowl — A 4-quart bowl is perfect. It needs to be big enough to fold the chicken into the creamy base without spilling. Glass or ceramic works best.
Electric Mixer or Large Spoon — An electric hand mixer makes short work of softening the cream cheese and blending everything smoothly. But if you’re using fully softened cream cheese and have strong arms, a sturdy wooden spoon works fine. I usually mix by hand for the first minute, then switch to the mixer for 30 seconds.
Baking Dish or Slow Cooker — I use a 9×9 inch square baking dish for oven baking. It’s the perfect size for this amount of dip. For slow cooking, a 3-quart slow cooker works well. Avoid large slow cookers; the dip will spread too thin and dry out.
Grater — A box grater for shredding your own cheddar. Microplane works too, but box grater gives better shreds that melt evenly.
Knife and Cutting Board — For slicing the green onions. Dull knives make you cry more—learned this the hard way.
Spatula — Silicone spatula for scraping the sides of the bowl and stirring the dip. Don’t use metal; it scratches non-stick surfaces.
Optional but nice:
- Chicken Shredder — Those claw tools are fun, but two forks work just as well.
- Food Processor — If you’re shredding a lot of cheese, a food processor with a shredding blade is a lifesaver.
How to Make It: Step-by-Step
Alright, let’s make this! I’m walking you through exactly how I do it, including the little tricks I’ve picked up over the years. This process takes about 10 minutes of active prep, plus baking time.
Step 1: Prep Your Chicken (5 minutes)
If you’re using rotisserie chicken, pull the meat off the bones and shred it into bite-sized pieces. I like to keep it slightly chunky rather than finely shredded—it gives the dip better texture. If you’re using canned chicken, drain it thoroughly and press out as much liquid as possible with a paper towel. Excess moisture will make your dip runny. If you’re cooking raw chicken, poach it in water or broth until cooked through, then shred it. Let it cool completely before mixing.
Step 2: Soften the Cream Cheese (Critical Step)
This is where most people fail. Cut the block of cream cheese into 4-6 small cubes and let it sit on the counter for 30 minutes. If you’re in a hurry, microwave it in 10-second bursts, stirring between each burst, until it’s soft but not melted. You want it pliable, like playdough. If it’s cold, you’ll end up with lumpy dip that’s impossible to fix. I’ve learned this the hard way with a grainy, separated mess.
Step 3: Mix the Base (3-4 minutes)
In your large mixing bowl, combine the softened cream cheese, buffalo sauce, mayonnaise, ranch dressing, garlic powder, and onion powder. Use an electric mixer on medium speed to blend until smooth and creamy. If mixing by hand, press the cream cheese against the sides of the bowl with your spoon to break it up before adding the other ingredients. The mixture should be uniform and pale orange. No lumps allowed.
Step 4: Fold in the Chicken and Cheese (2 minutes)
Add the shredded chicken and 1½ cups of the shredded cheddar cheese to the bowl. Switch to a spatula or large spoon. Fold gently until the chicken and cheese are evenly distributed. Don’t overmix; you want to preserve the texture of the chicken. The dip should look thick and cohesive. If it seems too thick, add a tablespoon of milk or extra ranch. If it’s too thin, add a bit more cream cheese.
Step 5: Transfer to Baking Dish
Spread the mixture evenly into your prepared 9×9 inch baking dish or slow cooker. Smooth the top with the back of your spoon. It should look like a thick, chunky paste. If using a slow cooker, you can skip the baking step and just cook on low for 2-3 hours, stirring once halfway through. For oven baking, proceed to the next step.
Step 6: Top and Bake (15-20 minutes)
Sprinkle the remaining ½ cup of cheddar cheese evenly over the top. If you’re using blue cheese crumbles, add them now. Bake in a preheated 350°F (175°C) oven for 15-20 minutes, or until the cheese is melted, bubbly, and slightly golden around the edges. The center should be hot and steaming. If you’re using a slow cooker, cover and cook on low for 2-3 hours until hot and bubbly.
Step 7: Garnish and Serve
Remove from heat and let it rest for 5 minutes. This allows the dip to thicken slightly and become easier to scoop. Sprinkle the sliced green onions over the top. Serve immediately with sturdy chips, celery sticks, or carrot sticks. The dip will continue to thicken as it cools, so if it gets too thick, stir in a splash of milk or extra ranch before serving.
Total Time: About 30-40 minutes (10 minutes active, 20-30 minutes baking)
Expert Tips & Tricks
Here’s everything I’ve learned from making this dozens of times. These tips will save you from my mistakes.
Drain That Chicken Thoroughly
This is the #1 mistake people make. Canned chicken or leftover cooked chicken holds a lot of moisture. If you don’t drain and press it dry, your dip will be watery. I use paper towels to pat the chicken dry. It takes an extra minute, but it ensures a thick, creamy dip.
Room Temperature Cream Cheese is Non-Negotiable
I cannot stress this enough. Cold cream cheese creates lumps. Softened cream cheese blends smoothly. If you forget to take it out, microwave it in 10-second bursts. But don’t melt it—just soften it. Melted cream cheese changes the texture completely.
Shred Your Own Cheese
Pre-shredded cheese contains cellulose to prevent clumping. Cellulose doesn’t melt. It creates a gritty texture. Buy a block of sharp cheddar and shred it yourself. It takes 2 minutes and makes a huge difference in the final taste and texture.
Adjust the Heat to Your Crowd
Buffalo sauce varies by brand. Frank’s RedHot is medium heat. If you want it milder, mix half buffalo sauce and half ranch. If you want it hotter, add cayenne pepper or diced jalapeños. I usually make the base mild and add hot sauce to individual servings for spicy eaters.
Don’t Overbake
The dip is done when it’s bubbly and the cheese is melted. Overbaking dries out the edges and makes the chicken tough. 15-20 minutes is usually perfect. Keep an eye on it after 15 minutes.
Make-Ahead Strategy
You can mix the entire dip (except the topping) up to 24 hours in advance. Store it in the baking dish, covered with plastic wrap, in the fridge. When ready to serve, let it sit at room temperature for 30 minutes, then bake as directed. This saves so much day-of stress.
Pro Trick: The Butter Finish
If you want restaurant-quality richness, stir in 1 tablespoon of cold butter at the very end, after baking. Swirl it in until melted. It makes the dip glossy and adds a luxurious mouthfeel.
Variations & Substitutions
Once you’ve nailed the basic version, here’s how you can mix it up. I’ve tried all of these, and they all work.
Blue Cheese Version
Substitute the ranch dressing with blue cheese dressing. Add ½ cup crumbled blue cheese to the mix. This is closer to traditional buffalo wing flavor. My friend who loves blue cheese requests this version exclusively.
Spicy Jalapeño Version
Add 2 diced jalapeños (seeds removed for less heat) and 1 teaspoon of cayenne pepper to the base. Top with diced jalapeños before baking. This is for the brave.
BBQ Chicken Version
Swap the buffalo sauce for BBQ sauce. Use smoked cheddar cheese. Top with crispy bacon bits and green onions. This is a totally different vibe—smoky and sweet.
Taco Style
Use taco seasoning instead of garlic/onion powder. Swap buffalo sauce for sour cream and taco sauce. Top with diced tomatoes, black olives, and cilantro. Serve with tortilla chips.
Lighter Version
Use light cream cheese and light ranch dressing. Reduce cheddar to 1 cup. It’s thinner and less rich, but still good. I make this when I’m trying to be “healthy,” though let’s be honest, it’s still a dip.
Gluten-Free
This recipe is naturally gluten-free as written. Just make sure your buffalo sauce and ranch dressing are certified gluten-free (some brands have hidden gluten). Serve with gluten-free chips or veggies.
Dairy-Free
Replace cream cheese with dairy-free cream cheese, ranch with dairy-free ranch, and cheddar with dairy-free shreds. It’s different but works. My lactose-intolerant friend uses this version.
Protein Swaps:
- Shredded turkey (leftover Thanksgiving turkey works great)
- Cooked and shredded chicken thighs (juicier than breasts)
- Canned tuna (yes, really—sounds weird, tastes surprisingly good)
Serving & Storage
How to Serve:
I usually serve this straight from the baking dish at the party—it looks rustic and stays warm. But here are other ways I’ve enjoyed it:
Dipping Options:
- Sturdy chips (Tortilla chips, Pita chips, or sturdy potato chips)
- Raw veggies (Celery sticks, carrot sticks, cucumber slices, bell pepper strips)
- Warm tortillas (for a dip wrap)
- Crusty bread or breadsticks
Wine Pairing:
I’m not a wine expert, but my wine-snob friend says a crisp Pinot Grigio or a light-bodied Sauvignon Blanc works great with the heat. For beer, a cold lager or IPA balances the creaminess.
Storage Instructions:
Refrigerator:
Store leftovers in an airtight container for up to 4 days. The dip will thicken in the fridge—totally normal. It’s actually easier to scoop after it’s chilled.
Reheating:
Best method: Add to a skillet with a splash of milk or cream over low heat. Stir until heated through and creamy again. Microwave method: Heat in 30-second intervals, stirring between. Add a splash of milk if it’s too thick. Never works: Trying to reheat in the oven without adding liquid. It will dry out. Ask me how I know.
Freezing:
Honestly, this doesn’t freeze well because of the dairy. The texture can become grainy when thawed. Make it fresh or store in the fridge for up to 4 days.
Meal Prep:
Mix the dip on Sunday, store in the fridge. Bake fresh before the party. Takes 10 minutes of prep and tastes way better than making it day-of.
Nutrition Information
I’m not a nutritionist, but here’s the breakdown if you’re tracking. Keep in mind that nutrition varies based on specific brands and portions.
Per Serving (based on 12 servings, 2 tablespoons per serving):
| Nutrient | Amount |
|---|---|
| Calories | 180 |
| Protein | 12g |
| Carbs | 2g |
| Fiber | 0g |
| Sugar | 1g |
| Fat | 14g |
| Saturated Fat | 7g |
| Cholesterol | 45mg |
| Sodium | 450mg |
What’s Good:
- Decent protein from chicken and cheese
- Low carb (if serving with veggies)
- Calcium from the cheese
What to Know:
- Higher in calories and fat from cream cheese and mayo
- Contains dairy
- Moderate sodium (use low-sodium chicken and sauce to reduce)
My Take:
Look, this is comfort food. It’s not a diet recipe. It’s creamy, cheesy, and spicy. But it’s way better than store-bought dip, costs less, and I know exactly what’s in it. When I want to make it lighter, I use the light versions and load up on celery sticks. But usually? I just eat a reasonable portion and enjoy it. Life’s too short to stress over every calorie.
Final Thoughts
So that’s my go-to Buffalo Chicken Dip! I’ve probably talked your ear off at this point, but when you make a recipe this often, you have a lot to say about it. This dip has saved tailgate parties, Super Bowl gatherings, and quiet weeknight snacks more times than I can count. It’s my answer to “what should I bring?” when I’m invited anywhere.
It’s reliable, it’s delicious, and it always disappears faster than I expect. My kids love it, my husband loves it, and even my picky eaters can’t resist it. Once you make this, you’ll never buy store-bought party dip again.
Make it yours! Try different cheeses, adjust the heat, or swap in your favorite proteins. The best recipes are the ones you adapt to your family’s tastes. If you make this, drop a comment and let me know what you think! I love hearing how recipes turn out in your kitchen. And if something doesn’t work, tell me that too—I’m here to help troubleshoot.
Happy cooking! And I hope your kitchen smells half as good as mine does right now.
Frequently Asked Questions
Can I use canned chicken instead of rotisserie?
Yes, but you MUST drain it thoroughly. Canned chicken holds a lot of liquid. Open the can, pour off the liquid, then press the chicken with paper towels to remove as much moisture as possible. If you don’t, your dip will be watery. I’ve made this mistake before, and it was a disaster.
Why is my dip too thin?
Usually means there was too much moisture in the chicken or you added too much liquid. Next time, drain the chicken better and use less ranch. If your dip is already thin, you can add more cream cheese (softened) or more shredded cheese to thicken it. Bake it a bit longer to evaporate excess moisture.
Can I make this ahead of time?
Absolutely. Mix everything except the topping cheese, cover, and refrigerate for up to 24 hours. Let it sit at room temperature for 30 minutes before baking. This saves so much stress on game day. I do this all the time for tailgates.
Why did my dip separate?
This usually happens if the heat was too high, or if you used cold cream cheese. High heat breaks the emulsion. Always bake at 350°F, not higher. If you’re using a slow cooker, stir occasionally. If it’s already separated, whisk in a splash of cold milk or cream to bring it back together.
Can I use ranch seasoning instead of ranch dressing?
You can, but the texture will be different. Ranch seasoning is dry, so you’ll need to add liquid (like milk or sour cream) to create a sauce. I recommend using ranch dressing for the creamy texture. If you only have seasoning, mix 2 tablespoons seasoning with ½ cup sour cream or mayo.
How do I reheat leftovers without it getting dry?
Add a splash of milk or cream to a skillet, add your leftover dip, and heat gently over low heat, stirring frequently. The extra liquid brings back the creamy texture. Microwave sort of works but tends to dry it out. If you do microwave, definitely add a splash of milk first and heat in short bursts, stirring between.
Can I double this recipe?
Yes! Double everything and use a larger baking dish (9×13 inch). The cooking time will increase by about 5-10 minutes. Keep an eye on it after the original baking time. I double this for large parties, and it works perfectly.
Pin This Recipe!
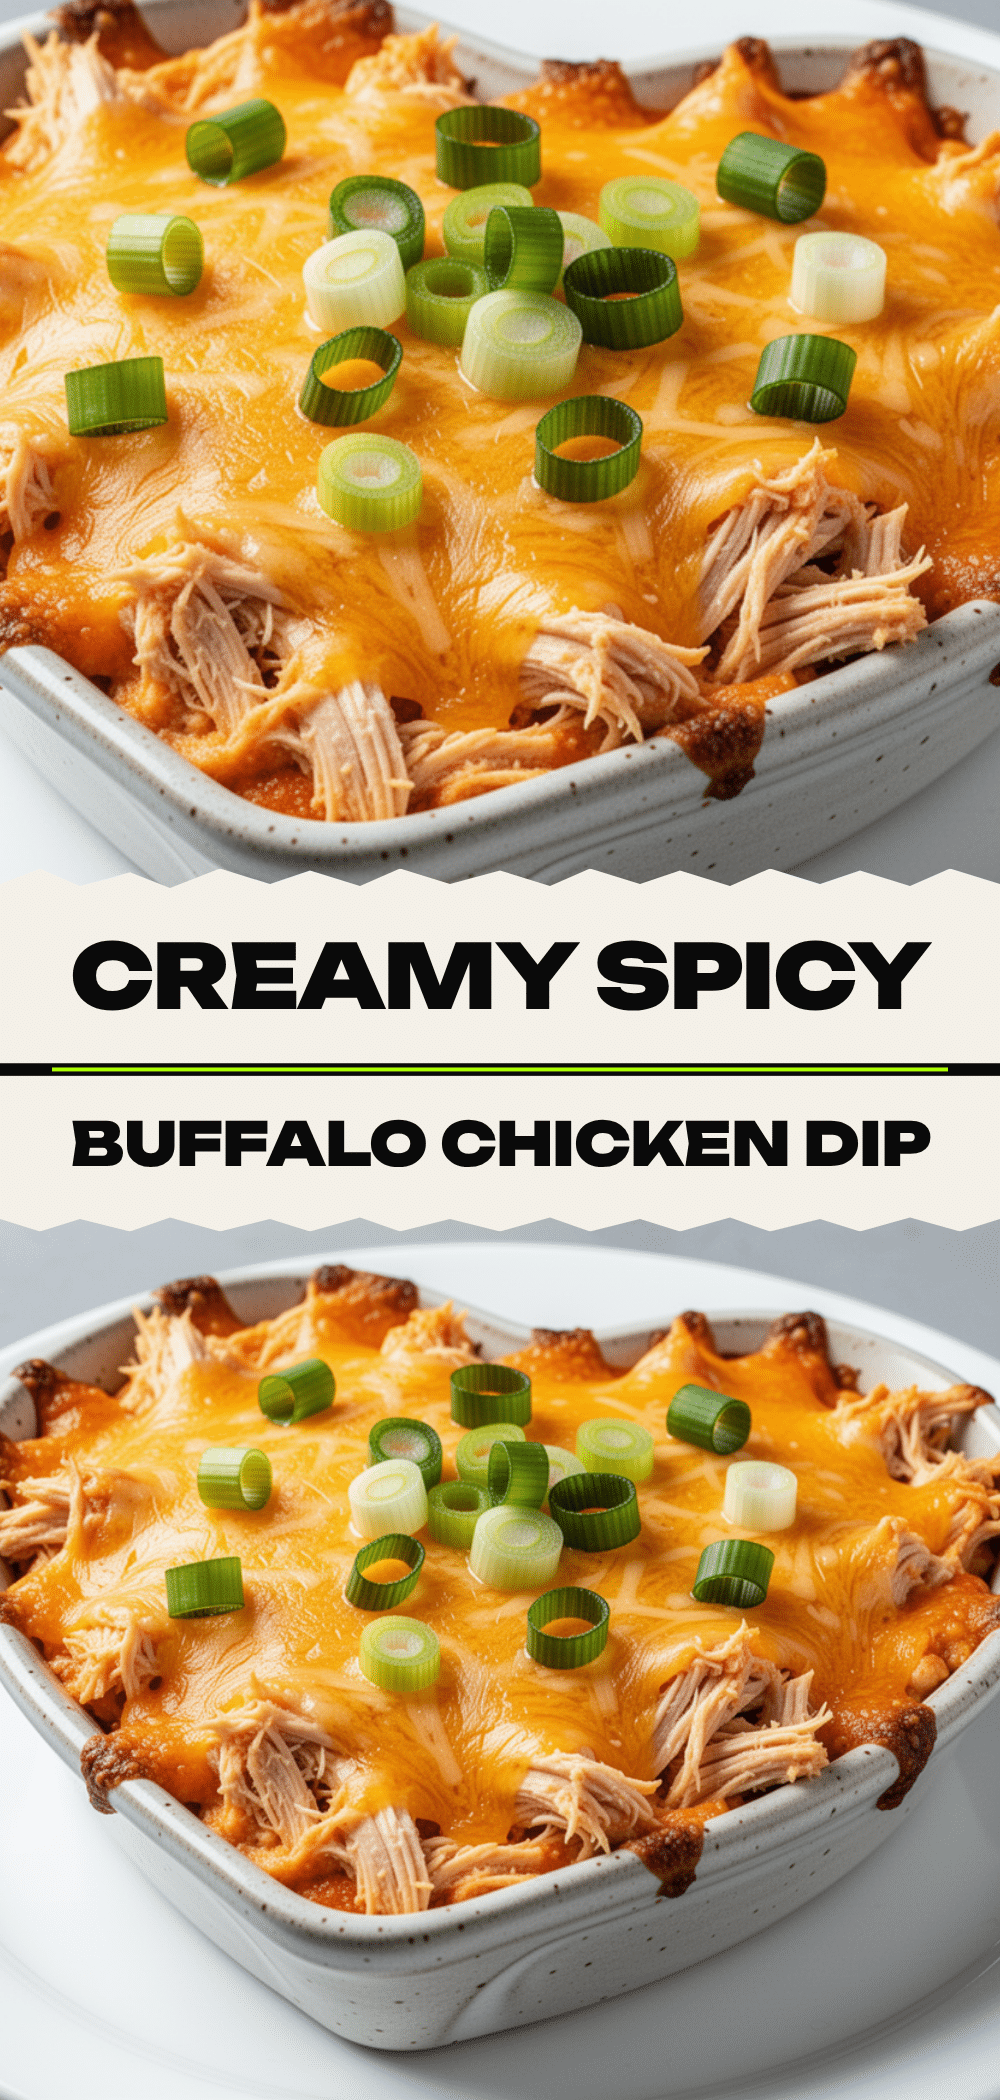

Buffalo Chicken Dip: Best Easy Tailgate Appetizer
- Total Time: 30 minutes
- Yield: 12 servings 1x
Description
A creamy, spicy, and cheesy buffalo chicken dip that is perfect for tailgating, parties, or weeknight comfort food. This easy-to-make appetizer feeds a crowd and can be prepared ahead of time.
Ingredients
- 3 cups cooked chicken, shredded (about 450g)
- 8 ounces cream cheese, softened
- ½ cup buffalo style hot sauce (e.g., Frank’s RedHot)
- ½ cup mayonnaise
- 2 cups shredded sharp cheddar cheese, divided
- ½ cup ranch dressing
- 1 teaspoon garlic powder
- ½ teaspoon onion powder
- 3–4 stalks green onions, sliced
- ½ cup blue cheese crumbles (optional)
Instructions
- Preheat oven to 350°F (175°C).
- Shred the cooked chicken and ensure it is thoroughly drained and dry to prevent a watery dip.
- Cut the softened cream cheese into cubes. If using canned chicken, drain and press out excess moisture with paper towels.
- In a large mixing bowl, combine the softened cream cheese, buffalo sauce, mayonnaise, ranch dressing, garlic powder, and onion powder. Mix until smooth and creamy.
- Fold in the shredded chicken and 1½ cups of the shredded cheddar cheese until evenly distributed.
- Transfer the mixture to a 9×9 inch baking dish and spread evenly.
- Sprinkle the remaining ½ cup of cheddar cheese (and blue cheese crumbles, if using) over the top.
- Bake for 15-20 minutes until the cheese is melted, bubbly, and slightly golden.
- Let rest for 5 minutes to thicken slightly.
- Garnish with sliced green onions and serve immediately with chips or vegetables.
Notes
Ensure cream cheese is softened to room temperature to avoid lumps. Drain chicken thoroughly to maintain dip thickness. Pre-shredded cheese contains anti-caking agents that prevent smooth melting, so shred cheese from a block if possible. This dip can be made ahead and refrigerated for up to 24 hours before baking.
- Prep Time: 10 minutes
- Cook Time: 20 minutes
- Category: Appetizer
- Cuisine: American
Nutrition
- Serving Size: 2 tablespoons per se
- Calories: 180
- Sugar: 1
- Sodium: 450
- Fat: 14
- Saturated Fat: 7
- Carbohydrates: 2
- Protein: 12
Keywords: buffalo chicken dip, tailgate appetizer, party dip, easy appetizer, spicy dip, creamy dip, game day food, slow cooker dip


