It was 94 degrees Fahrenheit. The kind of heat that makes the asphalt shimmer and turns your car interior into an oven. I was standing in line at a popular coffee shop, sweating through my shirt, watching the barista struggle with a machine that looked more complicated than a spaceship cockpit. The line behind me was growing, and I could feel my patience evaporating faster than a puddle on hot concrete. When I finally got to the front, I ordered a vanilla iced latte. It cost $7.50. It took 12 minutes. And when I took the first sip? It was watery, overly sweet, and tasted like syrup rather than coffee.
I walked home, defeated, and threw that $7.50 disappointment in the trash. That night, fueled by stubbornness and a desperate need for caffeine, I decided to try something I’d seen a friend make. I put coarse coffee grounds in a jar, poured cold water over them, and left it in the fridge. I didn’t have a fancy $200 brewer. I didn’t have a temperature-controlled water source. I just had a mason jar and some patience. Eighteen hours later, I pulled it out, strained it, added a splash of heavy cream and a drizzle of vanilla, and poured it over ice. It was the best cup of coffee I’d ever had. Smooth, rich, naturally sweet, and absolutely refreshing.
That was three summers ago. Since then, I’ve made this iced vanilla cold brew with cream probably 100 times. It’s become my morning ritual, my afternoon pick-me-up, and my go-to way to beat the heat when I don’t feel like turning on the stove. The best part? It’s stupidly simple. There’s no boiling water, no special equipment, and no waiting in line. You just mix it and wait. The result is a drink that tastes like it came from a high-end café but costs pennies to make and actually tastes like coffee.
I know what you’re thinking. “Cold brew sounds complicated.” It’s not. It’s literally just coffee and water sitting in a jar. But getting the ratio right, choosing the right beans, and knowing how to finish it with the perfect cream layer makes all the difference. This recipe isn’t just about caffeine; it’s about creating a moment of calm in your busy day. A cold, creamy, vanilla-kissed pause button. Let me walk you through exactly how I do it, so you can stop buying overpriced, under-delivered coffee and start making something that actually makes you happy.
Why You’ll Love This Iced Vanilla Cold Brew with Cream
There are a million reasons to switch to homemade cold brew, but here are the ones that keep me coming back to the jar in my fridge:
- It’s Naturally Smoother — Hot coffee extracts acids and oils quickly, which gives it that bright, sometimes bitter punch. Cold water extracts those slowly and gently. The result? A coffee that is 60% less acidic and tastes naturally sweet, even without sugar. If you’ve ever had coffee give you heartburn or an upset stomach, this is your answer.
- Lightning Fast Once Prepared — The 18 hours of steeping? Totally hands-off. You don’t stand there stirring it. You don’t watch it. You just walk away. When you want a cup, it’s ready in 3 minutes. That’s faster than driving to a drive-thru. I make this on Sunday, and I have enough for the whole week. It’s the ultimate meal-prep win.
- Customizable to Your Taste — Store-bought cold brew is one size fits all. With this iced vanilla cold brew with cream, you control everything. Want it stronger? Use more grounds. Want it sweeter? Adjust the vanilla or add a touch of maple syrup. Want extra creamy? Use half-and-half or oat milk. It’s your drink, your rules.
- Costs Pennies Per Cup — A bag of decent coffee beans costs around $12-15 and makes enough cold brew for 8-10 servings. That’s about $1.50 per cup. Compare that to $5-7 at the shop, and you’re saving enough to buy a new mug (or a whole new bag of beans) every few weeks.
- Perfect for Summer Heat — Hot coffee feels heavy in the summer. Cold brew is refreshing. The ice doesn’t water it down as fast because the concentrate is so strong. I keep a pitcher of this in the fridge all summer long. It’s like a liquid ice pack for your soul.
- Minimal Cleanup — You need one jar, one strainer (or cheesecloth), and one glass. That’s it. No fancy machines to descale, no filters to throw away (if you use a reusable metal sieve), no counter space taken up by a bulky brewer. Just a jar in the fridge.
This recipe has saved me money, saved me time, and honestly, saved my stomach from morning acidity. It’s the kind of simple habit that pays off every single day. Once you try it, you’ll never go back to the coffee shop.
Ingredients You’ll Need
The beauty of this iced vanilla cold brew with cream is that the ingredient list is incredibly short. You don’t need fancy syrups or exotic beans. You just need good quality basics. Here’s what I use and why it matters.
For the Cold Brew Concentrate
Coarsely Ground Coffee (1 cup / 100g) — This is the most important ingredient. Do not use fine ground coffee (like for drip machines) or espresso grounds. They will make the brew muddy and over-extracted. You need a coarse grind, similar to sea salt. If you buy whole beans, grind them yourself. I prefer a medium-dark roast for cold brew because it brings out chocolatey, nutty notes that pair beautifully with vanilla. Brands like Stumptown or local roaster beans work great, but even a good grocery store brand will do the trick.
Cold Filtered Water (4 cups / 950ml) — Use cold water, obviously. But if your tap water tastes like chlorine or metals, your coffee will too. Filtered water makes a noticeable difference in clarity and taste. If you don’t have a filter, just let the tap water run for 30 seconds to clear it out.
For the Finish
Heavy Cream or Half-and-Half (2-3 tablespoons per serving) — This is where the luxury comes in. Heavy cream makes it rich and velvety. Half-and-half makes it lighter but still creamy. I use a mix—sometimes just half-and-half if I’m being “healthy” (ha!). Dairy-free options like oat milk or almond milk work too, but they won’t give you that same luxurious mouthfeel. Oat milk is the closest in texture.
Vanilla Extract (1-2 teaspoons per serving) — Use real vanilla extract, not imitation. Imitation vanilla tastes artificial and sharp. Real vanilla adds a warm, floral sweetness that complements the coffee. If you want extra flavor, you can make vanilla syrup (simmer equal parts sugar and water with a split vanilla bean), but straight extract is easier and works perfectly.
Ice Cubes — Lots of them. Since cold brew concentrate is strong, you can add ice without watering it down too much. Use large ice cubes if you can—they melt slower. Or, for a pro tip, freeze some extra cold brew in an ice cube tray. That way, your drink stays strong even as the ice melts.
Optional Sweetener — I often skip added sugar because the cold brew is naturally sweet, but if you like it sweeter, a teaspoon of simple syrup, maple syrup, or brown sugar works well. Add it to the concentrate or the finished drink.
Equipment You’ll Need
You don’t need to buy anything special. Here’s what I actually use:
A Large Jar or Pitcher — A 1-quart or 1.5-quart glass jar works perfectly. A mason jar is ideal because it’s easy to find and clean. A glass pitcher with a lid works too, just make sure it’s big enough to hold the water and grounds without overflowing.
A Fine-Mesh Strainer or Cheesecloth — To remove the grounds. A fine-mesh metal strainer is easiest. If you don’t have one, line a colander with cheesecloth or a nut milk bag. Paper coffee filters work but take forever to strain and can get clogged.
A Spoon — For stirring the grounds and water together. Just a regular long-handled spoon is fine.
A Storage Bottle — Once strained, you’ll want to keep the concentrate in a bottle or jar in the fridge. An old mason jar or a dedicated glass bottle works great.
Coffee Grinder (Optional) — If you buy pre-ground, make sure it’s labeled “coarse” or “cold brew grind.” If you grind your own, a burr grinder is best for consistent sizing, but a blade grinder works in a pinch. Just pulse until it looks like coarse sand.
How to Make It: Step-by-Step
Alright, let’s make this! I’m walking you through exactly how I do it. It’s so simple you might think you’re missing a step, but that’s the magic of cold brew. There’s no heat, no timing precision, just patience.
Step 1: Combine Coffee and Water (2 minutes)
Add the coarse ground coffee to your jar or pitcher. Pour the cold filtered water over the grounds. The ratio I use is 1 cup of coffee to 4 cups of water. This creates a strong concentrate that you’ll dilute later. If you prefer a weaker brew, use a 1:5 ratio. Stir gently with a spoon to make sure all the grounds are saturated. You want to see wet coffee floating around, not dry clumps at the bottom. If you see dry clumps, give it another stir. This step takes literally two minutes.
Step 2: The Wait (18-24 hours)
Cover the jar with a lid or plastic wrap. Place it in the fridge. Now, you just wait. I usually do this on Sunday evening, so it’s ready by Monday morning. The steeping time can range from 18 to 24 hours. 18 hours gives a brighter, more acidic flavor (closer to iced coffee). 24 hours gives a deeper, smoother, more chocolatey flavor. I prefer 20-22 hours as a happy medium. Don’t rush it. The cold water needs time to extract the flavors gently. If you leave it for 24+ hours, it might start to taste bitter, so set a reminder on your phone if you’re forgetful like me.
Step 3: Strain the Concentrate (5-10 minutes)
After the steeping time, it’s time to strain. Place your fine-mesh strainer over a clean bowl or pitcher. If you’re using cheesecloth, set it up in a colander over the bowl. Slowly pour the coffee mixture through the strainer. The grounds will catch in the mesh, and the smooth liquid will drip through. If you’re using a paper filter, it will take longer and you might need to rinse the grounds a bit with cold water to get all the flavor out. Discard the used grounds (compost them if you can!). The resulting liquid is your cold brew concentrate. It should look dark and clear, not muddy. If it’s cloudy, you might have used grounds that were too fine.
Step 4: Dilute and Flavor
Your concentrate is strong! To make the iced vanilla cold brew with cream, mix one part concentrate with one part cold water or milk in a glass. Taste it first. If it’s too strong, add a bit more water. If it’s too weak, add more concentrate. Now, add your vanilla. I start with 1 teaspoon per serving and adjust to taste. Stir well. If you’re using sweetener, add it now and stir until dissolved.
Step 5: Add Ice and Cream
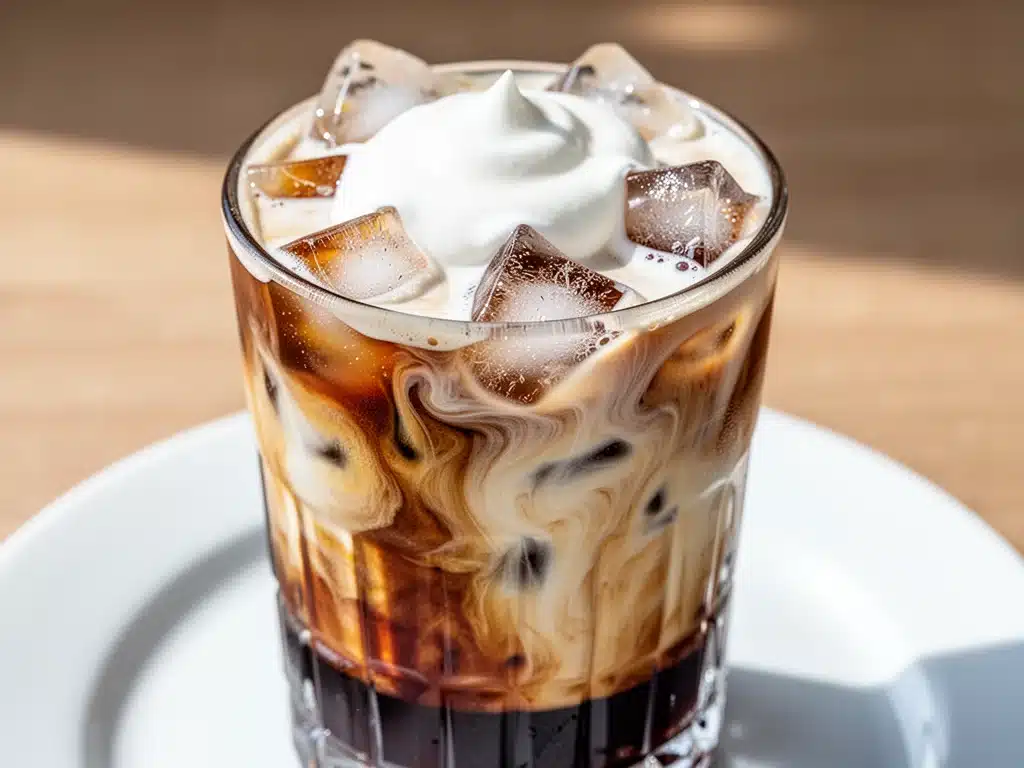
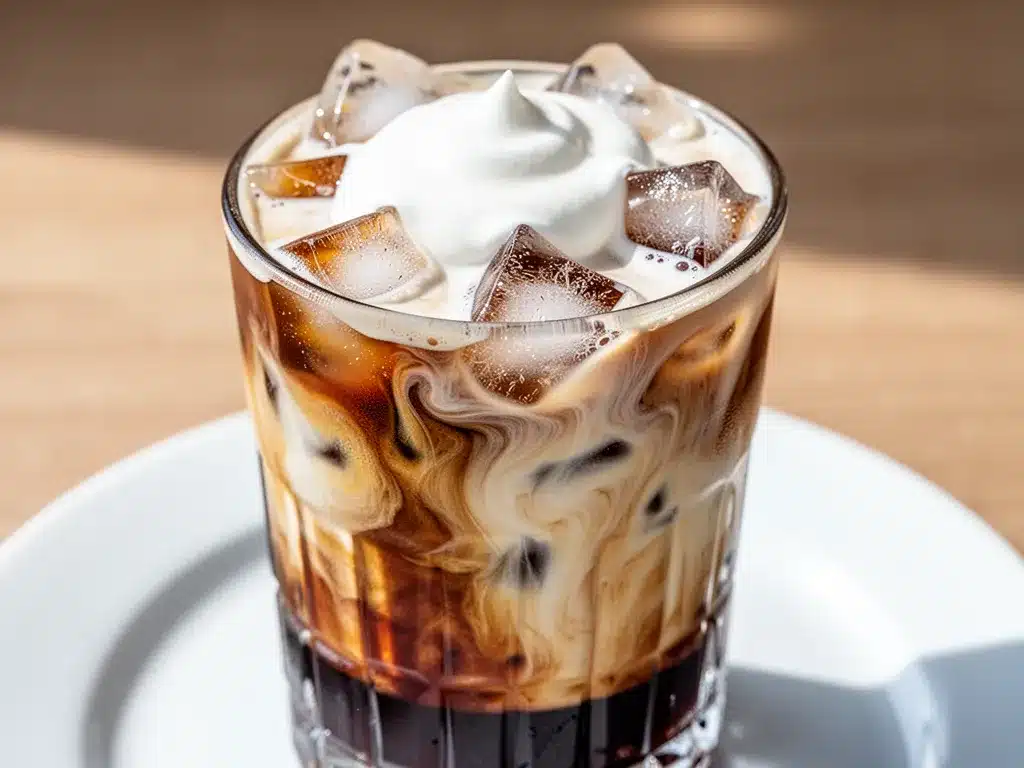
Fill a glass with ice cubes. Pour your diluted coffee mixture over the ice. Top with a splash of heavy cream or half-and-half. Stir gently. The cream will swirl into the dark coffee, creating those pretty layers. If you used coffee ice cubes, this step is even better because your drink won’t get watery. Serve immediately and enjoy the cool, smooth taste. It’s incredibly satisfying to see that first creamy swirl.
Expert Tips & Tricks
Here’s everything I’ve learned from making this dozens of times. These tips will save you from my early mistakes.
- Grind Size is Critical — I can’t stress this enough. If your grind is too fine, your cold brew will be bitter and muddy. It needs to be coarse. Think of it like the texture of sea salt or rough breadcrumbs. If you buy pre-ground, look for “cold brew” or “French press” grind. If you grind at home, pulse in short bursts and check the texture.
- Use a 1:4 Ratio for Concentrate — This is my gold standard. It makes a strong concentrate that you can dilute to your liking. Some recipes use 1:1, which is super strong and hard to manage. 1:4 gives you flexibility. You can make it as strong or as mild as you want.
- Don’t Skip the Stir — When you first mix the coffee and water, make sure you stir it well. Dry grounds floating on top won’t extract properly. You want every bit of coffee wet. I use a long spoon and swirl it around for 30 seconds.
- Strain Twice if Needed — If your first strain still has fine particles, strain it again through a paper filter or a clean cheesecloth. It takes a few extra minutes, but it makes the coffee silky smooth. No one wants grit in their drink.
- Store in the Fridge — Cold brew concentrate lasts up to two weeks in the fridge. Keep it in a sealed jar or bottle. It actually gets smoother over the first few days as the flavors meld. I usually make a batch every 10 days.
- Experiment with Roasts — Light roasts can be fruity and acidic in cold brew. Medium roasts are balanced and nutty. Dark roasts are chocolatey and bold. I love dark roast for this drink because it stands up to the cream and vanilla. But try different roasts to find your favorite.
One pro trick I’ve picked up: Add a pinch of salt to the grounds before adding water. It sounds weird, but a tiny pinch of sea salt reduces bitterness and enhances the sweetness. Just don’t overdo it—a little goes a long way.
Variations & Substitutions
Once you’ve mastered the basic version, here’s how you can mix it up. I’ve tried all of these, and they’re all winners.
- Mocha Cold Brew — Add 1 tablespoon of cocoa powder or chocolate syrup to the concentrate before straining, or stir it into the finished drink. It’s like a cold brew mocha. Rich and indulgent.
- Caramel Cold Brew — Drizzle caramel sauce into the glass before adding the ice, then pour the coffee over it. Swirl it up for a caramel latte vibe. This is my favorite treat on hot days.
- Coconut Cold Brew — Use coconut milk or cream instead of dairy cream. Add a drop of coconut extract for extra flavor. It’s tropical and refreshing, perfect for summer.
- Spiced Cold Brew — Add a cinnamon stick or a pinch of cardamom to the grounds before steeping. It infuses the coffee with warm spices, which is great even in summer if you like bold flavors.
- Matcha Cold Brew — Not a coffee lover? Mix your cold brew with a shot of matcha latte for a double-caffeine boost. It’s an interesting twist that’s surprisingly good.
- Dairy-Free Option — Use oat milk, almond milk, or soy milk instead of cream. Oat milk is the creamiest and works best. Add a touch of maple syrup to balance the nuttiness.
- Low-Carb/Keto — Skip the sugar. Use heavy cream or MCT oil. Add a sugar-free vanilla syrup if you need sweetness. This keeps the drink keto-friendly while still being rich and satisfying.
You can also change the base liquid. Instead of water, try using cold-brewed tea for a hybrid drink, or mix half coffee and half chicory root for a lower-caffeine option. The possibilities are endless, but the basic vanilla cream version is my daily go-to.
Serving & Storage
How to Serve: I usually serve this straight from the pitcher at brunch or just as a solo treat. It looks beautiful in a clear glass with the cream swirling. Garnish with a vanilla bean pod or a few coffee beans for presentation. It’s Instagram-worthy without trying too hard.
Side Pairings: This coffee pairs perfectly with light breakfasts. I love it with neapolitan ice cream cake for a fun summer brunch, or with some fresh berries and yogurt. It’s also great with any of my pumpkin bread recipes when the weather turns cooler, but in summer, it’s best with something light and fruity.
Storage Instructions: Store the strained concentrate in an airtight glass jar in the fridge. It stays fresh for up to two weeks. After that, it might start to lose its flavor or develop off-notes. Don’t freeze it—freezing can alter the texture and flavor of the concentrate. If you need to keep it longer, make smaller batches more frequently.
Reheating: Cold brew is meant to be cold. Don’t heat it up. If you want hot coffee, use a different method. This recipe is specifically for the icy, refreshing experience. Trying to warm it up will just make it taste bitter and flat.
Pro Tip: Make coffee ice cubes! Pour leftover cold brew into an ice cube tray and freeze it. Use these instead of regular ice cubes. Your drink stays strong and cold, and you never have to worry about it getting watery. It’s a game-changer for iced drinks.
Nutrition Information
I’m not a nutritionist, but here’s the breakdown if you’re tracking. This is per serving, assuming you use 1 cup concentrate, 1 cup water, 2 tbsp heavy cream, and 1 tsp vanilla (no added sugar).
- Calories: 120
- Protein: 1g
- Carbs: 2g
- Fiber: 0g
- Sugar: 1g (natural from vanilla/cream)
- Fat: 7g
- Caffeine: ~150-200mg (varies by beans)
What’s Good: It’s low in sugar and carbs if you don’t add sweeteners. The caffeine content is substantial, so it’s a real energy booster. What to Know: The calories come mainly from the cream. If you use skim milk or almond milk, it drops to near zero calories. It’s not a diet drink, but it’s not a calorie bomb either. Moderation is key, as with any caffeine drink.
Final Thoughts
So that’s my go-to iced vanilla cold brew with cream! I’ve probably talked your ear off at this point, but when you make a recipe this often, you have a lot to say about it. This simple jar method has changed my mornings. It’s my answer to “I need coffee but I’m tired of buying it” when I’m stressed and just want something reliable. My energy is stable, my stomach is happy, and I’m saving money every day.
Make it yours! Try different beans, adjust the cream, experiment with flavors. The best drinks are the ones you adapt to your taste. If you make this, drop a comment and let me know what you think! I love hearing how recipes turn out in your kitchen. And if something doesn’t work, tell me that too—I’m here to help troubleshoot.
Happy brewing! And I hope your kitchen smells half as good as mine does right now with fresh coffee grounds.
Frequently Asked Questions
Q: Can I use regular coffee grounds?
A: You can, but the texture matters. If your grounds are too fine, they’ll slip through the strainer and make your coffee muddy and bitter. Coarse grounds are best because they extract slowly and cleanly. If you only have fine grounds, use a paper filter to strain it, which will catch the finer particles. But for the best results, buy or grind coarse beans.
Q: Why is my cold brew bitter?
A: Bitterness usually comes from two things: over-extraction or too-fine grounds. If you steeped it for more than 24 hours, it might be over-extracted. Try 18-20 hours next time. Also, check your grind size. If it’s too fine, it releases too many bitter compounds. Use a coarser grind and ensure you’re using a 1:4 ratio of coffee to water.
Q: How long does cold brew concentrate last?
A: In the fridge, it lasts up to two weeks. After that, it starts to lose flavor and might develop off-notes. I usually make a new batch every 10 days to ensure the freshest taste. Keep it in a sealed container to prevent it from absorbing fridge odors.
Q: Can I make this with hot water?
A: No, that’s just regular iced coffee. Cold brew specifically uses cold or room-temperature water to steep for a long time. This slow extraction is what makes it smooth and low-acid. If you use hot water, you’ll get a much stronger, more acidic, and potentially bitter result. Stick to cold water for true cold brew.
Q: Can I add sugar to the concentrate?
A: You can, but it’s better to add sweetener to the finished drink. Sugar doesn’t dissolve well in cold liquid, so it might settle at the bottom. If you want sweetened concentrate, make a simple syrup (sugar + water heated until dissolved) and mix that in. Or just add sugar or syrup to your glass before pouring the coffee.
Q: Is cold brew stronger than regular coffee?
A: The concentrate is stronger, but when you dilute it, it’s about the same caffeine level as regular coffee. It depends on the bean and the ratio. Some cold brews are very strong, so start with a 1:1 dilution and adjust to taste. If you’re sensitive to caffeine, use a lighter roast or dilute it more.
Q: Can I use milk instead of cream?
A: Yes! Milk, half-and-half, oat milk, almond milk—all work. Cream gives the richest texture, but milk is lighter. I often use half-and-half for a balance of creaminess and lower calories. Just stir it in after pouring the coffee over ice.
Pin This Recipe!

Iced Vanilla Cold Brew with Cream
- Total Time: 20 hours
- Yield: 8 servings 1x
Description
A simple, smooth, and naturally sweet homemade cold brew coffee concentrate finished with heavy cream and vanilla extract. This recipe requires no special equipment, just a jar and patience, resulting in a refreshing drink that costs pennies per cup.
Ingredients
- 1 cup (100g) coarsely ground coffee (medium-dark roast preferred)
- 4 cups (950ml) cold filtered water
- 2–3 tablespoons heavy cream or half-and-half per serving
- 1–2 teaspoons real vanilla extract per serving
- Ice cubes (large cubes or coffee ice cubes recommended)
- Optional: Simple syrup, maple syrup, or brown sugar for sweetness
Instructions
- Add the coarsely ground coffee to a large glass jar or pitcher.
- Pour the cold filtered water over the grounds. Use a 1:4 ratio (1 cup coffee to 4 cups water).
- Stir gently with a spoon to ensure all grounds are saturated and no dry clumps remain.
- Cover the jar with a lid or plastic wrap and place it in the refrigerator.
- Steep for 18-24 hours (20-22 hours is recommended for a balanced flavor).
- Place a fine-mesh strainer lined with cheesecloth or a paper filter over a clean bowl or pitcher.
- Slowly pour the coffee mixture through the strainer to remove the grounds. Discard the grounds.
- Dilute the concentrate by mixing one part concentrate with one part cold water or milk in a glass.
- Add vanilla extract and optional sweetener to taste, stirring well.
- Fill a glass with ice cubes, pour the diluted coffee mixture over the ice, and top with heavy cream.
- Stir gently to create layers and serve immediately.
Notes
Use coarse ground coffee similar to sea salt to prevent bitterness and muddy texture. The concentrate can be stored in the fridge for up to two weeks. For best results, use filtered water. You can freeze leftover cold brew in ice cube trays to prevent dilution as the ice melts. A pinch of salt added to the grounds before steeping can reduce bitterness.
- Prep Time: 2 minutes
- Cook Time: 0 minutes
- Category: Beverage
- Cuisine: American
Nutrition
- Serving Size: 1 glass (approx. 12
- Calories: 120
- Sugar: 1
- Sodium: 10
- Fat: 7
- Saturated Fat: 4
- Carbohydrates: 2
- Protein: 1
Keywords: cold brew, iced coffee, vanilla coffee, homemade coffee, summer drinks, coffee concentrate, easy recipe, caffeine


