I have a confession to make. Last October, I tried to bake three dozen individual pumpkin cookies for my neighbor’s baby shower. You know the type—the ones that are supposed to be delicate, spiced little bites of autumn. I spent four hours piping dough, waiting for them to cool, and boxing them up. When I took a bite of one, it was dry. Gritty, even. It tasted like a pumpkin spice latte had a baby with a cardboard box, and I was heartbroken.
That failure haunted me. I wanted that cozy, spiced flavor, but I wanted texture. I wanted chew. I wanted something that didn’t require piping bags or perfect roundness. I wanted the comfort of a brownie with the nostalgia of a chocolate chip cookie.
So, I stopped trying to make cookies. Instead, I started making bars.
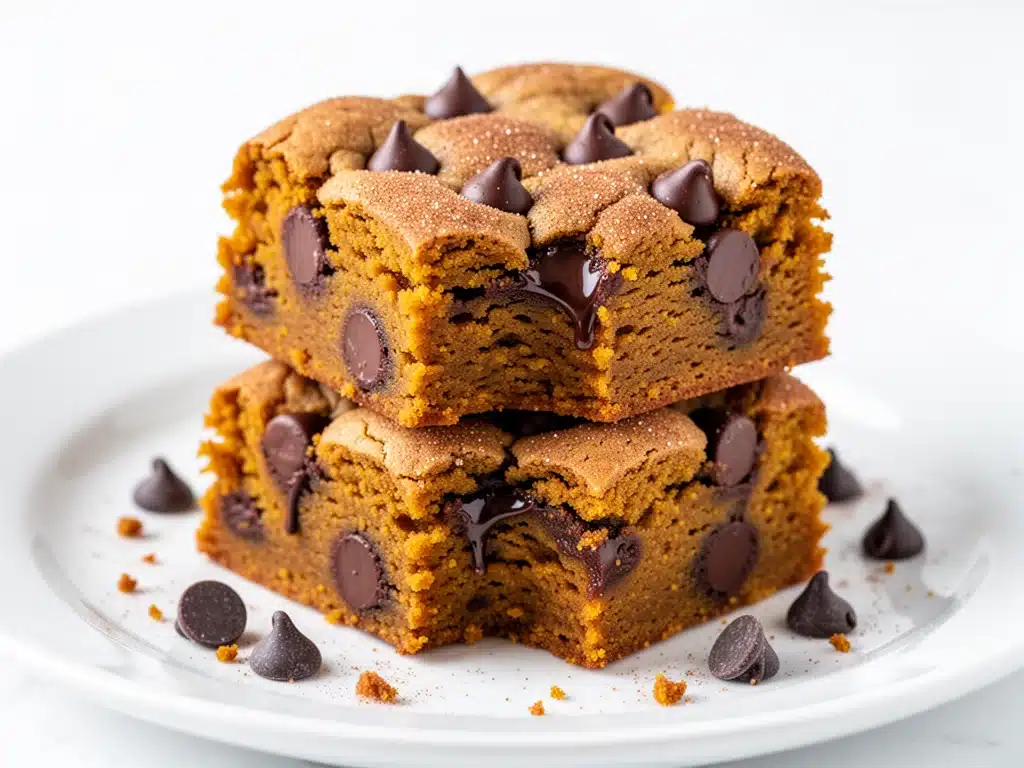
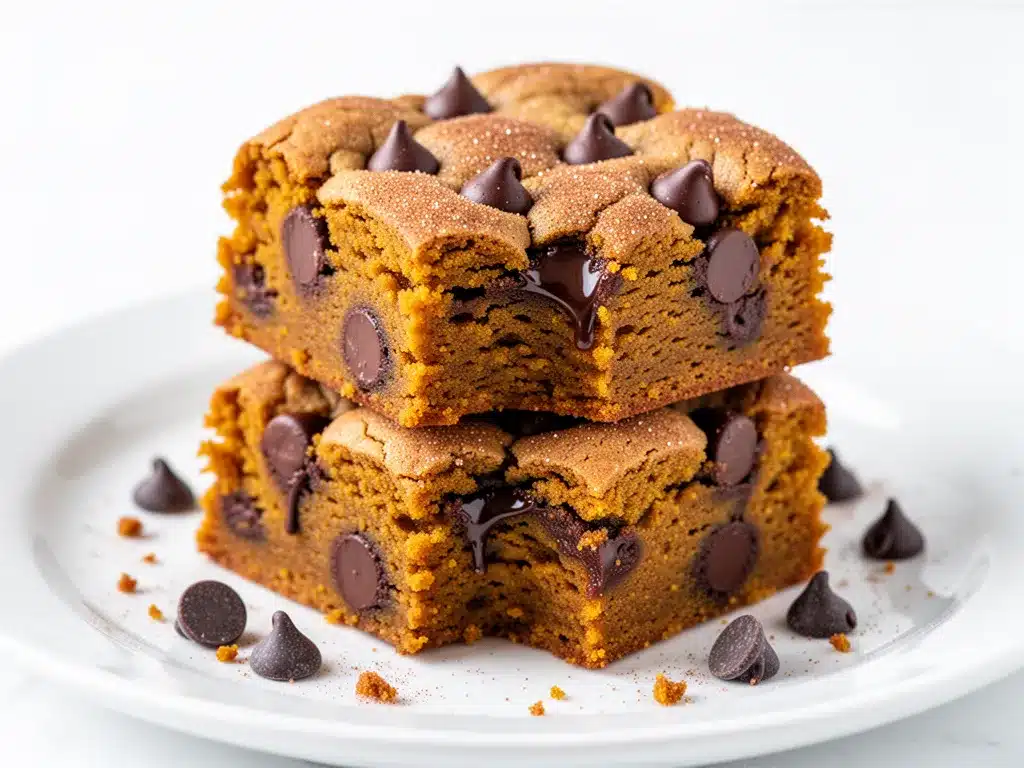
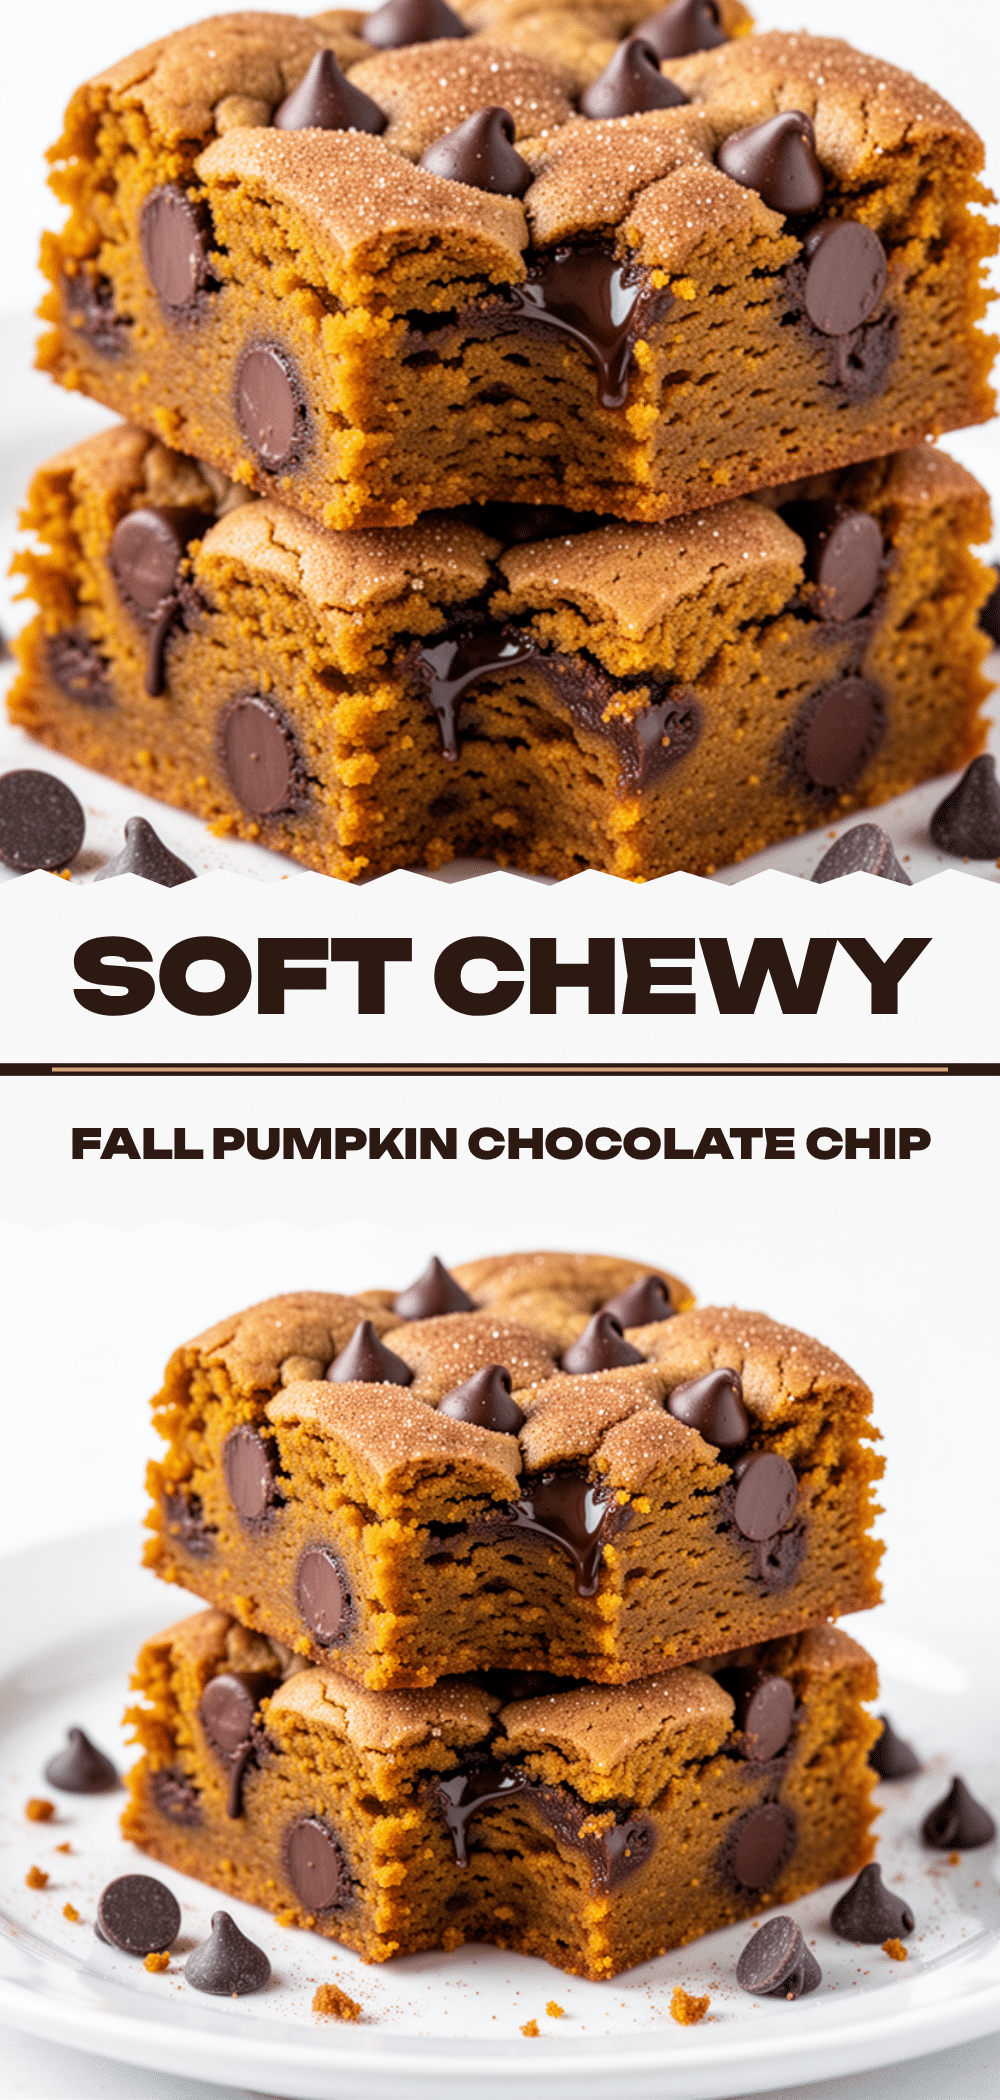
It took me six attempts. I adjusted the pumpkin puree ratio, swapped out some of the sugar, played with the baking powder, and argued with my own brain about whether to add nuts (spoiler: yes, but sparingly). But on the seventh try, I pulled this pan out of the oven, and the smell alone made my husband drop his phone and ask what was cooking. I took a warm, gooey bite straight from the pan (guilty as charged) and realized I’d finally cracked it. These Fall Pumpkin Chocolate Chip Cookie Bars are soft, chewy, deeply spiced, and honestly, easier than making individual cookies because you don’t have to deal with rolling dough balls.
They’ve become my go-to autumn dessert. They travel well to potlucks, they freeze beautifully, and they make your entire house smell like a bakery in October. If you’re looking for a dessert that captures the essence of fall without the fuss, this is it.
Why You’ll Love This Recipe
There are a dozen reasons I keep coming back to these bars, but let’s be real—here are the big ones that will change your fall baking game.
- Zero Dough Rolling — Seriously, if you can spread batter in a pan, you can make this. I’ve made these on nights when I’m exhausted after work, and I don’t have the energy to roll 36 perfect balls. Just spread, bake, eat. It’s that simple.
- Perfectly Chewy Texture — This isn’t a cake. It isn’t a dry biscuit. It’s that sweet spot between a blondie and a cookie. The pumpkin puree keeps it moist for days, meaning leftovers are actually better on day two.
- Spice-Forward, Not Just Sweet — A lot of pumpkin recipes are just sweet pumpkin. I’ve balanced the spices (cinnamon, ginger, nutmeg, cloves) so you taste the autumn, not just the sugar. It’s warm and aromatic.
- Make-Ahead Friendly — These bars taste even better after they’ve sat overnight. I often bake them on Sunday, let them cool, and have dessert ready for the week. They hold up in the fridge or freezer without drying out.
- Family-Tested — My kids, who usually turn their noses up at “vegetable” desserts, ask for these regularly. The chocolate chips and brown sugar sweetness wins them over every time.
This is my answer to “what’s for dessert?” when I want something special but don’t want to spend the whole evening in the kitchen. It’s reliable, delicious, and always a crowd-pleaser.
Ingredients You’ll Need
Here’s the best part: you probably have most of these ingredients already, especially if you’re into fall baking. I’m particular about a few things here, and I’ll tell you exactly why.
For the Base
All-purpose flour (2 ½ cups / 315g) — The foundation. Don’t use self-rising flour unless you adjust the leavening. I measure mine by spooning it into the cup and leveling it off—never scoop straight from the bag, or you’ll end up with dry bars.
Pure pumpkin puree (1 cup / 245g) — Listen closely: this must be 100% pumpkin puree, NOT pumpkin pie filling. Pie filling has sugar and spices added, which will throw off the balance of this recipe. Look for the can labeled “100% Pure Pumpkin.” I use Libby’s because it has a consistent texture.
Unsalted butter (½ cup / 113g, softened) — Softened means room temperature. If you microwave it, it melts. We want it spreadable, not liquid. This gives the bars their richness.
Light brown sugar (1 ½ cups / 300g, packed) — This is crucial. Brown sugar adds moisture and a caramel-like depth. Light brown is milder; dark brown is more molasses-heavy. I prefer light for these bars, but dark works if you want a deeper flavor.
Granulated sugar (½ cup / 100g) — Just enough to balance the sweetness without making it cloying. It helps with the chewy texture.
Large egg (1, room temperature) — Room temp eggs emulsify better into the batter. If you forget, just drop the egg in a bowl of warm water for 5 minutes.
For the Flavor
Pumpkin pie spice (2 teaspoons) — A blend of cinnamon, ginger, nutmeg, and cloves. If you don’t have a pre-made blend, mix 1 tsp cinnamon, ½ tsp ginger, ¼ tsp nutmeg, and ¼ tsp cloves. Freshly ground spices make a huge difference.
Baking powder (1 teaspoon) — For lift. Don’t skip it, or your bars will be dense bricks.
Baking soda (½ teaspoon) — Reacts with the brown sugar and pumpkin to help them spread and brown.
Salt (½ teaspoon) — Enhances all the flavors. Don’t omit it, even if you’re watching sodium.
Vanilla extract (1 teaspoon) — Real vanilla. I use Nielsen-Massey because it’s potent. Fake vanilla just tastes sweet.
For the Topping
Semi-sweet chocolate chips (1 ½ cups / 255g) — I use Ghirardelli 60% Cacao bittersweet chips because they melt beautifully without being too sweet. You can use milk chocolate if you prefer sweeter bars, but I recommend sticking to semi-sweet to balance the pumpkin spice.
Optional: Toasted pecans or walnuts (½ cup) — I add these sometimes for crunch. Toast them in a dry pan for 3 minutes before adding. It adds a nutty depth that pairs perfectly with the spices.
Equipment Needed
You don’t need fancy equipment for this. Here’s what I actually use.
9×13-inch baking dish — Glass or ceramic works best because it heats evenly. I use Pyrex. Metal pans can cause the edges to burn faster, so keep an eye on them.
Electric mixer — Handheld or stand mixer. You can use a whisk and muscle, but the mixer ensures the butter and sugar are creamed properly, which creates that chewy texture.
Spatula — A sturdy silicone spatula for folding in the chocolate chips and spreading the batter evenly.
Cooling rack — Essential. Never cut warm bars out of a hot pan; they’ll crumble. Let them cool completely on a rack.
Parchment paper — I line the pan with parchment, leaving an overhang on the sides. This makes lifting the bars out for cutting so much easier and keeps cleanup minimal.
How to Make It: Step-by-Step
Alright, let’s make this! I’m walking you through exactly how I do it, including the little tricks I’ve picked up.
Step 1: Prep Your Pan and Oven (5 minutes)
Preheat your oven to 350°F (175°C). Line your 9×13-inch baking dish with parchment paper, leaving a slight overhang on the long sides. This is your handle for lifting the bars out later. Grease the parchment lightly with butter or cooking spray so it sticks.
Step 2: Mix the Dry Ingredients (2 minutes)
In a medium bowl, whisk together the flour, baking powder, baking soda, salt, and pumpkin pie spice. Whisking ensures the spices are distributed evenly so you don’t get a bite of pure cinnamon. Set this aside.
Step 3: Cream the Butter and Sugars (3 minutes)
In a large bowl, beat the softened butter, light brown sugar, and granulated sugar together on medium-high speed for about 2-3 minutes. You want it to look light, fluffy, and well-combined. This step incorporates air, which helps with the chewy texture. Don’t rush this.
Step 4: Add Wet Ingredients (1 minute)
Add the egg and vanilla extract to the butter mixture. Beat until combined. Then, add the pumpkin puree. Beat on low speed just until the pumpkin is incorporated. If you overmix here, the bars can become cakey. Stop as soon as it’s smooth.
Step 5: Combine Wet and Dry (2 minutes)
Gradually add the dry ingredients to the wet ingredients, mixing on low speed. Mix until just combined. It’s okay if there are tiny streaks of flour. Overmixing develops gluten, which leads to tough bars.
Step 6: Fold in Chocolate Chips (1 minute)
Using your spatula, gently fold in the chocolate chips (and nuts, if using). Be gentle so you don’t break the chips. Spread the batter evenly into your prepared pan. It should be a thick, sticky batter.
Step 7: Bake (25-30 minutes)
Bake at 350°F for 25-30 minutes. The bars are done when the edges are golden brown and the center is just set. It might still look slightly soft in the middle—that’s good! They firm up as they cool. If the top is browning too fast, tent it loosely with foil after 20 minutes.
Step 8: Cool Completely (30+ minutes)
This is the hardest part. Let the bars cool in the pan on a wire rack for at least 30 minutes, but ideally until completely cool. Cutting warm bars will result in messy, crumbly pieces. Patience pays off.
Step 9: Cut and Serve
Use the parchment overhang to lift the entire slab out of the pan. Place it on a cutting board. Use a sharp knife to cut into squares. I like 12 large squares or 16 smaller ones, depending on how much chocolate chip happiness you want.
Expert Tips & Tricks
Here’s everything I’ve learned from making these dozens of times. These tips will save you from my mistakes.
- Don’t Skimp on the Pumpkin — The pumpkin puree provides moisture. If you use less, the bars will be dry. If you use too much, they’ll be gummy. Stick to 1 cup.
- Room Temperature Ingredients — Cold butter and eggs won’t emulsify properly. Take your butter out 30 minutes before you start. It saves time and ensures a better texture.
- Check Your Spices — Pumpkin pie spice loses potency after 6 months. If your spice jar is dusty and old, your bars will taste bland. Buy a new jar if you’re not sure.
- Underbake Slightly — These bars continue to cook in the pan after you take them out. Pull them when the center looks just set, not when it looks perfectly dry. They should be soft and chewy, not cakey.
- Use Parchment Paper — I cannot stress this enough. Trying to cut bars directly in a greased pan is a nightmare. Parchment makes cleanup and cutting effortless.
Common Mistakes (and how to avoid them)
Mistake: Bars are too cakey.
Fix: You likely overmixed the batter or used too much baking powder. Mix until just combined, and measure your leavening carefully.
Mistake: Bars are too dense.
Fix: You didn’t cream the butter and sugar enough. Take the extra 2 minutes to beat them until fluffy. It makes a big difference.
Mistake: Chocolate chips sank to the bottom.
Fix: Toss the chocolate chips in a tablespoon of flour before folding them in. This helps them stay suspended in the batter.
Variations & Substitutions
Once you’ve nailed the basic version, here’s how you can mix it up. I’ve tried all of these.
White Chocolate Pumpkin
Semi-sweet chocolate is my favorite, but white chocolate chips pair beautifully with pumpkin spice. The vanilla notes in white chocolate enhance the spices. Use 1 ½ cups of white chocolate chips.
Pumpkin Spice Latte Bars
Add 1 tablespoon of instant espresso powder to the dry ingredients. It doesn’t make them taste like coffee; it just deepens the chocolate and spice flavor. It’s a pro baker secret.
Gluten-Free Version
Use a 1:1 gluten-free flour blend (like Bob’s Red Mill or King Arthur). Add ½ teaspoon of xanthan gum if your blend doesn’t include it. The texture will be slightly more delicate, but still delicious.
Vegan Option
Replace butter with vegan butter (stick form, not tub). Use a flax egg (1 tbsp ground flaxseed + 3 tbsp water, let sit 5 minutes) instead of the egg. Use dairy-free chocolate chips. They hold together well and taste great.
Maple Pecan
Skip the chocolate chips. Add ½ cup toasted pecans and 2 tablespoons of maple syrup to the batter. Drizzle with a simple maple glaze after baking. It’s more rustic and less sweet.
Serving & Storage
How to Serve:
I usually serve these at room temperature. They’re perfect with a glass of cold milk or a cup of hot coffee. For a fancy touch, top each square with a dollop of whipped cream and a sprinkle of cinnamon.
Side Dishes:
These are a dessert, so they stand alone. But if you’re serving them at a potluck, they pair well with apple cider or pumpkin spice lattes.
Storage Instructions:
- Room Temperature: Store in an airtight container for up to 3 days. They stay soft and chewy.
- Refrigerator: Store for up to 5 days. The fridge can dry them out slightly, so let them come to room temperature before eating.
- Freezer: These freeze beautifully! Wrap individual squares in plastic wrap, then place them in a freezer bag. They last for 2 months. Thaw at room temperature or microwave for 10 seconds.
Pro Tip: If your bars seem dry after a few days, place a slice of bread in the container with them. The bars will absorb moisture from the bread and stay soft.
Nutrition Information
I’m not a nutritionist, but here’s the breakdown if you’re tracking. This is a rich dessert, so enjoy in moderation.
Per Serving (based on 12 bars):
| Nutrient | Amount |
|---|---|
| Calories | 280 |
| Fat | 14g |
| Saturated Fat | 8g |
| Carbohydrates | 38g |
| Fiber | 1g |
| Sugar | 24g |
| Protein | 3g |
| Sodium | 180mg |
What’s Good:
It’s a treat, but the pumpkin adds a bit of vitamin A. It’s filling, so one square is usually enough to satisfy a sweet tooth.
What to Know:
Higher in sugar and fat due to the butter, sugar, and chocolate chips. If you’re watching your intake, consider cutting the bars in half for smaller portions.
Final Thoughts
So that’s my Fall Pumpkin Chocolate Chip Cookie Bars! I’ve probably talked your ear off at this point, but when you make a recipe this often, you have a lot to say about it.
This recipe has saved my dessert game during the fall months. It’s my answer to “what’s for dessert?” when I want something cozy, easy, and absolutely delicious. My family loves them, my friends request them, and I’m happy because I’m not stressed about baking. They’re the perfect balance of spice, sweetness, and chew.
Make it yours! Try different chocolate chips, add nuts, or adjust the spice level to your liking. The best recipes are the ones you adapt to your family’s tastes.
If you make this, drop a comment and let me know what you think! I love hearing how recipes turn out in your kitchen. And if something doesn’t work, tell me that too—I’m here to help troubleshoot.
Happy baking! And I hope your kitchen smells half as good as mine does right now.
Frequently Asked Questions
Can I use pumpkin pie filling instead of pure pumpkin puree?
No, please don’t. Pumpkin pie filling has sugar, spices, and thickeners already added. If you use it, your bars will be way too sweet and the texture will be wrong. You need 100% pure pumpkin puree from a can.
Why did my bars turn out cakey instead of chewy?
This usually happens if you overmix the batter after adding the flour, or if you use too much baking powder. Mix until just combined, and measure your leavening carefully. Also, ensure you’re using brown sugar, which adds moisture and chew.
Can I freeze these bars?
Yes! They freeze beautifully. Let them cool completely, then wrap individual squares in plastic wrap and place them in a freezer-safe bag. They’ll last for up to 2 months. Thaw at room temperature for the best texture.
Can I make these gluten-free?
Absolutely. Use a 1:1 gluten-free flour blend. Make sure it contains xanthan gum, or add ½ teaspoon yourself. The texture will be slightly more delicate, but still tasty.
Do I have to use chocolate chips?
No. You can use white chocolate chips, butterscotch chips, or even chopped chocolate bars. For a non-chocolate version, try adding toasted pecans or dried cranberries. The spice profile works with many mix-ins.
How do I store leftovers?
Store in an airtight container at room temperature for up to 3 days. If your kitchen is very hot or humid, refrigerate them. Let them come to room temperature before eating for the best texture.
Can I double this recipe?
I don’t recommend doubling this recipe in the same pan. The batter will be too thick and won’t bake evenly. If you need more, bake two separate batches in two 9×13 pans. The cooking time stays the same.
Pin This Recipe!
Fall Pumpkin Chocolate Chip Cookie Bars: Soft Chewy & Easy
- Total Time: 40 minutes
- Yield: 12 servings 1x
Description
Soft, chewy, and deeply spiced pumpkin chocolate chip cookie bars that are easier to make than individual cookies. These bars capture the essence of fall with a perfect balance of spice and sweetness.
Ingredients
- 2 ½ cups all-purpose flour
- 1 cup pure pumpkin puree
- ½ cup unsalted butter, softened
- 1 ½ cups light brown sugar, packed
- ½ cup granulated sugar
- 1 large egg, room temperature
- 2 teaspoons pumpkin pie spice
- 1 teaspoon baking powder
- ½ teaspoon baking soda
- ½ teaspoon salt
- 1 teaspoon vanilla extract
- 1 ½ cups semi-sweet chocolate chips
- ½ cup toasted pecans or walnuts (optional)
Instructions
- Preheat oven to 350°F (175°C). Line a 9×13-inch baking dish with parchment paper, leaving an overhang on the long sides, and grease lightly.
- In a medium bowl, whisk together the flour, baking powder, baking soda, salt, and pumpkin pie spice. Set aside.
- In a large bowl, beat the softened butter, light brown sugar, and granulated sugar on medium-high speed for 2-3 minutes until light and fluffy.
- Add the egg and vanilla extract to the butter mixture and beat until combined. Add the pumpkin puree and beat on low speed just until incorporated.
- Gradually add the dry ingredients to the wet ingredients, mixing on low speed until just combined. Do not overmix.
- Gently fold in the chocolate chips and nuts (if using). Spread the thick batter evenly into the prepared pan.
- Bake for 25-30 minutes, or until the edges are golden brown and the center is just set. Tent with foil if the top browns too quickly.
- Let the bars cool in the pan on a wire rack for at least 30 minutes, or until completely cool.
- Use the parchment overhang to lift the bars out of the pan. Cut into 12 large or 16 smaller squares and serve.
Notes
Ensure you use 100% pure pumpkin puree, not pumpkin pie filling. Room temperature ingredients emulsify better. Do not overmix the batter to avoid tough bars. Bars continue to cook in the pan after removal from the oven, so slightly underbaking ensures a chewy texture. Store in an airtight container at room temperature for up to 3 days, or freeze for up to 2 months.
- Prep Time: 10 minutes
- Cook Time: 30 minutes
- Category: Dessert
- Cuisine: American
Nutrition
- Serving Size: 1 bar
- Calories: 280
- Sugar: 24
- Sodium: 180
- Fat: 14
- Saturated Fat: 8
- Carbohydrates: 38
- Fiber: 1
- Protein: 3
Keywords: pumpkin bars, chocolate chip cookie bars, fall dessert, easy baking, pumpkin spice, chewy bars, autumn recipes


