I have a confession to make. For three years, I avoided pumpkin bread like it was going to bite me. Not because I dislike pumpkin, but because I hate the waste. You buy a can of pumpkin puree, use half for a loaf, and then stare at the remaining half in your fridge for two weeks, wondering if it’s gone bad or if you should just make a second loaf you don’t really want. I ended up with three loaves of dense, overly sweet pumpkin bread sitting on my counter while my partner politely declined the fourth slice. It was sad. It was wasteful. It was me.
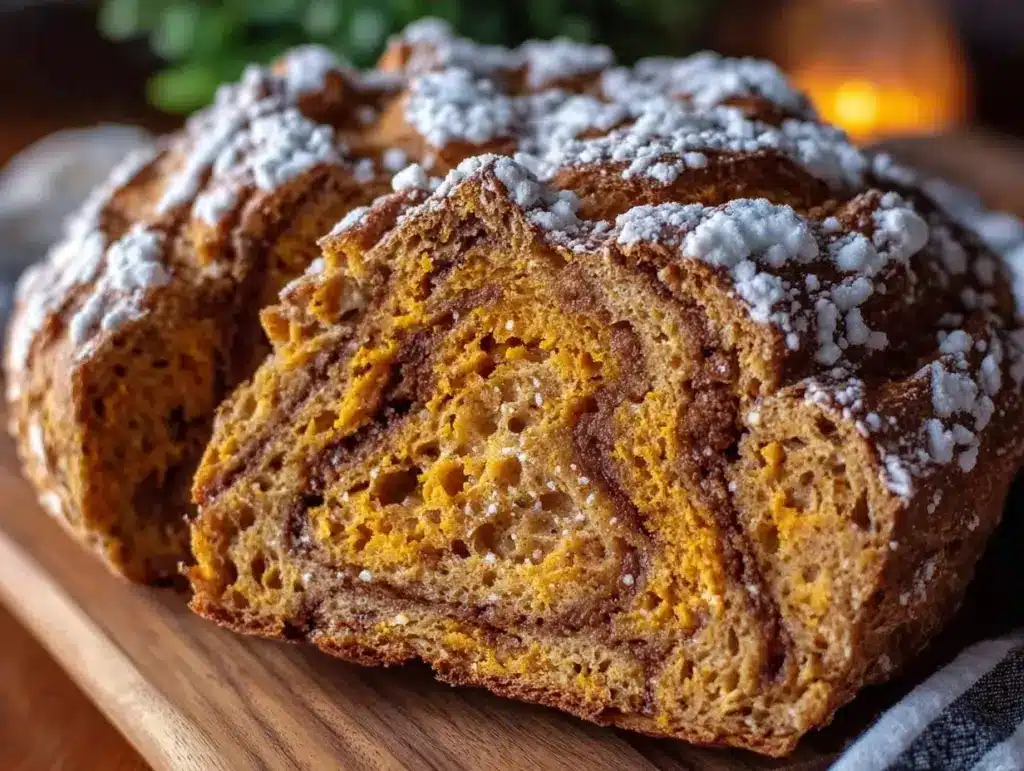
Last weekend, I was staring at my active sourdough starter. It was bubbly, active, and demanding. I had a half-can of pumpkin left. I also had a craving for something warm and spiced, but not enough to justify baking a full-sized loaf. So, I did what any desperate, slightly messy home cook would do: I scaled everything down. I made a small-batch pumpkin sourdough bread with a maple cinnamon swirl. I baked it in a mini loaf pan. It came out of the oven smelling like a cozy library in October, with a tangy crumb and a sweet, sticky center.
I took one slice while it was still warm (don’t judge me) and realized this was it. This was the solution. No more wasted pumpkin. No more forcing bread on friends who are tired of carbs. Just enough for me and my partner for two mornings, with a little extra for toast later. This easy small-batch pumpkin sourdough bread has become my autumn anchor. It’s tangy, it’s spiced, it’s sweet but not cloying, and it respects the fact that I am one person with a small kitchen and a limited appetite for bread.
If you’ve been hunting for a recipe that actually fits a small household, stop scrolling. This is the one. It’s forgiving, it’s fast (well, fast for sourdough), and it tastes like fall in every bite. Let’s get baking.
Why You’ll Love This Small-Batch Pumpkin Sourdough
Let’s be real about small-batch baking. It’s often seen as a hassle. Who wants to measure out half a teaspoon of baking soda? Who wants to clean a tiny bowl when a big one is right there? But here’s the thing: small-batch baking is actually liberating. Here’s why this recipe wins every time:
**Perfect Portion Control** — I’m talking about a 1-pound loaf. That’s it. It feeds two people for breakfast for a week, or four people for a lazy Saturday morning brunch. No leftovers piling up in Tupperware by Wednesday.
**Uses Your Active Starter** — If you feed your starter, you need to use it. This recipe uses about 100g of starter, which is a perfect discard or active feeding amount. It prevents waste and adds that signature sourdough tang that makes pumpkin bread taste sophisticated rather than just like cake.
**The Maple Cinnamon Swirl is Non-Negotiable** — Plain pumpkin bread is fine. But that ribbon of brown sugar, maple syrup, and cinnamon running through the center? That’s the game-changer. It creates pockets of sweetness that caramelize slightly in the oven. It’s like getting a mini dessert with your breakfast.
**Tangy Flavor Balance** — Sourdough adds a subtle acidity that cuts through the richness of the pumpkin and the sweetness of the maple. It keeps the flavor profile complex. It doesn’t taste like a box mix. It tastes like something you bought at a fancy bakery but made in your pajamas.
**Quick Cleanup** — Small bowl, small whisk, small loaf pan. You’re done in 20 minutes of active work. The rest is waiting. It’s the most efficient way to bake during the busy fall season.
This is my go-to when I want the smell of autumn in my kitchen without committing to a day-long baking project. It’s efficient, delicious, and perfectly sized for real life.
Key Ingredients for Your Small-Batch Loaf
Small-batch baking requires precision. You don’t have the buffer of a large dough to hide mistakes. Here’s exactly what you need, measured out for this specific 2-person loaf.
**All-Purpose Flour** (200g / 1 ¾ cups) — I use King Arthur All-Purpose. It has a protein content that gives the bread structure without being too dense. Bread flour works too, but all-purpose keeps the crumb tender, which is what we want for pumpkin bread.
**Active Sourdough Starter** (100g / ⅓ cup + 2 tbsp) — This needs to be active and bubbly. Feed it 4-6 hours before you bake. If it’s sluggish, your bread will be dense. I like using active starter here because the fermentation adds flavor, but you can use discard if you’re in a rush (though the taste will be milder).
**Pumpkin Puree** (113g / ½ cup) — Not pumpkin pie filling. Pure pumpkin. I use Libby’s or a homemade puree. It needs to be thick. If your puree is watery, your bread will be gummy. Pat it dry with a paper towel if it looks too wet.
**Maple Syrup** (60g / ¼ cup) — Use real maple syrup, grade A or B. The darker the better. It adds that distinct earthy sweetness that pairs perfectly with the sourdough tang. Avoid corn syrup blends; they just taste sweet without depth.
**Brown Sugar** (50g / ⅓ cup, packed) — For the swirl. This provides moisture and a molasses note. Dark brown sugar is best for that deep, caramel-like flavor.
**Butter** (30g / 2 tbsp, melted) — Also for the swirl. It adds richness and helps the cinnamon sugar stick to the dough.
**Egg** (50g / 1 large egg) — Just one egg. It binds the small amount of flour and pumpkin. Room temperature is best for even mixing.
**Pumpkin Pie Spice** (1 ½ tsp) — Cinnamon, ginger, nutmeg, cloves. I buy pre-mixed because it’s convenient, but if you’re feeling fancy, mix your own. The ratio should be mostly cinnamon, with smaller amounts of the others.
**Salt** (½ tsp / 3g) — Essential. It balances the sweetness and enhances the sourdough flavor. Don’t skip it.
**Baking Soda** (½ tsp / 2g) — This is the leavener. Since sourdough is slow, baking soda gives us that immediate rise in the oven. It reacts with the acidity in the starter and pumpkin.
Tools You Actually Need
You don’t need a fancy stand mixer or a marble countertop. Here’s what I use for this small loaf:
**Mini Loaf Pan** (3.5 x 2 inches) — This is the star of the show. A standard 8×4 pan will make a tiny, sad loaf. A mini pan gives you the right height and surface area for that perfect crust. I use a non-stick mini loaf pan.
**Small Mixing Bowl** — Just big enough to hold 300g of dough. A 2-quart bowl is perfect.
**Scale** — For small batches, volume measurements are risky. 1 cup of flour can vary by 20 grams. A scale ensures your hydration is correct every time.
**Offset Spatula** — For spreading the cinnamon swirl. It makes the layer even without tearing the dough.
**Instant-Read Thermometer** — Optional, but helpful. The bread is done when the internal temp hits 190°F (88°C).
How to Make Easy Small-Batch Pumpkin Sourdough Bread
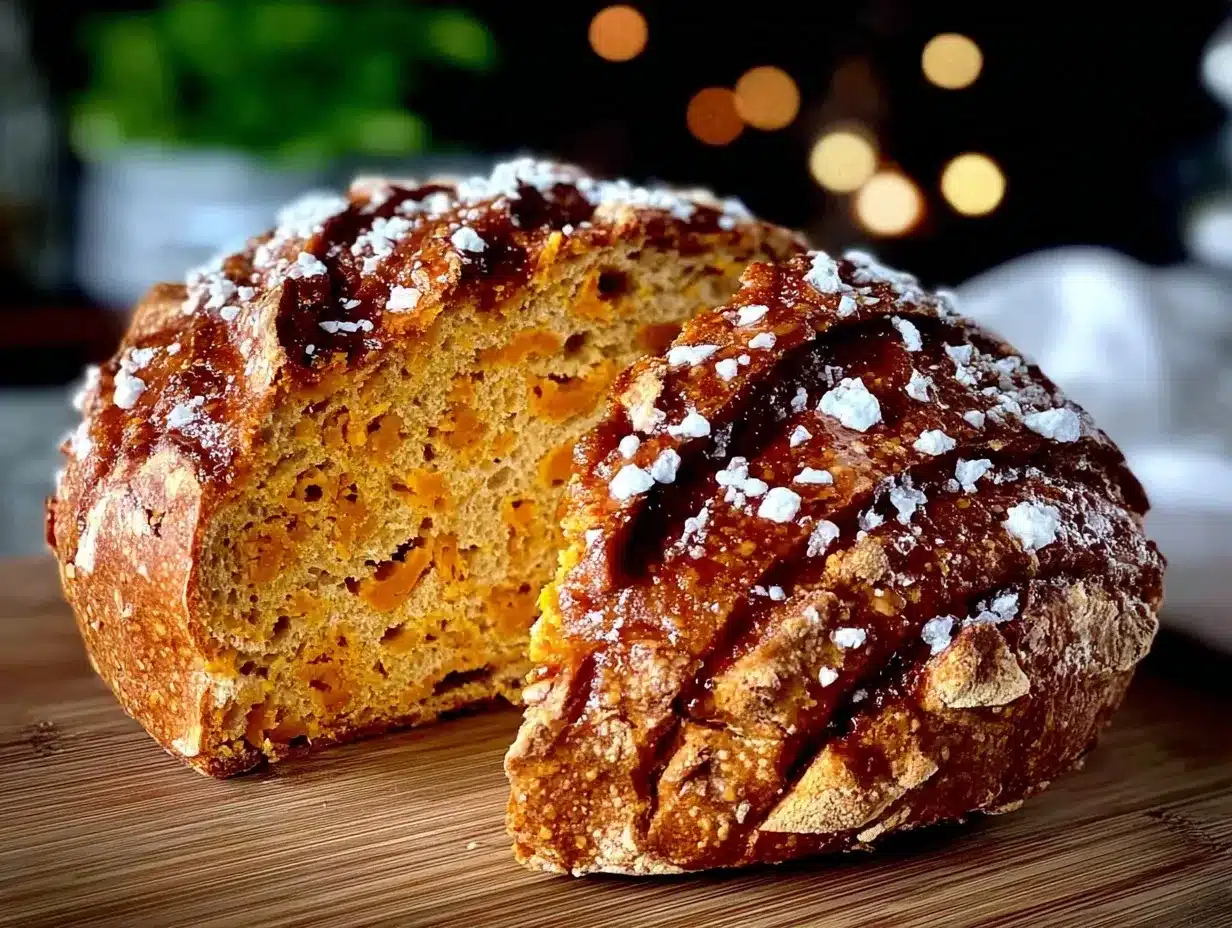
Let’s walk through the process. It’s straightforward, but timing matters with sourdough. Total time is about 2 hours, including a bulk rise.
**Step 1: Mix the Dough (10 minutes)**
In your small bowl, combine the 100g active sourdough starter and 100g water. Stir until dissolved. Add the 113g pumpkin puree, 60g maple syrup, 50g brown sugar, melted 30g butter, and 1 egg. Whisk until smooth. In a separate small bowl, whisk together 200g flour, 1 ½ tsp pumpkin pie spice, ½ tsp salt, and ½ tsp baking soda. Add the dry ingredients to the wet. Stir with a spatula or your hand until no dry flour remains. It will be a thick, sticky batter. Cover with plastic wrap or a damp towel.
**Step 2: Bulk Fermentation (1.5 – 2 hours)**
Let the dough rest at room temperature. This is where the sourdough does its magic. You want the dough to rise by about 50-75%. It won’t double like a full loaf. Look for bubbles on the surface and a slightly domed top. If your kitchen is cold, this might take longer. If it’s hot, check sooner. Don’t rush this step, or the bread will be dense.
**Step 3: Prepare the Swirl and Pan**
While the dough rises, mix the swirl. In a small bowl, combine 2 tbsp melted butter, 3 tbsp brown sugar, and 1 tsp cinnamon. Stir until it looks like wet sand. Grease your mini loaf pan lightly with butter or oil. You want a thin layer, not a pool.
**Step 4: Shape and Swirl (5 minutes)**
Once the dough has risen, gently stir it to degas it slightly. You want to keep some air bubbles. Pour half the batter into the prepared pan. Use your offset spatula to dollop the cinnamon mixture over the batter. Swirl it gently with a knife or chopstick—don’t overmix, just create a marbled effect. Top with the remaining batter. Smooth the top. It will look like a little volcano of spiced goodness.
**Step 5: Bake (35-40 minutes)**
Preheat your oven to 350°F (175°C) while the dough is rising, or just before you shape. Bake the loaf for 35-40 minutes. The top should be golden brown. If it browns too quickly, cover it loosely with foil after 20 minutes. Insert a toothpick into the center; it should come out clean or with just a few moist crumbs. No wet batter.
**Step 6: Cool (30 minutes)**
Let the bread cool in the pan for 10 minutes, then transfer to a wire rack. Wait at least 20 more minutes before slicing. Hot sourdough bread is gummy. Let it set. This is the hardest part, I know. But slice it warm, and you’ll regret it.
Total time: ~2.5 hours from start to finish. Mostly passive waiting.
Expert Tips for Small-Batch Success
I’ve made this recipe probably a dozen times now. Here’s everything I learned so you don’t have to make my mistakes.
**Don’t Skip the Sourdough Tang**
Some people ask if they can just use baking powder. You can, but you lose the flavor complexity. The sourdough starter adds a subtle acidity that balances the sweet pumpkin. If you’re using discard, make sure it’s been fed recently and is active. Dead starter = flat bread.
**Watch Your Pumpkin Moisture**
This is the #1 reason small-batch pumpkin bread fails. If your puree is watery, your bread will be dense and soggy. Always taste your puree. If it’s thin, cook it down in a pan for 5 minutes to evaporate excess water, then let it cool completely before adding to the dough.
**The Swirl Technique**
Don’t just dump the cinnamon sugar on top. Spread it evenly. If you clump it, you get a dense, sugary rock in the middle. Swirl it gently. Think of it as making a marble cake, not a rug.
**Cooling is Crucial**
Sourdough continues to cook after you take it out of the oven. The crumb sets as it cools. If you cut it hot, the steam escapes too fast, and the texture becomes gummy. Be patient. Set a timer. Drink tea. Wait.
Recipe Variations
Once you’ve nailed the basic version, here’s how to mix it up. This recipe is a canvas.
**Walnut Pumpkin Sourdough**
Add ½ cup of toasted walnuts to the batter. Fold them in after mixing. The crunch contrasts beautifully with the soft crumb. I love this version for holiday breakfasts.
**Cardamom and Orange**
Skip the pumpkin pie spice. Use 1 tsp cardamom and the zest of one orange. It’s brighter, more floral, and less traditional. It pairs wonderfully with black coffee.
**Dairy-Free Option**
Swap the butter in the swirl for coconut oil. Use maple syrup in the batter (which it already is). The texture remains moist because of the pumpkin.
**Gluten-Free Adaptation**
Use a 1:1 gluten-free flour blend that includes xanthan gum. The hydration might need a slight tweak, so add flour a tablespoon at a time if the batter seems too thin.
Serving and Storage
How do you serve this tiny loaf? It’s perfect sliced thick and toasted. The cinnamon swirl crisps up beautifully in the toaster. I serve it with a smear of salted butter or cream cheese. It pairs well with a hot cup of coffee, especially if you’re also making my fall pumpkin spice latte for a complete autumn experience.
For storage, this bread keeps well at room temperature for 2 days in an airtight container. After that, it starts to dry out. Refrigerate it for up to 5 days, but let it come to room temperature before eating, or toast it. It freezes beautifully. Wrap individual slices in plastic wrap, then foil, and freeze for up to 3 months. Thaw at room temperature or toast from frozen. It reheats perfectly.
Nutrition Information
I’m not a nutritionist, but here’s the breakdown per slice (1/8 of the loaf):
| Nutrient | Amount |
|---|---|
| Calories | 180 |
| Protein | 4g |
| Carbs | 28g |
| Fiber | 2g |
| Fat | 7g |
| Sodium | 220mg |
It’s indulgent, yes. But it’s also made with real ingredients. No processed sugars, no artificial flavors. It’s a treat, not a health food. Enjoy it mindfully.
Final Thoughts
Small-batch baking isn’t about compromise. It’s about intention. It’s about making exactly what you need, when you need it, without the guilt of waste. This easy small-batch pumpkin sourdough bread is my proof that you can have big flavor in small packages. It’s tangy, sweet, spiced, and perfectly sized for two.
If you make this, I want to hear about it. Did you add walnuts? Did you use discard or active starter? Drop a comment below. I love seeing your variations. And if you need more small-batch ideas, check out my fall pumpkin scones with maple glaze for another cozy morning treat.
Happy cooking!
FAQs
**Q: Can I use sourdough discard instead of active starter?**
A: Yes, but the bread will be denser and less tangy. If using discard, make sure it’s been fed within the last 24 hours and is still somewhat bubbly. The baking soda will help with rise, but the flavor won’t be as complex.
**Q: Why is my pumpkin bread gummy?**
A: This usually happens from underbaking or slicing too early. Sourdough bread continues to set as it cools. Make sure your internal temperature reaches 190°F (88°C) and let it cool completely on a rack before slicing.
**Q: Can I double this recipe?**
A: You can, but you’ll need to adjust the baking time. If you double it, you’ll need a standard 8×4 loaf pan. The baking time will increase to about 50-60 minutes. Check with a toothpick at 45 minutes.
**Q: Can I freeze the batter?**
A: No. Sourdough fermentation is active. If you freeze the batter, the yeast will die or behave unpredictably when thawed. It’s best to bake it fresh.
**Q: What if I don’t have a mini loaf pan?**
A: You can bake this in a standard muffin tin to make pumpkin sourdough muffins. Bake for 18-22 minutes. The swirl might be harder to layer, but you can dollop the cinnamon mixture on top before baking.
Pin This Recipe!
Easy Small-Batch Pumpkin Sourdough Bread: Perfect 2-Person Portion
- Total Time: 2.5 hours
- Yield: 1 mini loaf (serves 2-4) 1x
Description
A small-batch pumpkin sourdough bread scaled for two people, featuring a tangy crumb and a sweet maple cinnamon swirl, perfect for avoiding waste and enjoying fresh autumn flavors.
Ingredients
- 200g (1 ¾ cups) All-Purpose Flour
- 100g (⅓ cup + 2 tbsp) Active Sourdough Starter
- 113g (½ cup) Pumpkin Puree
- 60g (¼ cup) Maple Syrup
- 50g (⅓ cup, packed) Brown Sugar
- 30g (2 tbsp) Butter, melted
- 1 large Egg
- 1 ½ tsp Pumpkin Pie Spice
- ½ tsp Salt
- ½ tsp Baking Soda
- 2 tbsp Butter, melted (for swirl)
- 3 tbsp Brown Sugar (for swirl)
- 1 tsp Cinnamon (for swirl)
Instructions
- In a small bowl, combine 100g active sourdough starter and 100g water. Stir until dissolved.
- Add 113g pumpkin puree, 60g maple syrup, 50g brown sugar, 30g melted butter, and 1 egg. Whisk until smooth.
- In a separate bowl, whisk together 200g flour, 1 ½ tsp pumpkin pie spice, ½ tsp salt, and ½ tsp baking soda.
- Add dry ingredients to wet ingredients. Stir with a spatula until no dry flour remains. Cover with plastic wrap or a damp towel.
- Let the dough rest at room temperature for 1.5 – 2 hours until it rises by 50-75% and shows bubbles on the surface.
- While dough rises, mix the swirl by combining 2 tbsp melted butter, 3 tbsp brown sugar, and 1 tsp cinnamon.
- Grease a mini loaf pan lightly with butter or oil.
- Gently stir the risen dough to degas slightly. Pour half the batter into the prepared pan.
- Dollop the cinnamon mixture over the batter and swirl gently with a knife or chopstick to create a marbled effect.
- Top with remaining batter and smooth the top.
- Preheat oven to 350°F (175°C). Bake for 35-40 minutes until golden brown. Cover loosely with foil if browning too quickly.
- Check for doneness with a toothpick (should come out clean) or an instant-read thermometer (190°F/88°C).
- Let the bread cool in the pan for 10 minutes, then transfer to a wire rack to cool completely (at least 20 more minutes) before slicing.
Notes
Ensure pumpkin puree is thick, not watery, to avoid a gummy texture. Sourdough continues to cook after removal from the oven; cooling completely is crucial for proper texture. Can be stored at room temperature for 2 days or frozen for up to 3 months.
- Prep Time: 15 minutes
- Cook Time: 35-40 minutes
- Category: Breakfast
- Cuisine: American
Nutrition
- Serving Size: 1 slice (1/8 of the
- Calories: 180
- Sugar: 18
- Sodium: 220
- Fat: 7
- Saturated Fat: 3
- Carbohydrates: 28
- Fiber: 2
- Protein: 4
Keywords: pumpkin sourdough, small batch baking, pumpkin bread, sourdough starter, maple cinnamon swirl, fall recipes, 2-person loaf


