Last November, I was standing in my kitchen at 11:30 PM, sweating through my pajamas, trying to wrestle a raw dough into a pie dish while my toddler screamed because his crackers were “too crunchy.” The oven was already hot, the house smelled like burnt sugar, and I was pretty sure I had just ruined Thanksgiving dinner before it even started. I ended up ordering pizza and eating it on the floor. That was the moment I decided: no more stress. No more pie disasters.
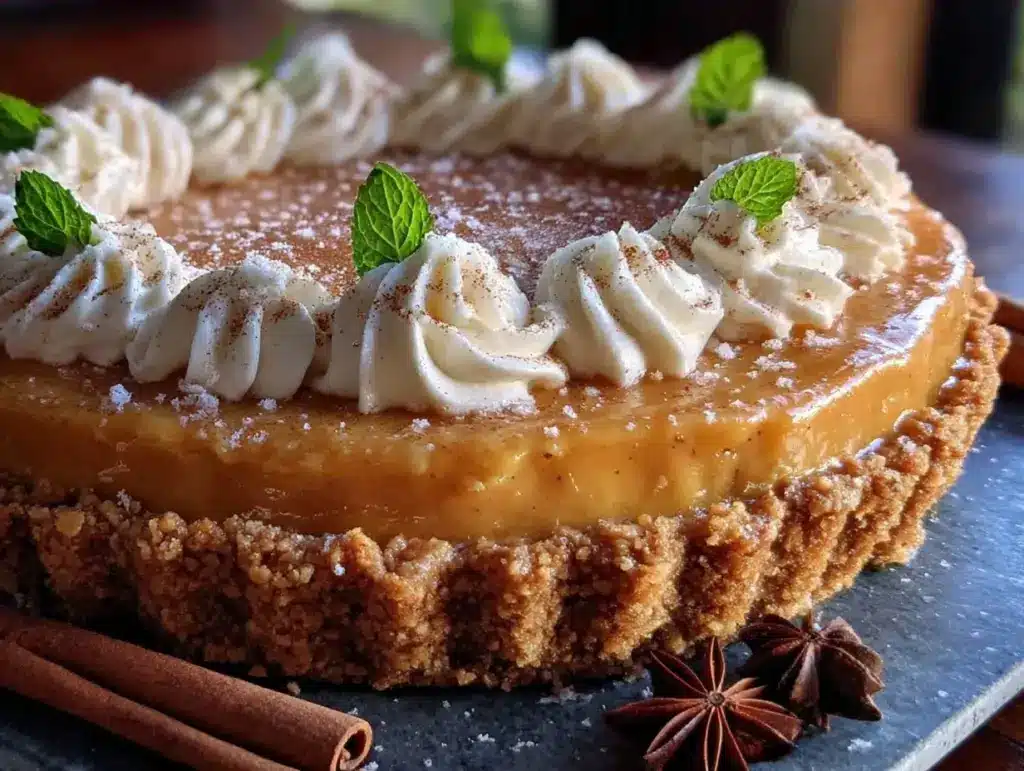
So, I started looking for a way to get that warm, spiced pumpkin flavor without the oven drama. I stumbled upon this easy no-bake pumpkin pie with gingersnap crust idea, and honestly? It changed my holiday game. It’s creamy, it’s tangy, it’s got that perfect crunch, and best of all, I can make it the day before. That means when Thanksgiving morning hits, I’m not panicking about whether the crust is soggy or the filling is runny. I’m just chilling.
I’ve tested this easy no-bake pumpkin pie with gingersnap crust recipe at least a dozen times now—some for family gatherings, some just for my own selfish cravings. It’s become my secret weapon. It’s affordable, uses ingredients you probably already have, and my kids actually ask for seconds. If you’re tired of the oven heat and the timing stress, this is your answer. Let’s talk about why this dessert is worth your time.
Why You’ll Love This Easy No-Bake Pumpkin Pie
Real talk: life is busy. Between work, school runs, and trying to keep everyone fed, the last thing you want is a dessert that requires three hours of active attention. This easy no-bake pumpkin pie with gingersnap crust is a lifesaver for several reasons:
- Zero Oven Drama — Your kitchen stays cool. This is huge in the fall when it’s already chilly, and even bigger in summer. I made this in July for a birthday party, and my guests didn’t even know it wasn’t baked until I told them.
- Make-Ahead Magic — You can assemble this the day before. In fact, I prefer it that way. The flavors meld overnight, and the texture sets up perfectly. You can literally put it in the fridge at 5 PM on Thanksgiving and forget about it.
- Cost-Effective — Fresh pumpkin puree can be pricey if you buy the little cans, but if you buy the big can or make your own from a cheap sugar pumpkin, it’s pennies per serving. This easy no-bake pumpkin pie with gingersnap crust stretches far, feeding a crowd without breaking the bank.
- Kid-Approved Crunch — The gingersnap crust is the star here. Kids love the spice and the snap. I’ve had picky eaters who refuse “mushy” desserts devour this because the crust holds its shape. It’s a win.
- Minimal Cleanup — No baking sheets to scrub. No pie dishes to soak. Just a bowl, a blender or mixer, and your springform pan (or pie dish). I usually have my dishes done while the pie is chilling.
This is my go-to when dinner needs to just work, and I still have energy left for dessert. It’s reliable, it’s delicious, and it’s stress-free.
Key Ingredients for the Best No-Bake Pumpkin Pie
You don’t need fancy, hard-to-find ingredients for this. Here’s exactly what you need, with my honest tips on what works and what to avoid.
Gingersnap Cookies (2 cups / 200g crushed) — This is your crust. Do not use ginger molasses cookies; they’re too soft and will make a mushy bottom. You want the crisp, spicy gingersnaps. I buy the store brand to save money. Crush them fine, like sand. If they’re too chunky, you won’t get that nice bite.
Unsalted Butter (1/2 cup / 113g) — You need real butter for the crust. Melted butter binds the crumbs so they stick together. Don’t try to substitute with oil or margarine here; the flavor and texture just aren’t the same. Use room temperature butter if you’re softening it, but melted works best for mixing.
Cream Cheese (2 blocks / 16 oz / 450g) — This is the base. It needs to be full-fat. Light cream cheese won’t set properly and will taste too tangy in a bad way. Let it sit on the counter for 30 minutes before you start. Cold cream cheese leads to lumps, and nobody wants lumpy pumpkin pie.
Heavy Whipping Cream (2 cups / 480ml) — Don’t swap this for milk or half-and-half. You need the fat content to whip it up into stiff peaks. If you don’t have heavy cream, this recipe won’t work. It’s the lift that makes the pie airy and light.
Pumpkin Puree (1 can / 15 oz / 425g) — Check the label. It should say “100% Pure Pumpkin,” not “Pumpkin Pie Mix.” The mix has sugar and spices already added, which will throw off the balance of your recipe. Puree is neutral and lets you control the sweetness.
Granulated Sugar (1/2 cup / 100g) — Depending on how sweet your gingersnaps are, you might adjust this. I stick to half a cup. It’s not a super sweet pie; it’s balanced. If you have a sweet tooth, bump it to 2/3 cup.
Spices (1 tsp cinnamon, 1/2 tsp ginger, 1/4 tsp nutmeg, 1/4 tsp cloves) — This is where the magic happens. Use ground spices, not whole. Freshly ground is better, but for this recipe, the jarred stuff works fine. I always use my “ground” spices because they’re cheaper and I use them for everything from pumpkin spice latte to savory stews.
Vanilla Extract (2 tsp) — Use real vanilla. The imitation stuff tastes chemical in no-bake desserts because there’s no heat to burn off the alcohol. It makes a noticeable difference.
Tools You’ll Need
You don’t need fancy equipment. Here’s what I use. Most of this is already in your drawer.
Food Processor or Blender — For crushing the cookies. If you don’t have one, put the cookies in a zip-top bag and smash them with a rolling pin. It’s a workout, but it works.
Stand Mixer or Hand Mixer — You need to whip the cream and beat the cream cheese. Doing this by arm is possible, but it takes effort and time. A hand mixer is fine, but a stand mixer is easier on your wrists.
9-Inch Springform Pan or Deep Dish Pie Plate — A springform pan is ideal because the sides come off, making it super easy to slice and serve. But if you don’t have one, a deep 9-inch pie plate works. Just be careful when slicing; the crust might stick.
Large Mixing Bowl — Something big enough to hold the whipped cream without spilling over when you fold in the pumpkin mixture.
Spatula — A flexible silicone spatula is best for folding. You want to keep the air in the mixture, so gentle folds are key.
How to Make It
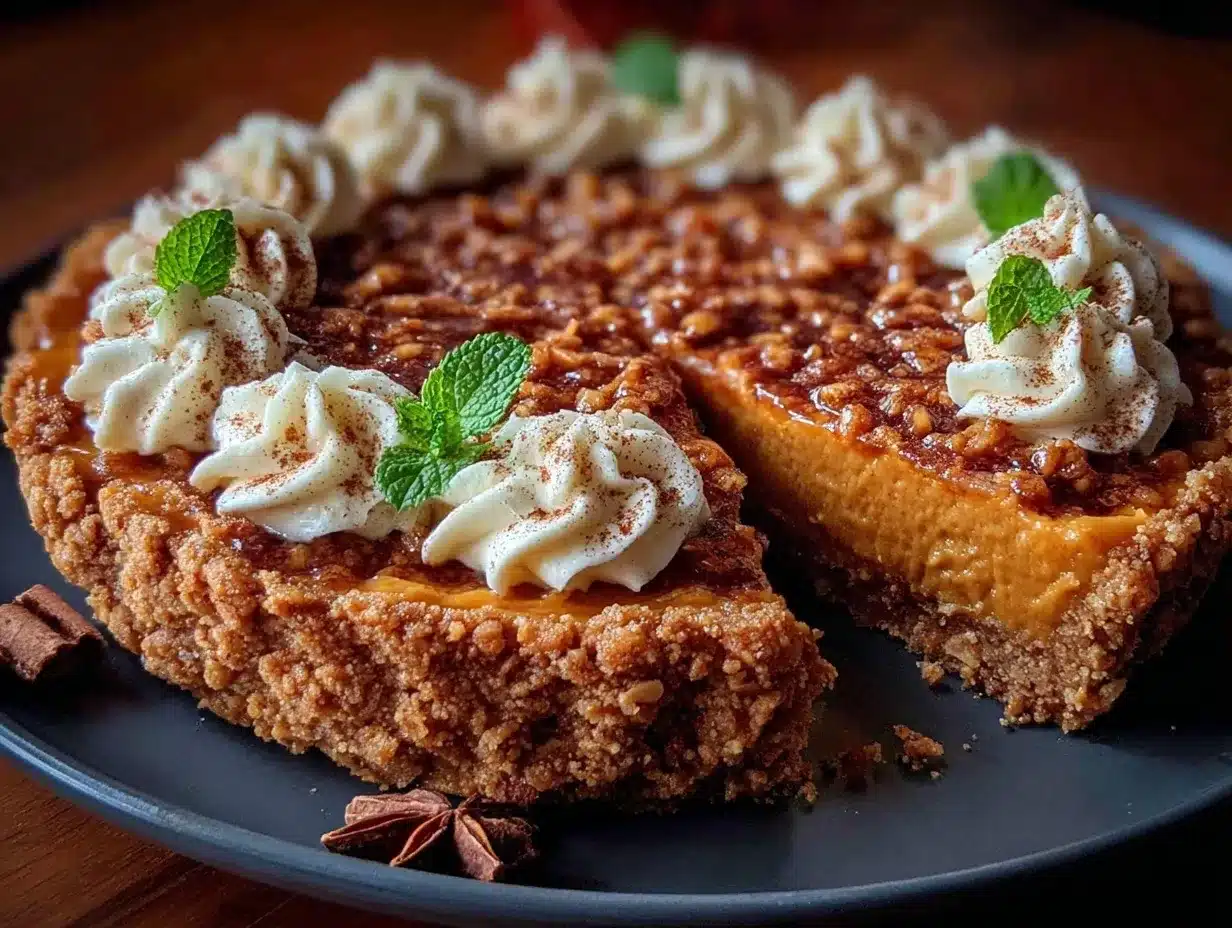
Let’s walk through the steps. It’s simple, but there are a few tricks to get that perfect texture.
Step 1: Crush the Cookies (5 minutes)
Place your gingersnap cookies in a food processor. Pulse until they are finely crushed. You want the texture of wet sand. If you’re doing it by hand, put them in a heavy-duty bag and roll over them until they’re fine crumbs. Transfer crumbs to a bowl.
Step 2: Make the Crust (5 minutes)
Melt your butter. Pour it over the cookie crumbs. Mix well with a spoon until every crumb is coated. It should look like wet sand. Press this mixture firmly into the bottom and slightly up the sides of your springform pan or pie dish. Use the bottom of a measuring cup to pack it down tight. If you don’t pack it down, the crust will crumble when you slice it. Refrigerate this while you make the filling.
Step 3: Beat the Cream Cheese (3 minutes)
In a large bowl, beat the softened cream cheese and sugar together until smooth and creamy. Scrape down the sides of the bowl. This step is crucial. If there are lumps of cream cheese, you’ll see them in the final pie. Take your time here.
Step 4: Add the Pumpkin and Spices (2 minutes)
Add the pumpkin puree, vanilla, and all your spices (cinnamon, ginger, nutmeg, cloves) to the cream cheese mixture. Beat on low speed just until combined. Don’t overmix once the pumpkin is in, or you might incorporate too much air which can affect the set. It should be smooth and orange.
Step 5: Whip the Cream (4 minutes)
In a separate cold bowl, whip the heavy cream until stiff peaks form. This means when you lift the beater, the cream stands up straight. Don’t over-whip it into butter, but don’t under-whip it either. Stiff peaks are your goal.
Step 6: Fold It All Together (2 minutes)
Add one-third of the whipped cream to the pumpkin mixture to lighten it up. Mix gently. Then, pour that mixture back into the bowl with the remaining whipped cream. Use your spatula to gently fold the two together. Fold from the bottom up, turning the bowl. Stop as soon as no white streaks remain. Over-mixing here will deflate the cream and make the pie dense.
Step 7: Chill and Set (4+ hours)
Pour the filling into your prepared crust. Smooth the top. Cover loosely with plastic wrap. Refrigerate for at least 4 hours, but overnight is best. The pie needs time to firm up. If you cut it too soon, it will be soupy. Wait. Trust the process.
Total active time: about 20 minutes. Total chill time: 4-12 hours.
Expert Tips for Success
Here’s everything I learned from making this too many times.
Cold Bowl, Cold Cream
This is the #1 tip for whipped cream. Put your mixing bowl and beaters in the freezer for 15 minutes before whipping. If the cream is warm, it won’t whip. I learned this the hard way once when I was in a rush. The cream stayed liquid. Never again.
Don’t Skip the Press
When pressing the crust, really pack it down. I once was lazy and just dumped the crumbs in. When I sliced it, the crust fell apart. A tight crust is a happy crust.
Room Temperature Cream Cheese
If your cream cheese is cold, you’ll get lumps. Plan ahead. Take it out in the morning. If you forget, microwave it in 5-second bursts, stirring in between, until it’s soft but not melted.
Storage Reality Check
This pie doesn’t freeze well. The texture of the whipped cream changes when frozen and thawed—it can become grainy. So, make it the day you plan to eat it, or the day before. Do not freeze leftovers if you can avoid it.
Recipe Variations
Once you’ve nailed the basic version, here’s how to mix it up.
Chocolate Chip Twist
Fold 1/2 cup of mini chocolate chips into the filling before pouring it into the crust. The crunch of chocolate with the spice is amazing. It’s like a pumpkin cookie in pie form.
Maple Pecan Crust
Replace 1/2 cup of the gingersnap crumbs with crushed pecans. Add a tablespoon of maple syrup to the butter before mixing. It adds a nutty depth that pairs beautifully with the pumpkin.
Coconut Cream Version
Substitute half of the heavy cream with coconut cream (the thick part from a can of full-fat coconut milk). It adds a tropical vibe and works great if you want a slightly dairy-free option (though the cream cheese still has dairy).
Less Sweet
If you find it too sweet, reduce the sugar to 1/4 cup and add an extra teaspoon of vanilla. The spice should shine, not the sugar.
Gluten-Free Option
Use certified gluten-free gingersnap cookies. Most major brands make them now. The rest of the ingredients are naturally gluten-free, so just double-check your spice labels for cross-contamination if you’re severe.
Serving & Storage
Serving:
Slice with a sharp knife dipped in hot water for clean cuts. Top with a dollop of homemade whipped cream and a sprinkle of extra cinnamon. It looks fancy, but it’s easy. I serve this alongside savory dishes like smoked BBQ pulled pork sliders or even smoked buffalo chicken dip for a hearty meal. It cuts through the richness of those dishes perfectly.
Storage:
Keep this covered in the fridge for up to 4 days. It actually tastes better on day two, as the flavors deepen. Do not leave it out at room temperature for more than 2 hours due to the dairy content.
Meal Prep Tip:
You can make the crust and the filling separately and assemble them the morning of the party. This saves you time if you’re hosting a big crowd.
Nutrition Information
I’m not a nutritionist, but here’s the breakdown per slice (assuming 12 slices). This is a rich dessert, so keep portions reasonable.
| Nutrient | Amount per Serving |
|---|---|
| Calories | 380 kcal |
| Protein | 6g |
| Carbohydrates | 32g |
| Fiber | 2g |
| Fat | 26g |
| Sodium | 220mg |
My Take:
This is comfort food. It’s got cream, sugar, and butter. It’s not a salad. But it’s homemade, so you know exactly what’s in it. It’s better than the sugary canned pies you get at the store, and you control the spice level. Enjoy it as a treat.
Final Thoughts
This easy no-bake pumpkin pie with gingersnap crust is more than just a dessert; it’s my peace of mind during the holidays. It’s affordable, it’s kid-friendly, and it lets me enjoy my family instead of stressing over my oven. I hope it brings you the same joy. Give it a try, and let me know how it turns out. If you make it, drop a comment! I love hearing how it turns out in your kitchen.
Happy cooking!
FAQs
Can I use fresh pumpkin instead of canned?
Yes, but you need to roast and puree it first. Make sure the puree is very thick and drained. Fresh pumpkin has more water, so if it’s watery, your pie will be runny. I usually stick to canned for consistency, but fresh works if you prep it right.
Why did my pie not set?
Most likely, you didn’t chill it long enough, or you under-whipped the cream. If the cream wasn’t stiff, the structure collapses. Also, check your cream cheese—it must be smooth and fully incorporated before adding the pumpkin.
Can I make this ahead?
Absolutely. This is actually better the next day. You can make it 24 hours in advance. Just keep it covered in the fridge.
Is there a dairy-free version?
You can use vegan cream cheese and coconut cream instead of dairy cream cheese and heavy cream. The texture will be slightly different, but it’s still delicious. Just make sure your gingersnaps are vegan (some contain honey).
How do I store leftovers?
Cover tightly with plastic wrap or transfer to an airtight container. Keep in the fridge for up to 4 days. Do not freeze.
Can I use a different crust?
You can use graham crackers or vanilla wafers, but the gingersnap crust is what gives this pie its signature spice kick. I recommend sticking with gingersnaps for the authentic flavor.
What drinks pair well with this?
A warm cup of pumpkin spice latte is classic. Or, if you want something cold, try a spiced apple cider. Both complement the pumpkin and spice perfectly.
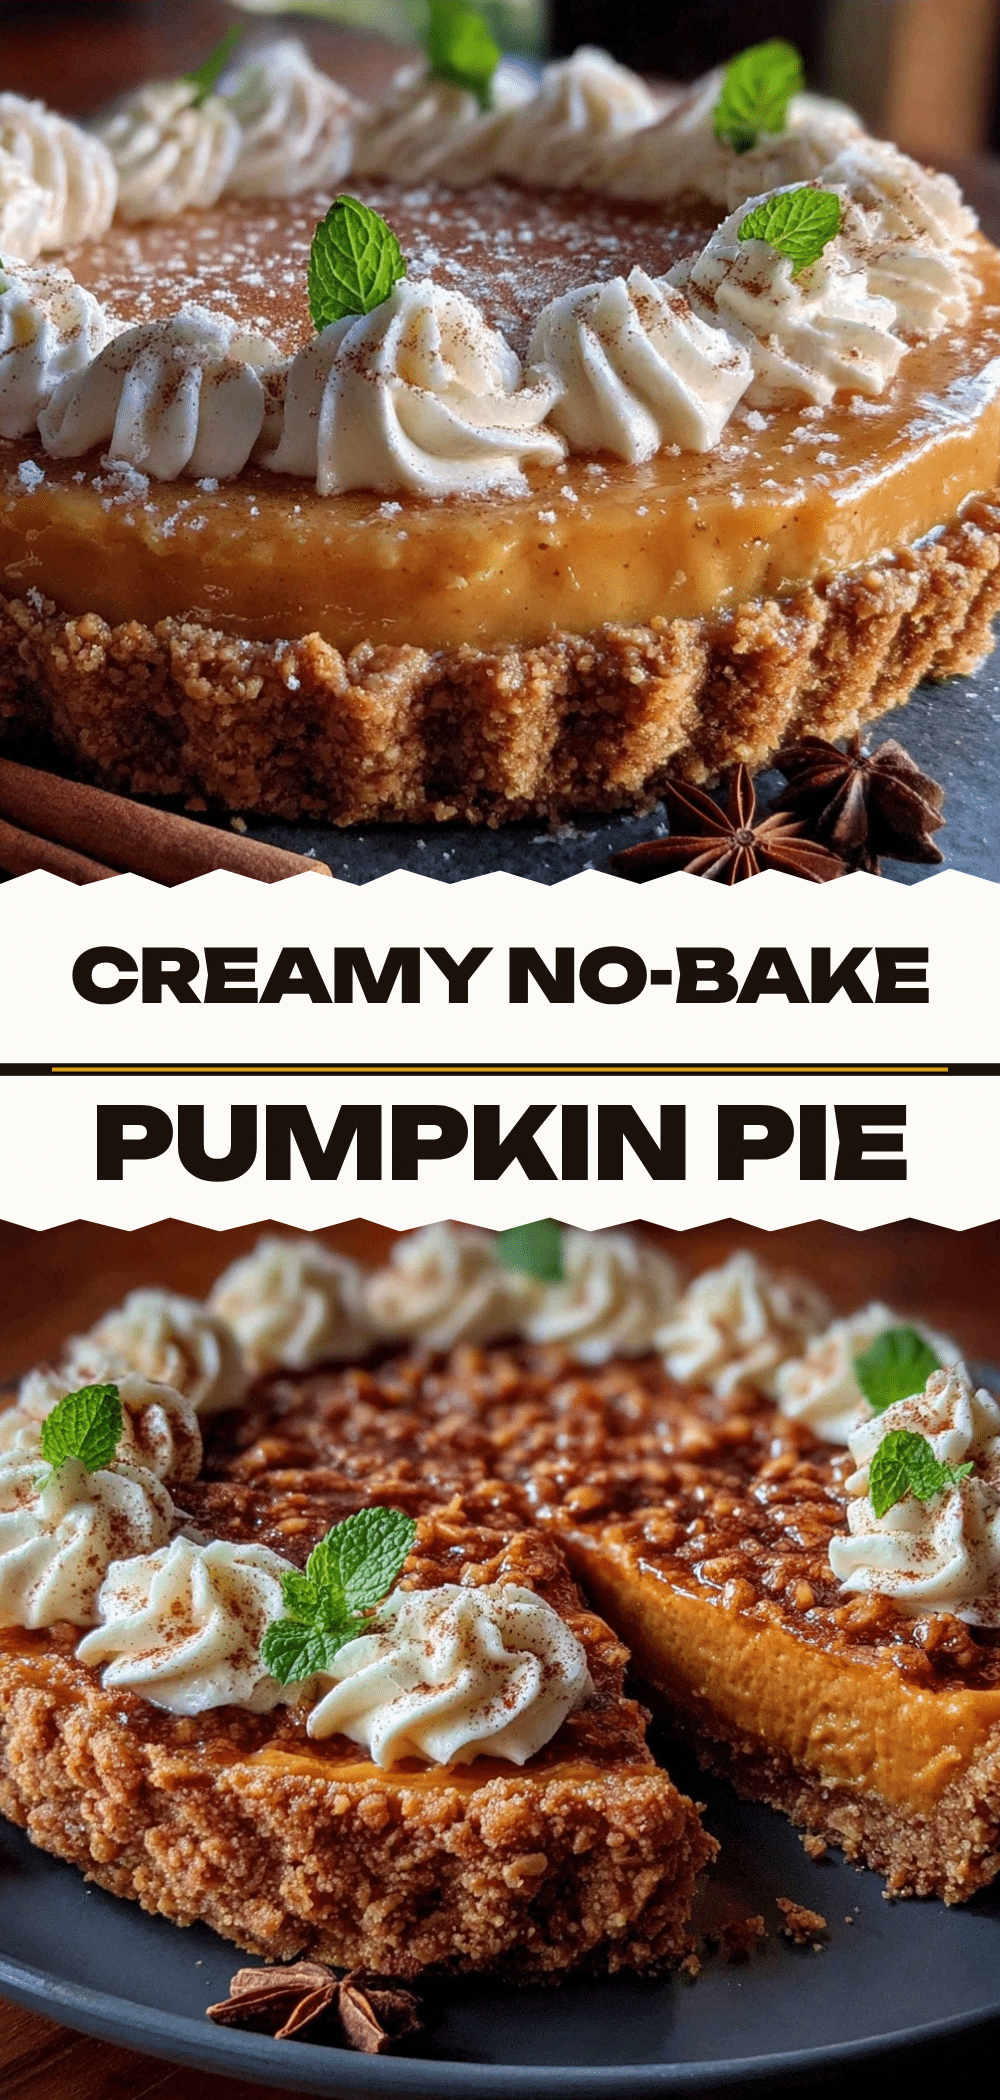
Pin This Recipe!
Easy No-Bake Pumpkin Pie with Gingersnap Crust
- Total Time: 4 hours 20 minutes
- Yield: 12 servings 1x
Description
A creamy, tangy, and crunchy no-bake pumpkin pie that requires zero oven drama. This make-ahead dessert is affordable, kid-approved, and perfect for stress-free holiday entertaining.
Ingredients
- 2 cups (200g) gingersnap cookies, crushed fine
- 1/2 cup (113g) unsalted butter, melted
- 2 blocks (16 oz / 450g) full-fat cream cheese, softened
- 1/2 cup (100g) granulated sugar
- 1 can (15 oz / 425g) 100% pure pumpkin puree
- 1 tsp ground cinnamon
- 1/2 tsp ground ginger
- 1/4 tsp ground nutmeg
- 1/4 tsp ground cloves
- 2 tsp vanilla extract
- 2 cups (480ml) heavy whipping cream
Instructions
- Crush the gingersnap cookies in a food processor until they resemble wet sand. Transfer crumbs to a bowl.
- Melt the butter and pour it over the cookie crumbs. Mix until every crumb is coated.
- Press the crust mixture firmly into the bottom and slightly up the sides of a 9-inch springform pan or deep dish pie plate. Refrigerate while making the filling.
- In a large bowl, beat the softened cream cheese and sugar together until smooth and creamy. Scrape down the sides of the bowl.
- Add the pumpkin puree, vanilla extract, cinnamon, ginger, nutmeg, and cloves to the cream cheese mixture. Beat on low speed just until combined.
- In a separate cold bowl, whip the heavy cream until stiff peaks form.
- Add one-third of the whipped cream to the pumpkin mixture to lighten it, then gently fold in the remaining whipped cream using a spatula until no white streaks remain.
- Pour the filling into the prepared crust and smooth the top.
- Cover loosely with plastic wrap and refrigerate for at least 4 hours, or overnight, until set.
Notes
Ensure cream cheese is fully softened to avoid lumps. Use a cold bowl and beaters for whipping the cream to ensure stiff peaks. Do not freeze this pie as the texture of the whipped cream may become grainy upon thawing. For a gluten-free option, use certified gluten-free gingersnap cookies.
- Prep Time: 20 minutes
- Cook Time: 0 minutes
- Category: Dessert
- Cuisine: American
Nutrition
- Serving Size: 1 slice
- Calories: 380
- Sugar: 22
- Sodium: 220
- Fat: 26
- Saturated Fat: 16
- Carbohydrates: 32
- Fiber: 2
- Protein: 6
Keywords: no-bake pumpkin pie, gingersnap crust, holiday dessert, make-ahead dessert, easy pumpkin recipe, fall baking, kid-friendly dessert


