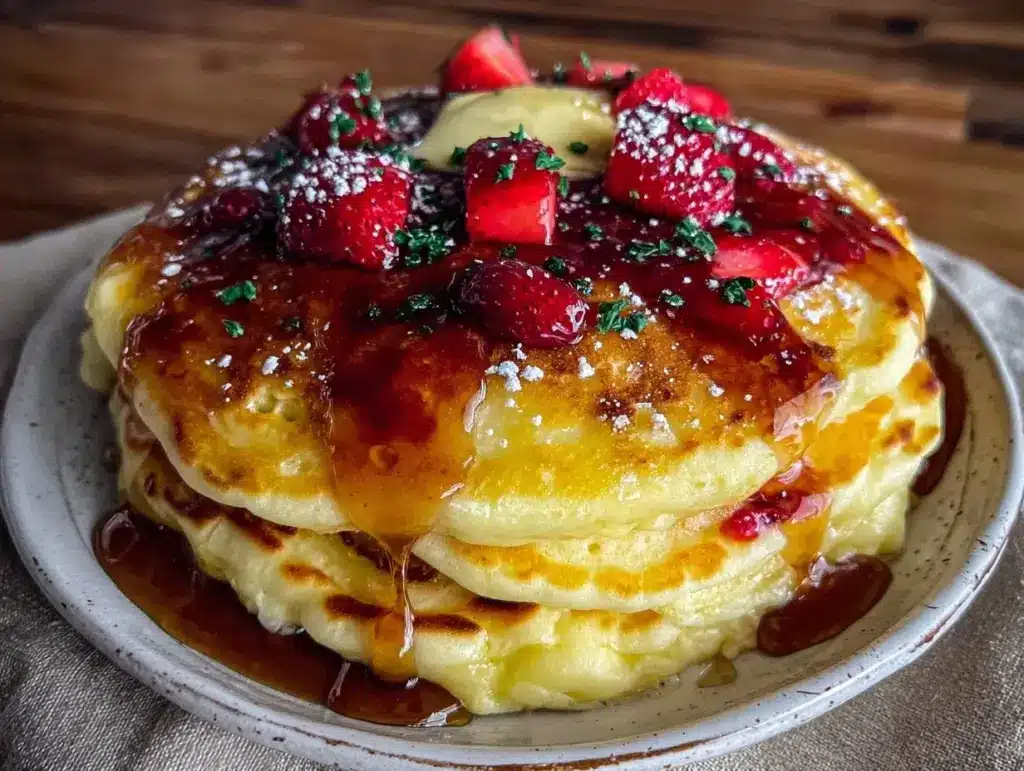
Last Sunday, I woke up at 6:30 a.m. with a sudden, crushing realization: I had promised my kids a “special” breakfast because they had a big soccer tournament that day. The problem? I was running on four hours of sleep, the coffee maker was broken, and I realized I hadn’t bought buttermilk in three weeks. I stood in my kitchen, staring at a carton of regular milk and a box of baking soda, feeling the weight of disappointment settle in my chest. I didn’t want to just make waffles. I wanted those fluffy, golden, diner-style pancakes that make you feel like you’re on vacation, even if you’re just in your pajamas.
I decided to improvise. I mixed up a quick batter using what I had, and honestly, I expected disaster. Instead, what came out of the skillet was a stack of pancakes so light and tender that my ten-year-old looked at me with genuine awe. They tasted like a real breakfast, not a compromise. That was the day I stopped buying expensive buttermilk for special occasions and started mastering the art of the homemade substitute. These Easy Diner Style Buttermilk Pancakes are now my go-to when I want to impress without spending a fortune or stressing over a grocery run.
There is something deeply satisfying about flipping a pancake that is perfectly golden brown on the outside and soft as a cloud on the inside. It’s comfort food at its most basic and honest. I’ve made this Easy Diner Style Buttermilk Pancakes recipe at least fifty times since that chaotic Sunday. Some days I serve them with just butter and syrup. Other days, I pile on fresh berries. But the base is always the same: simple, cheap, and reliable. If you’ve ever felt like your morning pancakes are flat, dense, or just… meh, this recipe is your fix. It’s the budget breakfast hero you didn’t know you needed.
Why You’ll Love This Recipe
I know what you’re thinking. “I can make pancakes.” And you can! But there’s a difference between a quick morning scramble and a proper diner-style stack. This Easy Diner Style Buttermilk Pancakes recipe changes the game because it prioritizes texture and ease. Here is why this has become a staple in my weekly rotation:
- Buttermilk Hack — You don’t need to go to the store. I show you how to make buttermilk from regular milk in seconds. This saves time and money, and the tangy flavor is what makes these pancakes taste gourmet.
- Lightning Fast Prep — From bowl to skillet, it takes about 15 minutes. I’ve made these while helping my kids with homework. The batter comes together in one bowl with minimal whisking.
- Fluffy Perfection — The secret isn’t just the leavening; it’s the resting time. Letting the batter sit for 5 minutes creates those air pockets that make every bite light. No dense, rubbery discs here.
- Budget Friendly — This recipe uses pantry staples. Flour, sugar, baking powder, milk, eggs, butter. You likely have 90% of this in your house right now. It’s a cheap way to make a fancy breakfast.
- Kid-Approved — My picky eaters actually ask for these. The mild sweetness and soft texture are perfect for little hands. Plus, they freeze well, so you can make a double batch on Sunday.
This is my go-to when dinner needs to just work, but on a Saturday morning. It’s reliable, it’s delicious, and it costs pennies per serving.
Key Ingredients for Easy Diner Style Buttermilk Pancakes
Let’s talk about what goes into the bowl. You don’t need fancy ingredients for this Easy Diner Style Buttermilk Pancakes recipe. In fact, keeping it simple is the key to success. Here is exactly what you need and why it matters.
All-Purpose Flour (2 cups / 250g) — This is your base. Don’t use cake flour; you need the protein in all-purpose to give the pancakes structure so they don’t spread too thin. If you’re using whole wheat, you can substitute half, but pure whole wheat makes them denser. For the lightest texture, stick to white all-purpose.
Granulated Sugar (2 tablespoons / 25g) — Even though these are savory-leaning, a little sugar helps with browning. It caramelizes on the skillet. Don’t skip it, but don’t double it either. You want a subtle sweetness, not a dessert.
Baking Powder (2 teaspoons / 10g) — This is your lift. Make sure it’s fresh! I’ve made pancakes with old baking powder and they came out flat as a pancake (see what I did there?). If your baking powder is more than 6 months old, buy a new can. It’s cheap insurance.
Salt (1 teaspoon / 6g) — Salt isn’t just for flavor; it strengthens the gluten structure slightly and balances the sweetness. Use kosher salt if you have it, but table salt works fine. Just be careful not to over-salt.
Eggs (2 large / ~100g without shell) — Room temperature eggs are best. They emulsify better into the batter. If you’re in a rush, just drop them in a bowl of warm water for 5 minutes. Cold eggs can cool down your butter too quickly.
Milk (1 3/4 cups / 415ml) — This is where the magic happens. For true buttermilk pancakes, you need acidity. If you don’t have buttermilk, see the note below. The fat content matters less than the acidity, so 2% milk works well.
Melted Butter (4 tablespoons / 60g) — Unsalted is best so you control the salt. Melt it and let it cool slightly so it doesn’t cook the eggs when you mix. This fat keeps the pancakes tender and moist.
Vanilla Extract (1 teaspoon / 5ml) — Optional, but I highly recommend it. It adds that classic diner aroma. Pure vanilla is better, but imitation works in a pinch.
Buttermilk Substitute Tip: For every 1 cup of buttermilk needed, add 1 tablespoon of white vinegar or lemon juice to a measuring cup, then fill the rest with regular milk. Let it sit for 5-10 minutes until it curdles slightly. This is how I make my Easy Diner Style Buttermilk Pancakes without a trip to the store.
Tools Needed
You don’t need a fancy kitchen to make great pancakes. Here is what I actually use on a busy morning:
Large Mixing Bowl — I use a 4-quart stainless steel bowl. It’s big enough to whisk everything without splashing. A glass bowl works too, but I like that I can see the bottom to ensure no flour pockets remain.
Whisk — A standard balloon whisk is perfect. It incorporates air and breaks up lumps. I don’t use a spoon; the lumps in pancake batter are the enemy of fluffiness.
Non-Stick Skillet or Griddle — This is the most important tool. I use a 12-inch non-stick skillet. If you have a flat electric griddle, even better because you can cook more at once. Avoid cast iron for this specific recipe unless you are very experienced with temperature control; it retains heat too aggressively and can burn the sugars.
Spatula — A thin, flexible silicone spatula is ideal for flipping without tearing the delicate pancake.
Measuring Cups and Spoons — Be precise with the leavening agents. Eyeballing baking powder is a common mistake that leads to flat results.
How to Make Easy Diner Style Buttermilk Pancakes
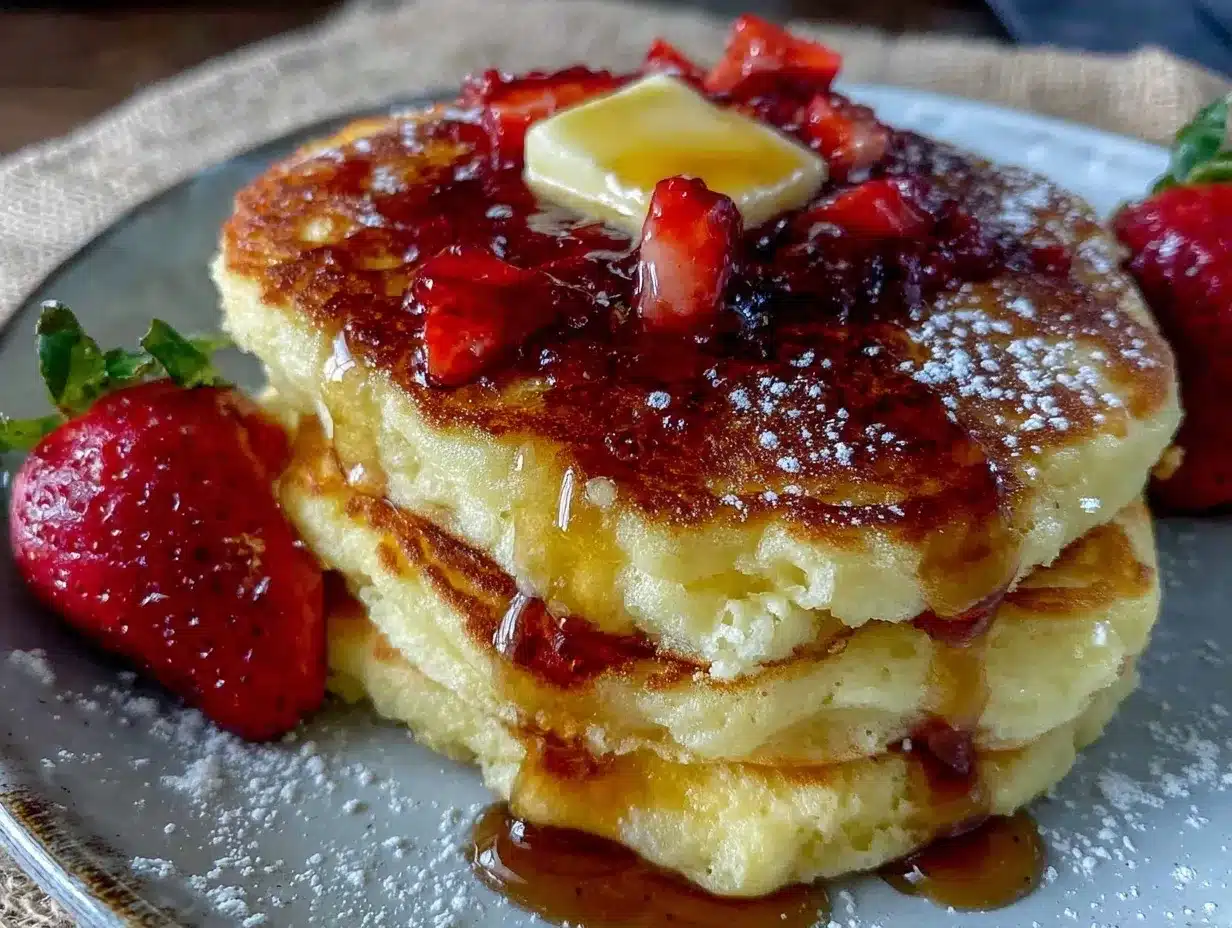
Let’s get cooking. This process is straightforward, but the details matter. I’m walking you through exactly how I do it to ensure success.
Step 1: Prepare the Buttermilk (5 minutes)
If you are using the vinegar/milk hack, do this first. Measure your vinegar or lemon juice into a liquid measuring cup. Pour in your regular milk until you reach the required amount (1 3/4 cups for this batch). Stir gently and set it aside. You’ll see it thicken slightly and look curdled. This acidity is crucial for reacting with the baking powder.
Step 2: Whisk Dry Ingredients (2 minutes)
In your large mixing bowl, combine the flour, sugar, baking powder, and salt. Whisk them together vigorously for about a minute. This ensures the baking powder is evenly distributed. If you don’t mix well, you might get a bite of bitter baking soda taste. I usually whisk until there are no visible white streaks of flour.
Step 3: Combine Wet Ingredients (1 minute)
In a separate medium bowl or large measuring cup, whisk the eggs, melted butter, vanilla, and your prepared buttermilk mixture. The butter should be warm but not hot. If it’s boiling, you’ll scramble the eggs. You want a smooth, yellow liquid.
Step 4: Mix the Batter (3 minutes)
Make a well in the center of the dry ingredients. Pour the wet mixture into the well. Now, here is the golden rule: Do not overmix. Use your whisk or a spatula to gently fold the ingredients together. Stop as soon as the flour is moistened. The batter will be lumpy. This is good! Lumps mean tender pancakes. If you mix until smooth, you develop gluten, and your pancakes will be chewy and tough. I’ve made this mistake before, and the results were like eating rubber bands. Never again.
Step 5: Rest the Batter (5-10 minutes)
Set your bowl aside and let it rest. This allows the flour to hydrate and the baking powder to start working. You’ll see small bubbles form on the surface. This step is what gives Easy Diner Style Buttermilk Pancakes their signature height and lightness. Don’t skip this!
Step 6: Heat the Skillet (5 minutes)
Place your skillet over medium heat. To test if it’s ready, flick a few drops of water onto the surface. If they sizzle and evaporate instantly, it’s too hot. If they bead up and dance around, it’s perfect. Lightly grease the skillet with butter or oil. Wipe out excess with a paper towel so you don’t get greasy pancakes.
Step 7: Cook the Pancakes (2-3 minutes per side)
Pour about 1/4 cup of batter for each pancake. Cook until you see bubbles forming on the surface and popping, leaving holes that don’t immediately fill in. This usually takes 2-3 minutes. The edges should look set and dry. Flip carefully. Cook the second side for another 1-2 minutes until golden brown. You don’t need to press down on them! Pressing squeezes out the air you worked so hard to create.
Total Time: About 30 minutes from start to finish. This yields about 12-14 medium pancakes.
Expert Tips for Fluffy Success
Here is everything I learned from making this too many times. These tips are the difference between “okay” pancakes and “call your mom and tell her you made these” pancakes.
The Lumpy Batter Rule
I cannot stress this enough. When you mix wet and dry, stop when you see streaks of flour. The residual heat and moisture will finish the job. Overmixing is the #1 reason for dense pancakes. My first few attempts were tough because I thought “smooth equals good.” It does not. Lumpy equals fluffy.
Temperature Control is Key
Medium heat is the sweet spot. If your stove is too high, the outside burns before the inside cooks. If it’s too low, the pancakes spread too much and turn out rubbery. I usually start with medium and adjust based on the first pancake. The first pancake is always a test. Don’t be afraid to toss it if it’s not right.
Keep Them Warm
Preheat your oven to 200°F (95°C). Place a baking sheet in there. As you finish each batch of pancakes, place them on the sheet and cover loosely with foil. This keeps them warm and soft while you cook the rest. Cold pancakes are sad pancakes.
Don’t Press Down!
When you flip, don’t squish the pancake with your spatula. You’re compressing the air bubbles. Let them rise naturally.
Recipe Variations
Once you’ve nailed the basic version, here is how to mix it up. These Easy Diner Style Buttermilk Pancakes are a blank canvas.
Berry Burst
Fold in 1 cup of fresh or frozen blueberries right before cooking. If using frozen, do not thaw them first, or they will bleed color into the batter. I love adding a handful of wild blueberries for a tart contrast to the sweet batter.
Chocolate Chip Delight
Add 1/2 cup of semi-sweet chocolate chips. I usually sprinkle them on top of the wet batter right after pouring it into the skillet, rather than mixing them in. This ensures you get a chip in every bite and prevents them from sinking to the bottom.
Banana Walnut
Mash one ripe banana and fold it into the batter. Add 1/2 cup of chopped walnuts. This makes the pancakes denser and more bread-like, which is delicious with maple syrup. It’s a great way to use up brown bananas.
Gluten-Free Option
Substitute the all-purpose flour with a 1:1 gluten-free flour blend (like Bob’s Red Mill or King Arthur). Make sure the blend contains xanthan gum, or add 1/2 teaspoon. The texture will be slightly different but still tasty.
Dairy-Free Version
Use plant-based milk (soy or almond works best) and substitute the melted butter with coconut oil or a dairy-free butter stick. The vinegar hack still works perfectly.
Serving & Storage
Serving Suggestions:
I serve these with a pat of salted butter and warm maple syrup. But don’t stop there! Try topping them with whipped cream, fresh strawberries, or even a dollop of sour cream for a tangy twist. They pair beautifully with crispy bacon or sausage links. For a drink, I often pair them with a strong cup of coffee or a glass of fresh orange juice. If you’re feeling fancy, check out my Old-Fashioned Sweet Tea Lemonade for a refreshing side drink that cuts through the richness.
Storage:
Leftovers? Yes, please! These pancakes freeze incredibly well. Let them cool completely on a wire rack, then layer them with parchment paper in an airtight container or freezer bag. They last for up to 3 months. To reheat, pop them in the toaster or microwave for 30-60 seconds. They come out soft and fluffy, just like fresh.
Do not store them in the fridge for more than 2 days, or they will dry out. The freezer is your friend here. I make a double batch every other Sunday to have quick breakfasts for the kids during the busy school week.
Nutrition Information
I’m not a nutritionist, but here is the breakdown for one pancake (assuming 12 servings from this batch):
| Nutrient | Amount |
|---|---|
| Calories | 180 kcal |
| Protein | 5g |
| Carbohydrates | 24g |
| Fiber | 1g |
| Fat | 7g |
| Sodium | 350mg |
My Take: These are comfort food. They have carbs and fat. They are not a diet food. But they are significantly better than the frozen kind from the grocery store, and you know exactly what is in them. Moderation is key, but as a weekend treat or a special morning, they are worth every calorie.
Final Thoughts
Making Easy Diner Style Buttermilk Pancakes is about more than just food. It’s about creating moments. It’s about slowing down on a busy morning and enjoying the smell of butter and vanilla filling your kitchen. It’s about feeding your family something made with love, even if it’s just flour and milk.
I hope this recipe becomes a staple in your home too. If you make it, I’d love to hear how it turns out. Did you add berries? Did you use the vinegar hack? Drop a comment below and let me know your favorite topping. And if you’re looking for more easy, budget-friendly breakfast ideas, don’t miss my Fall Pumpkin Streusel Muffins—they’re perfect for meal prep!
Happy cooking!
FAQs
Can I make the batter ahead of time?
A: I don’t recommend making the batter more than a few hours in advance. The baking powder loses its potency once it gets wet, so the pancakes won’t rise as much. However, you can mix the dry ingredients the night before and store them in an airtight container. Then just add the wet ingredients in the morning.
Why are my pancakes dense?
A: This is usually caused by overmixing the batter or old baking powder. Remember, lumpy batter is good! Also, check the expiration date on your baking powder. If it’s old, it won’t create the necessary bubbles for lift.
Can I freeze the batter?
A: No, do not freeze the batter. The leavening agents will stop working, and the texture will be ruined. Freeze the cooked pancakes instead, as mentioned in the storage section.
What is the best oil to use for greasing the pan?
A: Butter gives the best flavor, but it burns at higher temperatures. Oil (like vegetable or canola) has a higher smoke point. I often use a mix: brush the pan with oil, then add a small pat of butter for flavor. Wipe out the excess so you don’t get greasy pancakes.
How do I know when to flip the pancakes?
A: Look for bubbles on the surface. When they pop and leave holes that stay open, it’s time to flip. The edges should also look set and dry, not wet and shiny.
Can I use self-rising flour instead?
A: You can, but you need to adjust the recipe. Self-rising flour already contains baking powder and salt. If you use it, omit the baking powder and reduce the salt to 1/2 teaspoon. You may also need to adjust the liquid slightly as self-rising flours can vary in absorption.
Pin This Recipe!
Easy Diner Style Buttermilk Pancakes
- Total Time: 30 minutes
- Yield: 12-14 pancakes 1x
Description
Budget-friendly, fluffy diner-style pancakes made with a simple buttermilk hack. These pancakes are light, tender, and ready in about 30 minutes using common pantry staples.
Ingredients
- 2 cups (250g) All-Purpose Flour
- 2 tablespoons (25g) Granulated Sugar
- 2 teaspoons (10g) Baking Powder
- 1 teaspoon (6g) Salt
- 2 large Eggs
- 1 3/4 cups (415ml) Milk (for buttermilk substitute)
- 1 tablespoon White Vinegar or Lemon Juice (for buttermilk substitute)
- 4 tablespoons (60g) Unsalted Butter, melted and cooled
- 1 teaspoon Vanilla Extract
Instructions
- Prepare the buttermilk: Mix 1 tablespoon of vinegar or lemon juice with enough milk to make 1 3/4 cups. Let sit for 5-10 minutes until slightly curdled.
- Whisk dry ingredients: In a large mixing bowl, combine flour, sugar, baking powder, and salt. Whisk vigorously to distribute leavening agents evenly.
- Combine wet ingredients: In a separate bowl, whisk eggs, melted butter, vanilla, and the prepared buttermilk mixture until smooth.
- Mix the batter: Pour wet ingredients into the dry ingredients. Gently fold together until just moistened; the batter should remain lumpy. Do not overmix.
- Rest the batter: Let the batter sit for 5-10 minutes to allow flour to hydrate and bubbles to form.
- Heat the skillet: Place a non-stick skillet or griddle over medium heat. Test with water drops; they should dance around. Lightly grease with butter or oil.
- Cook pancakes: Pour 1/4 cup of batter per pancake. Cook for 2-3 minutes until bubbles form and pop, leaving holes. Flip and cook for another 1-2 minutes until golden brown.
- Serve: Serve immediately with butter and syrup, or keep warm in a 200°F oven while cooking the rest.
Notes
Do not overmix the batter; lumps are desirable for fluffy texture. Ensure baking powder is fresh for proper rise. The first pancake is a test for heat adjustment. Leftovers freeze well for up to 3 months.
- Prep Time: 15 minutes
- Cook Time: 15 minutes
- Category: Breakfast
- Cuisine: American
Nutrition
- Serving Size: 1 medium pancake
- Calories: 180
- Sugar: 6
- Sodium: 350
- Fat: 7
- Saturated Fat: 3.5
- Carbohydrates: 24
- Fiber: 1
- Protein: 5
Keywords: pancakes, buttermilk pancakes, diner style, budget breakfast, fluffy pancakes, easy recipe, homemade buttermilk


