Last Tuesday, I was walking through the farmers market with my hands full of groceries and a head full of “I need to figure out dinner” panic. I spotted these gorgeous, slightly bruised Honeycrisp apples on a corner stand. They weren’t pretty. They had spots and weird shapes. But they smelled like fall—sweet, tart, and earthy. I bought a bag on impulse, thinking I’d make my usual classic apple crisp or maybe an apple sauce.
But then, on the drive home, I had this sudden craving for something handheld. Something nostalgic. I wanted that specific feeling of walking through a county fair, holding a warm, flaky pastry in one hand while trying not to burn my fingers. I wanted the crunch of cinnamon sugar and the burst of warm apple filling. I didn’t want to stand over a stove stirring a pot. I wanted something I could make with my kids, something messy and fun, and something that tasted like comfort.
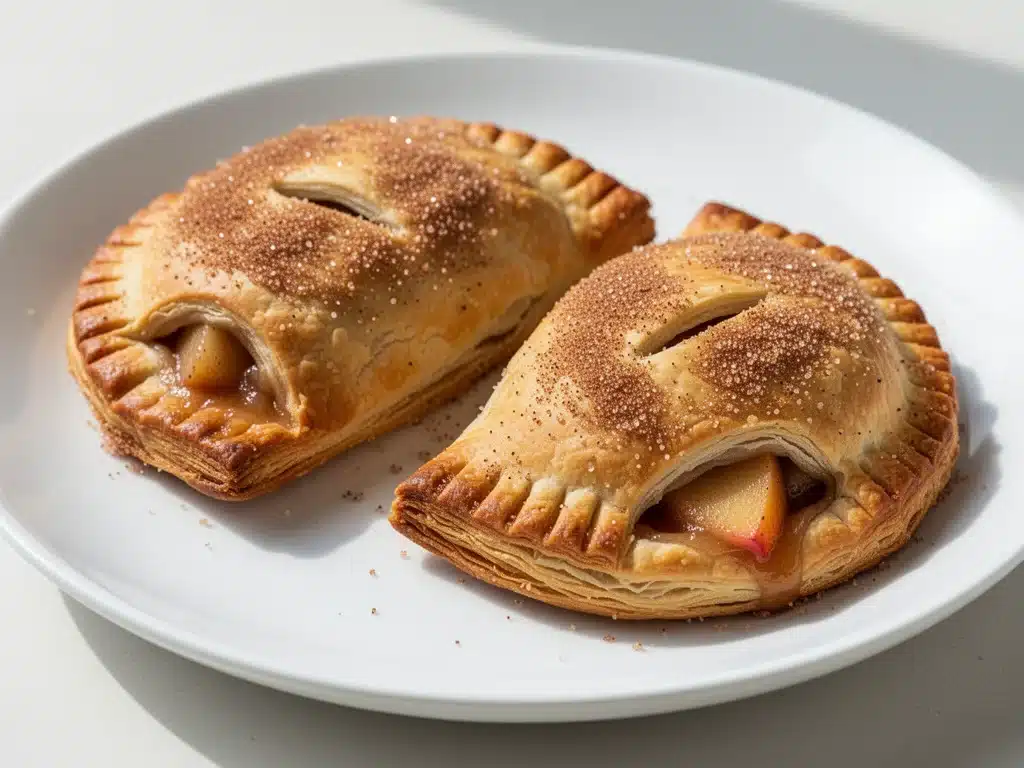
So, I grabbed a package of refrigerated pie crusts (yes, I’m using store-bought for this one, and I’m not sorry) and set to work. I made three batches that afternoon. The first batch was too big and the filling leaked out everywhere. The second batch was undercooked in the middle. But the third? The third batch was magic. Golden, flaky, perfectly sealed, and dusted with that irresistible cinnamon-sugar crunch.
Since then, I’ve made these classic apple hand pies at least eight times. They’ve become my go-to autumn dessert. They’re perfect for after-school snacks, easy to pack for lunchboxes, and honestly, they taste better than anything you’d buy at a bakery. Plus, the smell of cinnamon and apples baking in your oven will make your entire house feel like a cozy cabin. If you love fall baking, you also might enjoy my fall cinnamon pumpkin dump cake for when you need something even more effortless.
Here’s the thing about these hand pies: they’re deceptively simple. You don’t need to be a pastry chef. You don’t need a rolling pin if you don’t want to use one. You just need good apples, some buttery crust, and a little patience. I’ve tested this recipe with different apple varieties, different sweeteners, and even different crust types. This version? This is the winner. It’s the one my kids ask for every week. It’s the one that disappears within minutes of coming out of the oven.
Why You’ll Love This Recipe
There are a hundred reasons I keep coming back to these apple hand pies, but let’s be real—you’re probably looking for reasons to add them to your weekly rotation right now. Here’s why this classic apple hand pies with cinnamon sugar recipe is about to become your new favorite.
- Stupid Simple — Seriously, if you can open a tube of pie crust and spoon filling onto it, you can make this. I’ve made these while helping my teenager with math homework. No fancy techniques required. I use store-bought crusts to keep it easy, but you can absolutely make your own if you’re feeling ambitious.
- Lightning Fast — From start to finish, these take about 45 minutes. But half of that is just baking time. The active work is maybe 15 minutes. I make these on weeknights when I need a dessert that feels homemade but doesn’t require me to stand in the kitchen for an hour.
- Perfectly Portable — Unlike my fall chocolate chip pumpkin bread which is best eaten at the table, these hand pies are designed to be grabbed and go. They travel well in lunchboxes, picnic baskets, or even your purse if you’re hiding them from your partner. The edges seal tight, so no messy spills.
- Customizable — While I’m obsessed with the classic apple-cinnamon combo, you can swap the apples for pears, peaches, or even berries. I’ve made a version with blueberries that tastes like summer. But for autumn? Apples are king.
- Makes Amazing Leftovers — These actually taste better the next day. The filling softens slightly, and the crust becomes even more flaky. I deliberately make extra for breakfast treats or afternoon snacks. They reheat beautifully in the microwave (30 seconds) or toaster oven.
- Budget-Smart — You can make a dozen of these for under $10. Pie crusts are cheap, apples are in season and affordable, and cinnamon is a pantry staple. That’s way cheaper than buying individual pastries at the coffee shop, and you know exactly what’s in them.
This is my go-to when I need a dessert to just work. No complicated techniques, no weird ingredients, just reliable, delicious food that makes everyone happy. My kids love making them, my husband loves eating them, and I love that they don’t take over my whole day.
Ingredients You’ll Need
Here’s the best part: you probably have most of this already in your pantry or fridge. This classic apple hand pies with cinnamon sugar recipe relies on simple, accessible ingredients. I’m particular about three things here, and I’ll tell you exactly why.
For the Filling
Apples (4 medium, peeled and diced / about 600g) — I recommend using a mix of Granny Smith and Honeycrisp. Granny Smiths hold their shape and provide tartness, while Honeycrisps add sweetness and a bit of softness. Avoid Red Delicious—they turn to mush. You want apples that stay slightly firm after baking. Dice them into small, bite-sized pieces (about ½-inch cubes) so they cook evenly and fit inside the pies.
Granulated sugar (¼ cup / 50g) — This sweetens the apples. I like a balance, not too sweet. If your apples are very tart, you can bump this up to ⅓ cup. If they’re super sweet, stick with ¼ cup.
Ground cinnamon (1 teaspoon) — The star of the show. Don’t skimp. Fresh cinnamon smells amazing and tastes vibrant. If your cinnamon jar has been sitting since last Christmas, toss it and get a new one. It makes a huge difference.
Ground nutmeg (¼ teaspoon) — Just a pinch. It adds depth and warmth without overpowering the apple flavor. If you don’t have nutmeg, skip it, but it’s worth keeping on hand for fall baking.
Lemon juice (1 tablespoon) — This prevents the apples from browning and adds a bright note that cuts through the sweetness. Freshly squeezed is best, but bottled works in a pinch.
Cornstarch (2 tablespoons) — This thickens the juices so you don’t get a soggy bottom. Apples release a lot of liquid, and cornstarch is the hero that keeps the filling contained. Mix it with the sugar before adding to the apples.
For the Crust
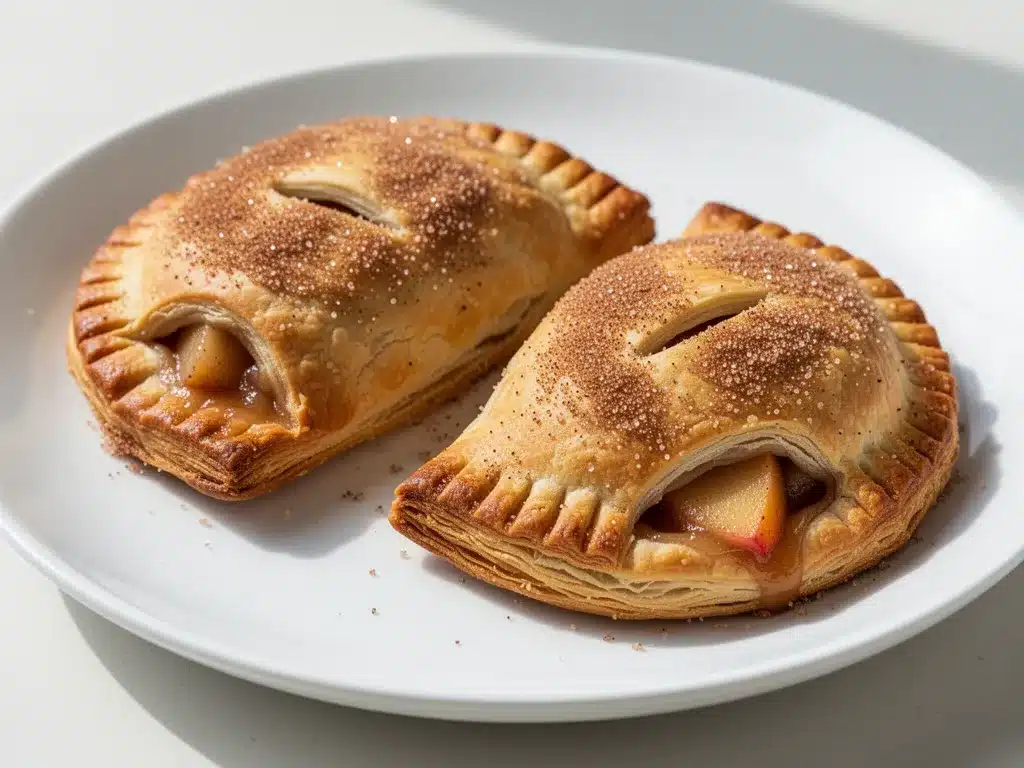
Refrigerated pie crusts (2 sheets / usually found in the dairy aisle) — I use the standard two-crust packages. I love the brand Pillsbury or store brand—it doesn’t matter. Just make sure they’re thawed according to the package instructions before you open them. If you want to go gourmet, feel free to use healthy pumpkin bars-style homemade crust, but honestly, store-bought is just as good here and saves so much time.
Butter (2 tablespoons, melted) — Brushing the tops with melted butter helps them brown beautifully and gives that bakery-style shine.
For the Cinnamon Sugar Topping
Granulated sugar (2 tablespoons / 25g) — For the crunch.
Ground cinnamon (½ teaspoon) — Mixed with the sugar.
Flaky sea salt (optional, for finishing) — A tiny sprinkle on top after baking elevates the flavor. It sounds fancy, but it’s just salt crystals that add a nice contrast to the sweet.
Equipment Needed
You don’t need fancy equipment for this. Here’s what I actually use.
Mixing bowls — One medium bowl for the filling, one small bowl for the cinnamon sugar. I use glass bowls because I can see through them.
Peeler and knife — I use a Y-peeler for the apples and a sharp paring knife for dicing. A dull knife makes peeling a nightmare.
Pastry brush — For brushing the melted butter on top. A silicone brush is easiest to clean, but a regular pastry brush works fine.
Fork — For crimping the edges. A fork gives that classic pie look and helps seal the dough.
Baking sheet — A standard 13×18 inch sheet pan. I line it with parchment paper for easy cleanup. Grease isn’t necessary if you use parchment.
Cooling rack — Essential. Letting them cool on the rack prevents the bottoms from getting soggy. I have a wire rack from IKEA that’s cheap and sturdy.
Optional: Apple corer — If you have one, it speeds up peeling and coring. But I usually just peel and slice manually. It takes a few extra minutes but isn’t hard.
How to Make It: Step-by-Step
Alright, let’s make this! I’m walking you through exactly how I do it, including the little tricks I’ve picked up. This classic apple hand pies with cinnamon sugar recipe is straightforward, but there are a few key steps to ensure success.
Step 1: Prep Your Apples (10 minutes)
Peel, core, and dice your apples. You want small, uniform cubes—about ½ inch. This ensures they cook through quickly and fit nicely inside the small pies. Toss the diced apples in a bowl with the lemon juice, sugar, cinnamon, nutmeg, and cornstarch. Mix gently until every piece is coated. Let this sit for 10 minutes while you prep the crust. This draws out some of the juices, which helps the cornstarch thicken the filling properly.
Step 2: Prep the Crust (5 minutes)
Take your refrigerated pie crusts out of the fridge and let them sit at room temperature for about 15 minutes. If they’re too cold, they’ll crack when you roll them. Once they’re pliable, unroll them onto a lightly floured surface. If your crusts come in four squares, that’s perfect. If they come in two large rectangles, you’ll need to cut them into quarters. You want 12 squares total (or 6 large squares if you’re making bigger pies).
Step 3: Assemble the Hand Pies (10 minutes)
Place a square of dough on your baking sheet (leave space between them). Spoon about 2 tablespoons of the apple filling into the center of each square. Don’t overfill! If you put too much filling, it will burst out during baking. Leave a ½-inch border around the edges. If you’re making smaller pies, use 1 tablespoon of filling.
Step 4: Seal and Decorate (5 minutes)
Take another square of dough and place it on top of the filled square. Press the edges together firmly with your fingers. Then, take a fork and press down around the edges to crimp them. This creates a seal so the filling doesn’t leak. You can also use a knife to trim any excess dough hanging off the edges for a neat look. If you want to get fancy, cut small slits in the top crust to let steam escape, but it’s not strictly necessary.
Step 5: Brush and Sprinkle (5 minutes)
Melt the 2 tablespoons of butter in the microwave. Brush the tops of each hand pie with the melted butter. This helps them brown. Then, mix the 2 tablespoons of sugar with the ½ teaspoon of cinnamon. Sprinkle this mixture generously over the buttered tops. Make sure you get into the creases and edges for maximum crunch.
Step 6: Bake (20-25 minutes)
Preheat your oven to 375°F (190°C). Place the baking sheet in the center rack. Bake for 20-25 minutes, or until the crust is golden brown and the filling is bubbling. Keep an eye on them around the 20-minute mark. If the edges are browning too fast, you can tent them with foil. The pies are done when the crust is deep golden and the apples are tender.
Step 7: Cool and Serve
Let the hand pies cool on the baking sheet for 5 minutes, then transfer to a cooling rack. Let them cool for at least 15 minutes before eating. The filling will be extremely hot and can burn your mouth. Cooling also allows the filling to set slightly. Serve warm with a scoop of vanilla ice cream or a dollop of whipped cream.
Expert Tips & Tricks
Here’s everything I’ve learned from making these dozens of times. These tips will save you from my mistakes.
Don’t Skip the Rest Time
Letting the apple mixture sit for 10 minutes before assembling is crucial. It releases some of the water, so the cornstarch can do its job. If you skip this, you might end up with a soupy center.
Keep the Dough Cold
If your dough gets warm and sticky while you’re working, pop it in the fridge for 10 minutes. Cold dough is easier to handle and results in a flakier crust. I keep a sheet pan in the fridge to chill the dough if needed.
Seal Tight
The most common mistake is leaky pies. Make sure you press the edges firmly and crimp well. If you’re worried, you can brush the edges of the bottom crust with a little water before placing the top crust on. This acts like glue.
Use a Fork, Not Just Fingers
Fingers might not create a tight enough seal. A fork presses down harder and creates those classic ridges that lock the edges together.
Brush with Butter, Not Egg Wash
Some recipes call for an egg wash for shine. I prefer melted butter. It gives a richer flavor and a more rustic, homemade look. Plus, it plays nicely with the cinnamon sugar.
Watch the Oven
Ovens vary. My oven runs hot, so I check at 20 minutes. If your oven runs cool, it might take 25-27 minutes. The key visual cue is golden brown crust and bubbling filling.
Variations & Substitutions
Once you’ve nailed the basic version, here’s how you can mix it up. I’ve tried all of these.
Pear Hand Pies
Swap the apples for ripe pears. Pears are sweeter and softer, so reduce the sugar to 2 tablespoons and add a teaspoon of vanilla extract to the filling. They taste like autumn in a different way.
Apple Pie Spice
Instead of just cinnamon and nutmeg, use 1 tablespoon of apple pie spice. It usually contains cinnamon, nutmeg, allspice, and ginger. It’s a convenient shortcut if you don’t have individual spices.
Maple Glaze
Instead of cinnamon sugar, mix ¼ cup powdered sugar with 1 tablespoon maple syrup and a splash of milk. Drizzle over the cooled pies. It’s sweet and sophisticated.
Bacon Apple
Add 2 strips of cooked, crumbled bacon to the filling. The saltiness pairs amazingly with the sweet apples. This is a favorite among my adult friends.
Gluten-Free
Use gluten-free pie crusts. Most brands work well, but make sure they’re thawed properly. The rest of the ingredients are naturally gluten-free.
Vegan
Use vegan pie crusts (check labels for butter/dairy) and vegan butter for brushing. The filling is already vegan. Some people find vegan crusts a bit more fragile, so handle gently.
Serving & Storage
How to serve these classic apple hand pies with cinnamon sugar for maximum enjoyment.
How to Serve
Warm is best. These are fantastic fresh out of the oven. I serve them with a scoop of vanilla bean ice cream, which melts into the warm crust. A dollop of whipped cream is also great. For a lighter option, just serve them plain.
Side Dishes
These are a dessert, so they don’t really need sides. But if you’re having a fall dinner party, they pair well with pumpkin spice snickerdoodle cookies as part of a dessert spread.
Storage Instructions
Refrigerator: Store in an airtight container for up to 3 days. They’ll stay soft but still edible. Reheat in the microwave for 20-30 seconds to warm them up.
Freezer: These freeze well! Bake them, let them cool completely, then wrap individually in plastic wrap and place in a freezer bag. They’ll last for 2 months. Reheat from frozen in the oven at 350°F for 15 minutes, or microwave from frozen for 1-2 minutes.
Reheating: Avoid the microwave if you want crispiness. A toaster oven or conventional oven is best to restore the flaky texture.
Nutrition Information
I’m not a nutritionist, but here’s the breakdown if you’re tracking.
Per serving (based on 12 pies, 1 pie per serving):
| Nutrient | Amount |
|---|---|
| Calories | 180 |
| Protein | 2g |
| Carbs | 28g |
| Fiber | 2g |
| Sugar | 14g |
| Fat | 7g |
| Saturated Fat | 3g |
| Sodium | 180mg |
What’s Good:
- Real fruit in every bite
- Small portion size controls calories
- Fiber from the apples
What to Know:
- Higher in sugar due to the filling and topping
- Contains gluten and dairy (unless modified)
- Calories are moderate, but easy to overeat if you’re not careful
My Take:
Look, this is a dessert. It’s sweet, it’s buttery, and it’s delicious. It’s not a health food. But it’s better than buying processed pastries, and you can control the sugar. When I make these, I enjoy one or two and call it a day. It’s a treat, not a meal.
Final Thoughts
So that’s my go-to classic apple hand pies with cinnamon sugar! I’ve probably talked your ear off at this point, but when you make a recipe this often, you have a lot to say about it.
This has saved my dessert game more times than I can count. It’s my answer to “what’s for dessert” when I want something homemade but don’t have hours to spend. My kids are happy, my husband’s happy, and I’m happy because I’m not stressed about cooking.
Make it yours! Try different apples, add some bacon, or drizzle with maple glaze. The best recipes are the ones you adapt to your family’s tastes. I love seeing how other people tweak my recipes, so don’t be afraid to experiment.
If you make this, drop a comment and let me know what you think! I love hearing how recipes turn out in your kitchen. And if something doesn’t work, tell me that too—I’m here to help troubleshoot.
Happy baking! And I hope your kitchen smells half as good as mine does right now.
Frequently Asked Questions
Can I make the crust from scratch?
Absolutely! If you have a favorite pie crust recipe, go for it. Just roll it out and cut into squares. Homemade crust is flakier but more work. Store-bought is perfectly fine for this recipe and saves time. If you do make it from scratch, keep the dough cold until it hits the oven.
Why did my filling leak out?
This usually happens if you overfilled the pies or didn’t seal the edges tightly enough. Use about 2 tablespoons of filling per pie, not more. Press the edges firmly with your fingers, then crimp with a fork. If you see small cracks, pinch them shut before baking.
Can I use frozen apples?
I don’t recommend it. Frozen apples release a lot of water and can make the filling runny. Fresh apples are best. If you only have frozen, thaw them completely and drain the excess liquid before mixing with the cornstarch.
How do I store leftovers?
Store in an airtight container at room temperature for up to 2 days. After that, they might get a bit soggy. For longer storage, refrigerate for up to 3 days or freeze for up to 2 months. Reheat in the oven or toaster oven for best texture.
Can I double the recipe?
Yes! Just make sure you have enough baking sheets. You might need to bake in batches. Don’t crowd the pies on the sheet; they need space to bake evenly. Double the filling and topping ingredients accordingly.
What’s the best apple for this?
Granny Smith and Honeycrisp are my top picks. They balance tartness and sweetness and hold their shape well. Braeburn and Jonagold are also good options. Avoid Red Delicious or McIntosh if you want distinct apple pieces.
Can I make these ahead of time?
You can assemble them and freeze them unbaked. Place them on a baking sheet, freeze until solid, then transfer to a bag. Bake from frozen, adding 5-10 minutes to the baking time. Or, bake them ahead and reheat before serving.
Pin This Recipe!


Classic Apple Hand Pies: 5 Easy Autumn Dessert Recipe
- Total Time: 45 minutes
- Yield: 12 servings 1x
Description
These classic apple hand pies are a simple, nostalgic autumn dessert made with store-bought pie crusts and a sweet cinnamon-sugar apple filling. They are portable, easy to make, and perfect for weeknight baking.
Ingredients
- 4 medium apples (peeled and diced, approx. 600g; mix of Granny Smith and Honeycrisp recommended)
- 1/4 cup granulated sugar (for filling)
- 1 teaspoon ground cinnamon (for filling)
- 1/4 teaspoon ground nutmeg
- 1 tablespoon lemon juice
- 2 tablespoons cornstarch
- 2 sheets refrigerated pie crusts (thawed)
- 2 tablespoons butter (melted, for brushing)
- 2 tablespoons granulated sugar (for topping)
- 1/2 teaspoon ground cinnamon (for topping)
- Flaky sea salt (optional, for finishing)
Instructions
- Preheat oven to 375°F (190°C). Line a standard baking sheet with parchment paper.
- Peel, core, and dice apples into 1/2-inch cubes. In a medium bowl, toss apples with lemon juice, 1/4 cup sugar, 1 teaspoon cinnamon, nutmeg, and cornstarch. Let sit for 10 minutes to draw out juices.
- Unroll pie crusts onto a lightly floured surface. Cut into 12 equal squares (or 6 large squares).
- Place one square of dough on the baking sheet. Spoon 2 tablespoons of apple filling into the center, leaving a 1/2-inch border.
- Place another square of dough on top. Press edges firmly with fingers, then crimp with a fork to seal. Trim excess dough if desired.
- Repeat with remaining dough squares and filling.
- Brush tops of pies with melted butter. Mix 2 tablespoons sugar and 1/2 teaspoon cinnamon, then sprinkle generously over the buttered tops.
- Bake for 20-25 minutes until crust is golden brown and filling is bubbling. Tent with foil if edges brown too quickly.
- Cool on a wire rack for at least 15 minutes before serving to allow filling to set.
Notes
Let the apple mixture sit for 10 minutes before assembling to help the cornstarch thicken the filling. Keep dough cold for a flakier crust. Ensure edges are sealed tightly to prevent leaking. Store in an airtight container for up to 3 days or freeze for up to 2 months.
- Prep Time: 25 minutes
- Cook Time: 20-25 minutes
- Category: Dessert
- Cuisine: American
Nutrition
- Serving Size: 1 hand pie
- Calories: 180
- Sugar: 14
- Sodium: 180
- Fat: 7
- Saturated Fat: 3
- Carbohydrates: 28
- Fiber: 2
- Protein: 2
Keywords: apple hand pies, autumn dessert, cinnamon sugar, easy dessert, fall baking, handheld dessert, apple pie


