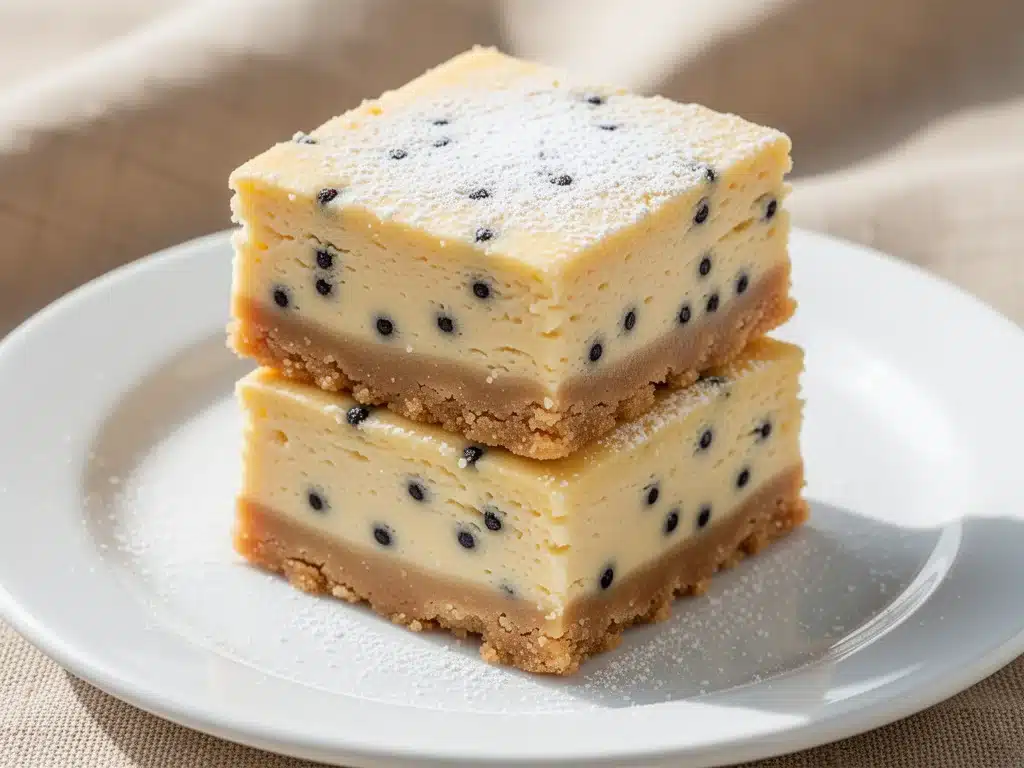
I have a confession to make. For years, I was terrified of cheesecake. Not because I didn’t love it—I do. I love the dense, creamy texture and the way it tastes like a hug in dessert form. I was terrified because of the water bath. You know the one. The foil-wrapping panic. The cracking crust. The twelve-hour chill time that makes you question every life choice that led you to this moment. I’ve cracked more cheesecakes than I care to admit, and let’s be honest, a cracked cheesecake is just a sad, sad thing to serve at a dinner party.
Then came the “small batch” trend, and honestly? It changed my baking life. But most small batch recipes are still complicated. They ask for cream cheese, sugar, eggs, vanilla, and a graham cracker crust that requires a food processor. I wanted something simpler. Something I could throw together in the time it takes to boil water for tea. Something that didn’t require a springform pan or a complex baking technique.
That’s when I discovered these small batch vanilla bean cheesecake bars. Four ingredients. One bowl. No water bath. No cracking. And the best part? They are intensely flavorful because the ratio of creamy filling to buttery crust is maxed out. I’ve made these at least fifteen times in the last six months. Sometimes just for me, sometimes for my neighbor who keeps bringing me homemade bread. They are my new go-to when I need a dessert that feels fancy but actually respects my time.
If you’ve ever felt overwhelmed by traditional cheesecake recipes, this is your escape hatch. It’s easy, it’s reliable, and it tastes like pure vanilla heaven. I promise you, once you try this small batch vanilla bean cheesecake bars recipe, you’ll never go back to the complicated stuff unless you really want to.
Why You’ll Love This Small Batch Vanilla Bean Cheesecake Bars Recipe
There are about ten reasons I keep making these, but here are the big ones that keep me coming back to this small batch vanilla bean cheesecake bars recipe week after week.
Stupid Simple — Seriously, if you can mix batter in a bowl, you can make these. I don’t even use an electric mixer. A sturdy whisk and some elbow grease are all it takes. I’ve walked my teenage son through it over FaceTime, and he didn’t burn the kitchen down.
Lightning Fast — From start to finish, including the chill time, it’s a manageable afternoon project. The actual prep and bake time is only about 25 minutes. I make these on weeknights when I want a treat but don’t have hours to spare.
Perfectly Portioned — This is a 4×4 inch pan recipe. That’s it. It makes exactly 16 bars. This means no giant leftovers sitting in your fridge for a week, getting dry and sad. You make what you need, when you need it. It’s the anti-waste dessert.
Intense Flavor — Because the batch is small, the flavors are concentrated. The vanilla bean is front and center, not hidden under pounds of sugar. The crust is buttery and crisp, providing the perfect contrast to the soft, creamy filling.
No Special Equipment — You don’t need a springform pan. You don’t need a water bath. You don’t even need a stand mixer. Just a small baking pan (or a square brownie pan if that’s what you have) and a mixing bowl. I use my basic 8×8 pan, which is usually used for brownies, but it works perfectly here.
Crowd-Pleaser — I’ve served these to my vegetarian sister, my gluten-free neighbor (with a swap), and my dad who thinks desserts should be “more substantial.” Everyone loved it. It feels indulgent but isn’t overwhelmingly heavy.
This is my go-to when I need a dessert to just work. No complicated techniques, no weird ingredients, just reliable, delicious food that makes everyone happy. It’s the small batch vanilla bean cheesecake bars that saved my sanity.
Ingredients You’ll Need
Here’s the best part: you probably have most of this already. This small batch vanilla bean cheesecake bars recipe relies on high-quality ingredients because there are so few of them. When you strip away the extras, what’s left really matters.
For the Crust
Graham cracker crumbs (1 cup / 100g) — I buy the pre-made crumbs to save time, but if you have leftover graham crackers, just blitz them in a food processor. It’s surprisingly satisfying. Avoid the chocolate graham crackers for this recipe; you want the classic honey-sweet flavor.
Unsalted butter (3 tablespoons / 42g) — Melted. I use unsalted so I can control the saltiness. If you only have salted, reduce the pinch of salt in the filling. Real butter makes a huge difference here; margarine just won’t give you that crisp, crumbly texture.
Granulated sugar (2 tablespoons / 25g) — Just enough to sweeten the crust without making it candy-like. It helps bind the crumbs together.
Pinch of salt — Essential. It cuts the sweetness and enhances the butter flavor. Don’t skip it.
For the Filling
Cream cheese (8 oz / 225g) — Full-fat, brick-style cream cheese. Do not use the tub-style light cream cheese. It won’t set properly and the texture will be grainy. Let it sit out for 30 minutes before you start. Cold cream cheese leads to lumps, and we want smooth.
Granulated sugar (½ cup / 100g) — This is the main sweetener for the filling. I’ve tried reducing it, but cheesecake needs sugar for texture, not just sweetness. It helps keep the filling creamy rather than hard.
Large egg (1) — Just one egg. This is what binds the small batch together. Room temperature is best, but if you’re in a hurry, just drop the egg in a bowl of warm water for 5 minutes.
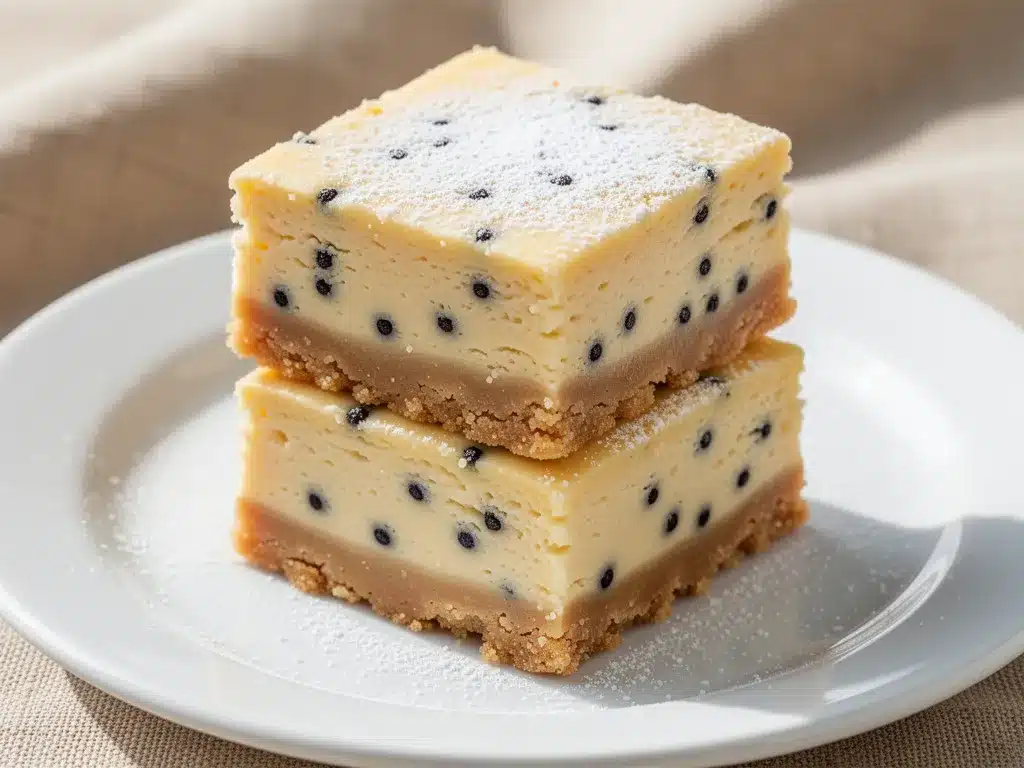
Vanilla bean paste (1 teaspoon) — Or high-quality vanilla extract. I insist on vanilla bean paste for this small batch vanilla bean cheesecake bars recipe because you can see the actual seeds. It looks beautiful and tastes deeper. If you use extract, make sure it’s pure, not imitation. Imitation vanilla tastes chemical and ruins the simplicity.
Heavy cream (2 tablespoons / 30ml) — This is the secret ingredient. It adds richness and ensures the bars are super creamy, not dense like a brick. It also helps with the texture, making it softer and more sliceable.
All-purpose flour (1 tablespoon / 8g) — A tiny bit of flour stabilizes the filling so it doesn’t crack or sink. It’s barely noticeable in taste but crucial for structure.
Equipment Needed
You don’t need fancy equipment for this. Here’s what I actually use.
8×8 inch baking pan — I use a metal pan for even baking. Glass pans heat up slower and can lead to over-baked edges. If you don’t have an 8×8, a 9×9 will work, but the bars will be thinner, so reduce bake time by 2-3 minutes.
Parchment paper — Crucial for easy removal. I cut two strips and cross them in the pan, leaving overhang on the sides. This acts as a sling so you can lift the entire block of bars out once they’re chilled.
Mixing bowl — Any medium-sized bowl works. I prefer glass or ceramic because they’re heavy and don’t slide around.
Whisk — A standard wire whisk is perfect. No mixer needed, which means less cleanup.
Measuring cups and spoons — Standard stuff. Dollar store versions work fine.
Small spatula — For scraping the bowl and smoothing the topping.
Sharp knife — For cutting clean bars. I use a chef’s knife, but a serrated bread knife works too if you wipe it clean between cuts.
How to Make It: Step-by-Step
Alright, let’s make this! I’m walking you through exactly how I do it, including the little tricks I’ve picked up.
Step 1: Prep Your Pan and Oven (5 minutes)
Preheat your oven to 350°F (175°C). Line your 8×8 inch baking pan with parchment paper. I like to leave a little overhang on the long sides so you can lift the bars out later. It’s a game-changer for cleanup. Grease the parchment lightly with butter or cooking spray so the crust sticks.
Step 2: Make the Crust (3 minutes)
In your mixing bowl, combine the graham cracker crumbs, melted butter, sugar, and salt. Mix with a fork or your hands until it looks like wet sand. It should clump together when you squeeze it. Press this mixture firmly and evenly into the bottom of your prepared pan. Use the bottom of a measuring cup to pack it down tight. If the crust is loose, the bars will fall apart. Bake for 8 minutes until it smells nutty and golden. Remove from oven and let it cool slightly while you make the filling.
Step 3: Mix the Filling (5 minutes)
In the same bowl (no need to wash it, but make sure no crust crumbs fell in), add the softened cream cheese, sugar, egg, vanilla bean paste, heavy cream, and flour. Whisk vigorously. I mean, really whisk. You want to remove any lumps of cream cheese. The batter should be smooth, thick, and glossy. If you see little white lumps, keep whisking. It takes about 2 minutes.
Step 4: Assemble and Bake (18-20 minutes)
Pour the filling over the warm crust. Smooth the top with a spatula. It doesn’t need to be perfect, but try to get it even so it bakes uniformly. Bake for 18-20 minutes. The edges should be set and slightly puffed, but the center should still have a slight jiggle when you shake the pan. It will firm up as it cools. Do not overbake, or you’ll get cracks.
Step 5: Cool and Chill (Critical Step)
Let the bars cool in the pan on a wire rack for 30 minutes. They will sink slightly in the center—this is normal. Once cool to the touch, cover the pan with plastic wrap and refrigerate for at least 4 hours, or ideally overnight. This chilling time is non-negotiable. It allows the flavors to meld and the texture to set properly. If you cut into them warm, they will be mushy.
Step 6: Slice and Serve
Lift the bars out of the pan using the parchment sling. Place on a cutting board. Use a sharp knife to cut into 16 squares (4×4 grid). Wipe the knife clean between cuts for neat edges. Serve plain, or with a dollop of whipped cream and fresh berries.
Expert Tips & Tricks
Here’s everything I’ve learned from making this small batch vanilla bean cheesecake bars recipe dozens of times. These tips will save you from my mistakes.
Room Temperature Cream Cheese — This is the #1 tip. Cold cream cheese creates lumps that whisking can’t always fix. Take it out of the fridge 30 minutes before you start. If you forgot, cut it into cubes and microwave in 5-second bursts until pliable. Not melted, just soft.
Don’t Overmix After Adding Egg — Once you add the egg, mix just until combined. Overmixing incorporates too much air, which can cause the cheesecake to rise and then crack as it cools. We want a dense, creamy texture, not a fluffy sponge.
The Jiggle Test — When checking for doneness, look for a slight jiggle in the center. It should look like Jell-O, not like a solid block. It will firm up as it cools. If it’s completely firm in the oven, it’s overbaked.
Use a Water Bath? No. — For this small batch version, a water bath is unnecessary and messy. The small size means it bakes evenly without the risk of cracking. Save the water bath for the 9-inch round cheesecakes.
Chill Time Matters — I know it’s tempting to eat them warm. Resist. The texture transforms from “mush” to “silky” after 4 hours in the fridge. Overnight is best.
Clean Knife Cuts — Dip your knife in hot water and wipe it dry between each cut. This ensures clean, sharp edges. If you cut into them with a cold knife, the cream cheese will drag and tear the bars.
Variations & Substitutions
Once you’ve nailed the basic version, here’s how you can mix it up. I’ve tried all of these.
Berry Swirl — Before baking, dollop 2 tablespoons of raspberry or strawberry jam on top of the filling and swirl with a toothpick. It adds a beautiful marbled effect and a tart contrast to the sweet vanilla.
Chocolate Chip — Fold ½ cup of mini chocolate chips into the filling before pouring it over the crust. Simple, classic, and always a hit with kids.
Lemon Vanilla — Add the zest of one lemon to the filling. It brightens the vanilla flavor and makes it feel lighter. Great for spring.
Gluten-Free — Use gluten-free graham cracker crumbs or almond flour for the crust. Everything else is naturally gluten-free. I use Kinnikinnick crumbs, which work perfectly.
Dairy-Free — Use dairy-free cream cheese (like Kite Hill) and coconut milk cream instead of heavy cream. The texture will be slightly different, but still delicious. I’ve made this for my lactose-intolerant friend, and she loved it.
No Vanilla Bean Paste? — Use 1 teaspoon of high-quality vanilla extract. It won’t have the pretty seeds, but the flavor will be great. Avoid imitation vanilla at all costs.
Serving & Storage
How to Serve:
I usually serve these straight from the fridge. They are best cold, when the texture is firmest. I like to pair them with fresh berries—strawberries, raspberries, or blackberries. The tartness cuts through the richness. A dollop of whipped cream is nice if you want to go all out.
Side Dishes:
These bars are rich, so they don’t need much else. But if you’re serving a full dessert plate, I recommend a simple green salad or some roasted fruit. They also pair well with coffee or tea.
Storage Instructions:
Store in an airtight container in the refrigerator for up to 5 days. They actually taste better on day 2, as the flavors have had time to meld. Do not freeze these. The texture of the cream cheese filling changes when frozen and thawed—it becomes grainy and watery. Make them fresh or store in the fridge.
Pro Tip:
If you’re bringing them to a potluck, keep them in the pan they were baked in, covered with foil, until you arrive. Then transfer to a serving platter. It’s easier than trying to lift fragile bars.
Nutrition Information
I’m not a nutritionist, but here’s the breakdown if you’re tracking. This is per bar (based on 16 bars).
Per Serving:
– Calories: 110
– Protein: 2g
– Carbs: 10g
– Fiber: 0g
– Sugar: 7g
– Fat: 7g
– Saturated Fat: 4g
– Cholesterol: 25mg
– Sodium: 60mg
What’s Good:
– Small portion size helps with calorie control.
– No artificial additives.
– Simple ingredients.
What to Know:
– Higher in saturated fat due to cream cheese and butter.
– Contains dairy and gluten (unless modified).
– Moderate sugar content.
My Take:
Look, this is a dessert. It’s meant to be enjoyed. These small batch vanilla bean cheesecake bars are rich and indulgent, but because they are small, you can have a couple without feeling guilty. When I want to make it lighter, I use half the crust and extra berries on top. But usually? I just enjoy one or two and savor every bite.
Final Thoughts
So that’s my go-to small batch vanilla bean cheesecake bars! I’ve probably talked your ear off at this point, but when you make a recipe this often, you have a lot to say about it.
This has saved weeknight desserts more times than I can count. It’s my answer to “what’s for dessert?” when I’m tired, don’t want to order takeout, and still want something that tastes really good. My kids are happy, my husband’s happy, and I’m happy because I’m not stressed about baking.
Make it yours! Try different swirls, swap in your favorite fruits, or adjust the vanilla. The best recipes are the ones you adapt to your family’s tastes.
If you make this, drop a comment and let me know what you think! I love hearing how recipes turn out in your kitchen. And if something doesn’t work, tell me that too—I’m here to help troubleshoot.
Happy baking! And I hope your kitchen smells half as good as mine does right now.
Frequently Asked Questions
Can I use a different pan size?
You can, but the baking time will change. If you use a 9×9 pan, the bars will be thinner, so reduce the bake time to 15-17 minutes. If you use a loaf pan, you’ll get taller bars, and you may need to add 5-10 minutes to the bake time. Keep an eye on the center jiggle.
Why did my cheesecake bars crack?
Cracking usually happens from overbaking or overmixing. Make sure you pull them out when the center still jiggles slightly. Also, don’t whisk the batter too vigorously after adding the egg, as this incorporates too much air. Let them cool slowly in the pan on the rack; rapid temperature changes can cause cracks.
Can I make these ahead for a party?
Yes! In fact, they taste better made ahead. You can make them up to 2 days in advance. Store them in the fridge in an airtight container. Bring them to the party cold. They hold their shape well and don’t get soggy.
Can I use vanilla extract instead of vanilla bean paste?
Absolutely. Use 1 teaspoon of pure vanilla extract. It won’t have the visible seeds, but the flavor will be excellent. Just make sure it’s pure vanilla, not imitation. Imitation vanilla has a chemical aftertaste that really shows up in simple recipes.
How do I store leftovers?
Store in an airtight container in the refrigerator for up to 5 days. They do not freeze well because the cream cheese texture changes. If you have leftovers, just keep them in the fridge and eat them within the week.
Can I make this gluten-free?
Yes! Just use gluten-free graham cracker crumbs or almond flour for the crust. The filling is naturally gluten-free, so no changes needed there. I’ve used Kinnikinnick crumbs, and they work perfectly.
Why are my bars too soft?
They probably weren’t chilled long enough. Cheesecake needs time to set. Make sure you chill for at least 4 hours, but overnight is best. If you cut into them warm, they will be soft. Also, ensure you didn’t overbake them; if the center was liquidy in the oven, it might not have set properly.
Pin This Recipe!
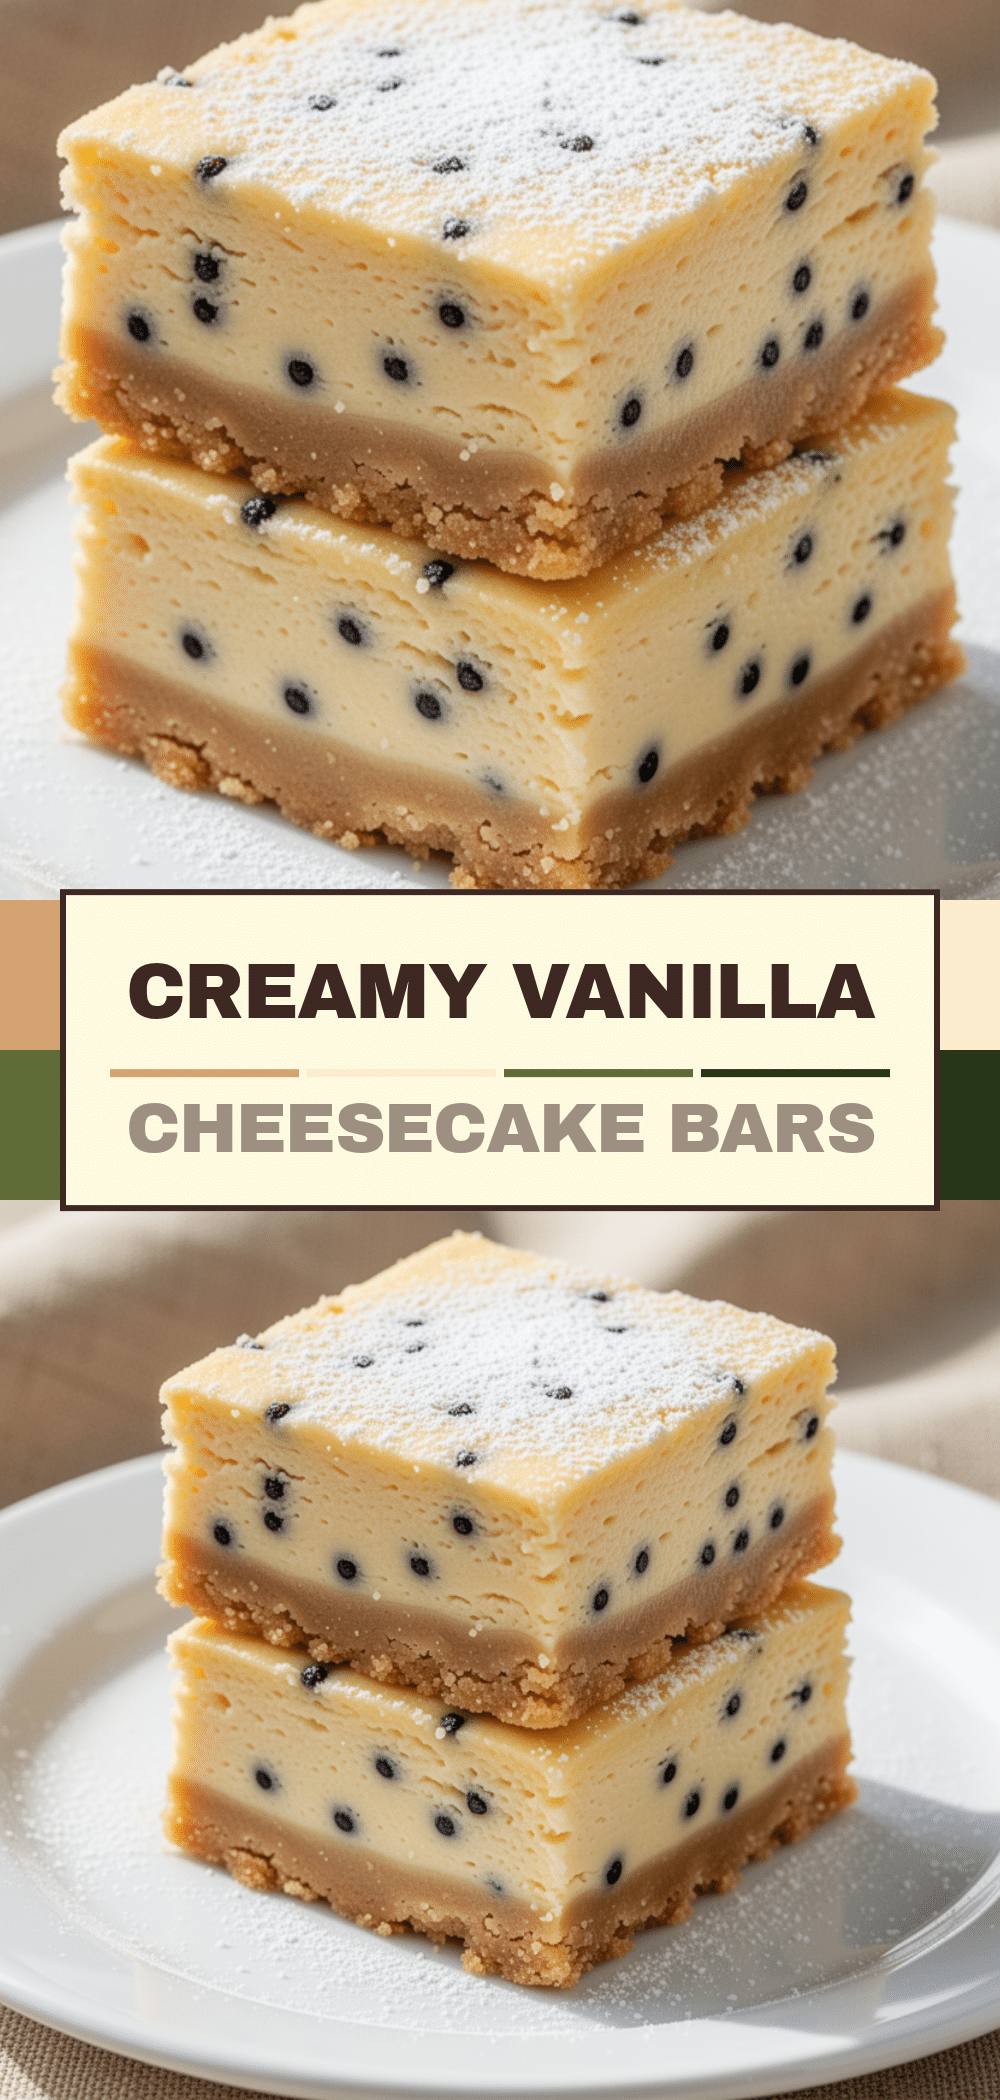
Small Batch Vanilla Bean Cheesecake Bars
- Total Time: 4 hours 41 minutes
- Yield: 16 servings 1x
Description
A simple, 4-ingredient dessert that requires no water bath or special equipment. These bars offer intense vanilla flavor and a creamy texture in a manageable small batch size.
Ingredients
- 1 cup (100g) graham cracker crumbs
- 3 tablespoons (42g) unsalted butter, melted
- 2 tablespoons (25g) granulated sugar
- Pinch of salt
- 8 oz (225g) full-fat brick-style cream cheese, softened
- 1/2 cup (100g) granulated sugar
- 1 large egg, room temperature
- 1 teaspoon vanilla bean paste (or pure vanilla extract)
- 2 tablespoons (30ml) heavy cream
- 1 tablespoon (8g) all-purpose flour
Instructions
- Preheat oven to 350°F (175°C). Line an 8×8 inch baking pan with parchment paper, leaving an overhang on the long sides for easy removal. Lightly grease the parchment.
- In a mixing bowl, combine graham cracker crumbs, melted butter, 2 tablespoons sugar, and salt. Mix until it resembles wet sand.
- Press the crust mixture firmly and evenly into the bottom of the prepared pan. Bake for 8 minutes until golden and nutty. Remove and let cool slightly.
- In the same bowl, whisk softened cream cheese, 1/2 cup sugar, egg, vanilla bean paste, heavy cream, and flour until smooth and lump-free.
- Pour the filling over the warm crust and smooth the top.
- Bake for 18-20 minutes. The edges should be set and slightly puffed, but the center should still have a slight jiggle.
- Cool in the pan on a wire rack for 30 minutes. The center may sink slightly.
- Cover and refrigerate for at least 4 hours, or ideally overnight, until fully set.
- Lift the bars out using the parchment sling. Cut into 16 squares using a sharp knife wiped clean between cuts.
- Serve chilled, optionally with whipped cream or fresh berries.
Notes
Ensure cream cheese is at room temperature to avoid lumps. Do not overmix after adding the egg to prevent cracking. The bars must be chilled for at least 4 hours to set properly. They do not freeze well due to texture changes in the cream cheese.
- Prep Time: 15 minutes
- Cook Time: 26 minutes
- Category: Dessert
- Cuisine: American
Nutrition
- Serving Size: 1 bar
- Calories: 110
- Sugar: 7
- Sodium: 60
- Fat: 7
- Saturated Fat: 4
- Carbohydrates: 10
- Protein: 2
Keywords: small batch cheesecake, vanilla bean cheesecake bars, easy dessert, no water bath, 4 ingredient dessert, weeknight dessert


